background image

Using Special Mode

4-32

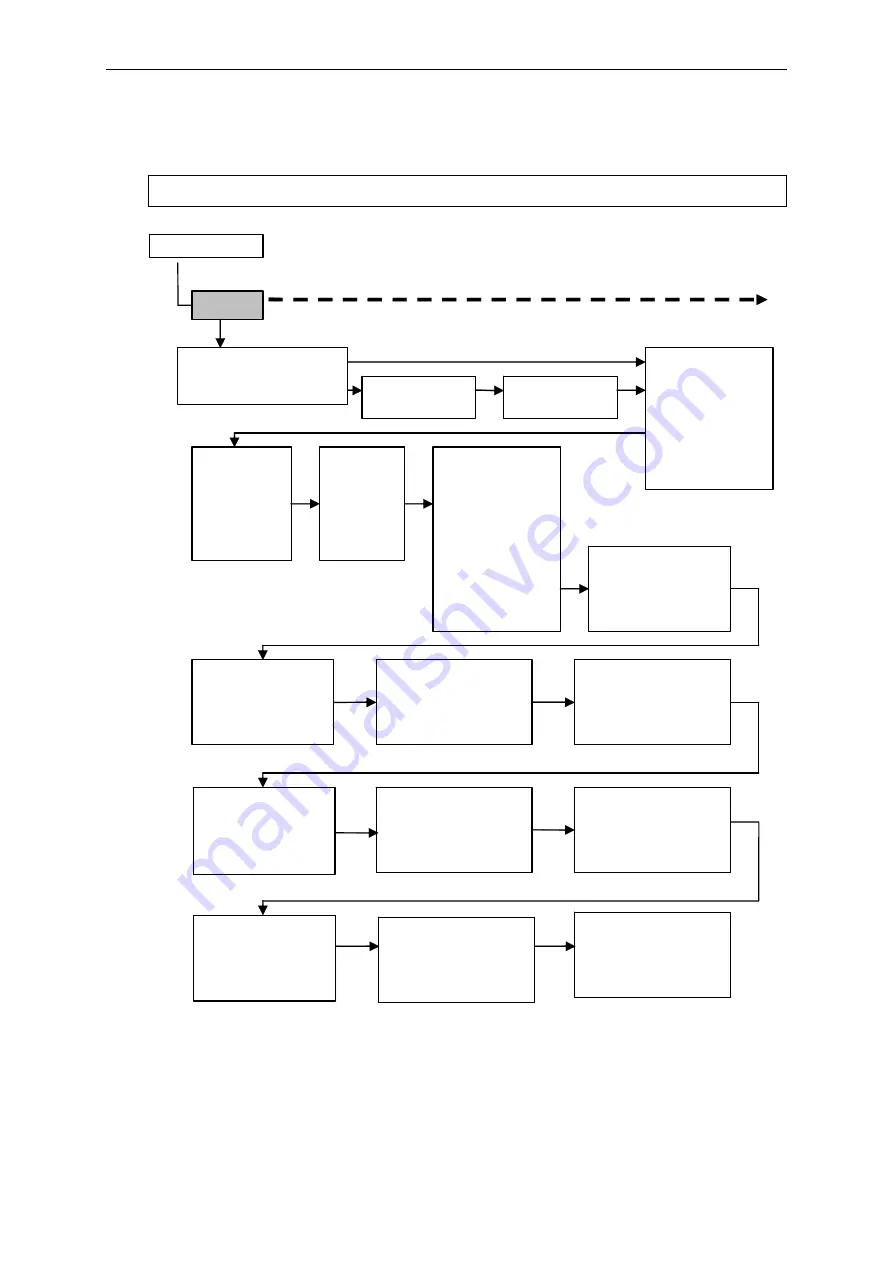
Set-Up Mode Quick Reference

The following flowchart shows how the Set-Up mode is organized.

NOTE: Asterisks (*) indicate factory settings.


SET-UP MODE 

MACRO  

EMULATION 


EPSON EP2  * 
 

     IBM PPX24 


     RESERVED 

EMUL SERL 

EPSON EP2 * 
IBM PPX24

EMUL PARL 

EPSON EP2 * 
IBM PPX24

FONT  

DRAFT * 
HSDRAFT 
HI-IMPACT 
PICA 
COURIER 
PRESTIGE 
COMPRESSED 
BOLDFACE 
TIMELESS 
NINBUS-SAN 
OCR A 

HORIZ PITCH 

10    CPI * 
12    CPI 
13.2 CPI 
15    CPI 
16.5 CPI 
17    CPI 
18    CPI 
20    CPI


VERT PITCH  

2 LPI   
3 LPI 
4 LPI 
6 LPI * 
8 LPI 
1 LPCM
2 LPCM
4 LPCM

FORM LENGTH 

3    INCHES 
3.5 INCHES 
4    INCHES 
5.5 INCHES 
6    INCHES 
7    INCHES 
8    INCHES 
8.5 INCHES 
11  INCHES * 
11 2/3 INCH 
12  INCHES 
14  INCHES 
15  INCHES 
No of LINE 

LEFT MARGN-No of COLM 

1     COL * 
2     COL 


255 COL 
256 COL

TOP OF FRM-No of INCH 

0 /60 IN * 
1 /60 IN 


99/60 IN


TOP MRGN  -No of LINE 


1   LINES * 

 . 
 . 
 256 

LINES


LINE MODE 

LF=LFCR=CR * 
LF=LF+CR 
CR=LF+CR 
LFCR=LF+CR


PAPER SRC 

TRACTOR * 
MANUAL 
RESVD 1 
RESVD 2 
RESVD 1/2 

IGNORE FF 
 NO 
 YES 

EPSON DFLT========== 

<E-CHR SET> 
<6820 SEQ> 
<6820 PROT> 


BOTTOM MRG-No of LINE 

1


LINES 


66        LINES 


256 LINES


PRINT DIR 

UNIDIR 
BIDIR 
SOFT CNTRL * 

IBM DEFLTS=========== 

<I-SET ½> 
<I-DBL HIGT> 
<IBMAGM> 


Summary of Contents for TALLY MIP480

Page 1: ...User Guide MIP480 Mobile Impact Printer...

Page 2: ...s Reorient the TV and or radio antennas and cables until the interference stops For an out door antenna ask your local electrician for support Use coaxial cable antennas Notes 1 The use of a non shiel...

Page 3: ...10 Using Continuous Forms 2 11 Positioning the Paper Stack 2 11 Loading Continuous Forms Push Tractor 2 12 Unloading Continuous Forms 2 14 Recovering from an Unexpected Unloading Operation 2 14 Automa...

Page 4: ...Mode 4 5 Options with Pre determined Values 4 7 Options with Undetermined Values 4 8 Points to Remember 4 10 Macro Options and Values 4 11 INSTALL Options and Values 4 16 Safe Panel 4 18 Recalling Fa...

Page 5: ...2 Paper Handling Problems and Solutions 6 3 Operating Problems and Solutions 6 4 Printer Failures 6 5 Diagnostic Functions 6 5 Checking Vertical Alignment 6 5 Supplies and Options A 1 Supplies A 1 Opt...

Page 6: ...de Page 850 E 3 Code Page 851 E 3 Code Page 852 E 4 Code Page 853 E 4 Code Page 855 E 5 Code Page 857 E 5 Code Page 858 E 6 Code Page 860 E 6 Code Page 863 E 7 Code Page 864 E 7 Code Page 865 E 8 Code...

Page 7: ...nter specifically designed as a robust output device for use in vehicular applications This compact versatile printer offers maximum compatibility with today s software packages and personal computers...

Page 8: ...nloading custom fonts Simple switching of paper types The ability to park continuous forms to switch between continuous forms and single sheets Two positions capability The printer may be mounted vert...

Page 9: ...e sheets Using continuous forms Feeding and positioning paper Switching paper types Tips for paper handling are given at the end of this chapter Check that section if you are using multipart forms inv...

Page 10: ...ct to the vehicle battery 4 Control Panel to load and feed paper select print features or change the printer s optional settings 5 Single Sheet Edge Guides to adjust location of single sheets 6 Easy L...

Page 11: ...rms Tractors to hold and feed continuous forms 4 Paper Guides to guide single sheets 5 Paper Exit Slot and Tear Edge 6 Top Cover Rear 7 Single Sheet Tray Shown in down Position Bottom View 8 Interface...

Page 12: ...s The second table lists Normal mode opera tions and required user response Operations are listed by functions Basic States of the Printer Indicator Status Printer Status Ready On The printer is ready...

Page 13: ...nload continuous forms paper Not printing Off Press Park Pause printing On Printing Off Press READY Resume printing Blinking Not printing Off Press READY Resume printing after a fault Off Not printing...

Page 14: ...quired Action Ready Printing 2 Fault Enter Set Up mode N A N A N A Turn power on while pressing SETUP EXIT Move cursor to select a Set Up Function or Value Off Not printing Off Press NEXT or PREVIOUS...

Page 15: ...and Paper Specifications for detailed specifications If you are unsure of the suitability of a particular type of paper try testing the paper or consult your dealer Paper Specifications Paper Size Pap...

Page 16: ...r on the left side under the cover Paper Select lever on the right side under the cover The following figure shows the location of each lever indicators and keys All keys on the control panel for prim...

Page 17: ...te a form feed Continuous forms are fed forward by one page Single sheets are ejected Load paper Press FF LOAD to feed paper to the top of form position PARK Unload forms Press PARK to retract continu...

Page 18: ...t for different paper thicknesses Be sure to adjust the Print Gap lever whenever you change the number of copies being printed The print gap lever has twelve settings Moving the Print Gap lever to fro...

Page 19: ...is fed into the printer using the forms tractor unit The Push tractor is at the front bottom of the printer The paper is loaded and adjusted via keys The forms may be advanced to tear off position by...

Page 20: ...readjust the Print Gap lever for continuous forms See the section Adjusting for Paper Thickness earlier in this chapter 3 Move the paper select lever backward to Continuous Paper position 4 Release th...

Page 21: ...the left locking lever down to secure the tractor in place 8 Press the FF LOAD key to advance the paper to the top of form position from which printing can start The printer is automatically placed i...

Page 22: ...bar that allows you to tear off printed pages without wasting paper The tear bar is at the rear edge of the paper exit slot Your printer is factory set for automatic tear off When a printing job ends...

Page 23: ...Paper Handling 2 15 2 Tear the paper off at the perforation by pulling the paper to the rear against the tear edge Tearing Off Continuous Forms...

Page 24: ...ntil it locks in Paper Support Position 2 5 Line up the right sliding edge guide with the notch on the Paper Support Adjust the left sliding edge guide to the width of the paper Insert the sheet into...

Page 25: ...jecting Single Sheets If you print using software which inserts a form feed at the end of each page each sheet is ejected automatically upon the completion of the page printing To manually eject sheet...

Page 26: ...same position when a form feed occurs Top line This is the line where the printing actually starts To define a top margin select the number of this line within Set Up mode TOP MRGN option Example In t...

Page 27: ...nition Form Feed Use the form feed function to move paper forward This function is valid whenever the printer is not receiving or printing data and has no fault Pressing the FF LOAD key feeds the pape...

Page 28: ...per tray support and guide to tray position 2 For details see the section Using Single Sheets earlier in this chapter Put a sheet of paper on the Paper support and guide with its bottom edge aligned w...

Page 29: ...ready to print using continuous forms paper Tips on Paper Handling General Tips Use high quality paper Do not use paper that is wrinkled or curled at the edges Do not use paper with staples or metal...

Page 30: ......

Page 31: ...ary of the operation of these keys see the sec tion Getting to Know the Printer s Major Parts and the Control Panel in Chapter 2 Paper Handling Instructions for loading and handling paper are also giv...

Page 32: ...function is valid for single sheets and continuous forms in push tractor feed mode Resuming Printing To resume printing press the READY key again If the paper is advanced for viewing it is backed up t...

Page 33: ...per when the end of the printed page is reached To eject sheets manually Press the FF Load key to execute a form feed If you have set the TEAR option to MANUAL use the READY key to control the Tear Of...

Page 34: ...econds to enter Sleep Mode While in sleep mode the READY LED blinks slowly all 5 seconds all other LEDs of the control panel are off Leaving Sleep Mode To leave the Sleep Mode Press the POWER SLEEP ke...

Page 35: ...ist of all the printer s cur rently selected values Printing Test Run the printing test Hex Dump Mode Hex dump allows you to determine whether the computer is sending the correct commands to the print...

Page 36: ...ward 2 Turn the printer off 3 Turn the printer back on and immediatley press each keys Function Load FF Park Alt Ready Clear Setup Mode Print Configuration Printing Test Hex Dump Mode Printing Alignme...

Page 37: ...allowed to avoid accidentally chang ing of Set Up values How Set Up Works The Set Up mode consists of Set Up functions which correspond to the printer settings described in the previous page Each fun...

Page 38: ...nd FUNCTIONS menu 2 The header tells you that the printer is in the Set Up mode The help menu provides a quick summary of how to use keys in the Set Up mode The FUNCTIONS menu 2 is started from MACRO...

Page 39: ...n Set Up Mode Functions Function Description MACRO Assigns print features to MACRO INSTALL Changes the Set Up menu language computer interface and paper feed control options SAFE PANEL READY PARK and...

Page 40: ...he other functions have neither options nor val ues Repeatedly press the NEXT key or the PREVIOUS key to position the option you require The first four Macro options are shown below 3 Press the ALT NE...

Page 41: ...NEXT key to select the Macro function and print the EMULATION option 3 Print the menu of the vertical pitch option Since you only want to change the vertical pitch press the NEXT key repeatedly until...

Page 42: ...ss the ALT NEXT key to select the LEFT MARGN option and print its values 4 Change the left margin from column 1 to column 20 Press the NEXT key nineteen times When the key is released the new value is...

Page 43: ...EADY d Printer prints help menu and FUNCTIONS menu Select values RECALL FACTORY DEFAULTS MACRO and INSTALL SAFE PANEL Press SAVE EXIT ALT NEXT or ALT PREVIOUS Printer saves changes and exits Set Up mo...

Page 44: ...e top of the page Use the help menus for quick reference while in the Set Up mode When printing the option for each function you can move either forward or backward in the option list To move forward...

Page 45: ...id in Standard model EMUL USB Select an emulation for USB interface This is invalid and skipped when PORT DEPEND is not selected for the EMULATION option Epson EP2 EP2 factory setting IBM 2390 IBM Pro...

Page 46: ...RGN Specify the left margin by the number of the left column see Print Area Definition in Chapter 2 Paper Handling No of COLM 1 to 256 Number of the left column TOP OF FORM Specify the top of form in...

Page 47: ...F Line Feed codes CR CR CR LF CR LF LF LF LF CR CR CR No line feed is added to a carriage return CR LF CR A line feed is added to each carriage return LF LF No carriage return is added to a line feed...

Page 48: ...SR GOST 864 437G 920 858 923 IBM DEFLTS The following are the Set Up options for the IBM Proprinter 2390 emulation only IBM SET 1 2 Specify a character set of the IBM Proprinter 2390 IBM SET 1 IBM cha...

Page 49: ...Spanish 2 LATIN AM Latin American 6820 SEQ Select Parser control NO Disable 6820 control sequences YES Enable 6820 control sequences 6820 PROT Select Protocol mode NO Disable the 6820 protocol YES En...

Page 50: ...om the computer AUTO 5 SEC 5 seconds after data stops from the computer MANUAL Feed the paper for tear off when the READY key is pressed changing to pause mode NO TEAR Tear off feeding is inhibited un...

Page 51: ...e WIRELESS Wireless interface BLUETOOTH Bluetooth interface BAUD RATE The baud rate is in bps bits per second Select the same baud rate as that used by your computer or modem 4800 BPS 4800 Bits Per Se...

Page 52: ...stment functions are all initialized to the factory settings STOP BIT Word Length setting Select the same word length setting that is used by your computer or modem 1 BIT 1 Stop bit per data byte 2 BI...

Page 53: ...es you have made To exit the Set Up mode with the settings saved first select the SAVE EXIT function and then press the ALT NEXT key or the ALT PREVIOUS key Any settings changed while in the Set Up mo...

Page 54: ...nter the Printer Configuration mode a Make sure that the tractors are loaded with continuous feed paper and that the paper select lever is set backward b Turn the printer off c Turn the printer back o...

Page 55: ...al ue M EN U AC C ES ALL FU N C M AC R O O pt i ons Val ue EM U LATI O N EPSO N EP2 EM U L SER I AL EPSO N EP2 EM U L U SB EPSO N EP2 EM U L W I R ELESSEPSO N EP2 EM U L BLU ETO O TH EPSO N EP2 FO N T...

Page 56: ...key 2 The printer starts to print rolling ASCII data as shown below 3 To exit the Printer Configuration mode Printing Test mode is continues until power OFF NOTE Do not press any keys alone or in comb...

Page 57: ...e READY CLEAR ALT keys 2 Print the Hex Dump a To start Hex Dump printing send your file or program to the printer The printer goes online and prints the Hex Dump b Press the READY key to pause and res...

Page 58: ...d paper and that the pa per select lever is set backward b Turn the printer off c Turn the printer back on while simultaneously pressing the READY CLEAR LOAD FF keys 2 Adjust the vertical print alignm...

Page 59: ...djustment range is 01 15 and the center value is 08 By pressing SETUP EXIT Key the ad justment value for High Speed is determined and the adjustment value for Low Speed is saved 4 Printing new setting...

Page 60: ...Position are printed b The format of Loading Position is printed and the paper is automatically advanced for viewing after the printing is complete The message of Loading Position Pos xx is printed c...

Page 61: ...is automatically advanced for viewing after the printing is complete After ejecting a form the mes sage Loading Position xx is printed 4 Exit the Top Adjustment mode Turn the printer off to exit the...

Page 62: ...tion on the left side is printed as below 15 patterns of adjustment Position are printed b After the format of setting of the first dot Position on the left side is printed the pa per is automatically...

Page 63: ...stment value of the first dot position on the left side is printed The paper is automatically advanced for viewing after the printing is complete After ejecting a form the message 1st Print Position x...

Page 64: ...d move up e Press SETUP EXIT key to save the value and move to SAVE EXIT menu 3 Exit the Menu Access mode Turn the printer off to exit the Menu Access mode MENU ACCESS Options Values Description MENU...

Page 65: ...6820 mode default 1 To enter setting setup mode to default value 6820 mode a Turn the printer off b Turn the printer back on while simultaneously pressing the PARK ALT keys 2 Exit the setting setup mo...

Page 66: ...20 CPI VERT PITCH 2 LPI 3 LPI 4 LPI 6 LPI 8 LPI 1 LPCM 2 LPCM 4 LPCM FORM LENGTH 3 INCHES 3 5 INCHES 4 INCHES 5 5 INCHES 6 INCHES 7 INCHES 8 INCHES 8 5 INCHES 11 INCHES 11 2 3 INCH 12 INCHES 14 INCHE...

Page 67: ...NONE AUTO SW 2 SEC 4 SEC 18 SEC 20 SEC BAUD RATE 600 BPS 1200 BPS 2400 BPS 4800 BPS 9600 BPS 19200 BPS I F TYPE PARALLEL SERIAL AUTO I SET 1 2 IBM SET 1 IBM SET 2 IBM DEFLTS DEFLT SET CP 210 CP DHN EL...

Page 68: ...NONE AUTO SW 2 SEC 4 SEC 18 SEC 20 SEC BAUD RATE 600 BPS 1200 BPS 2400 BPS 4800 BPS 9600 BPS 19200 BPS I F TYPE PARALLEL SERIAL AUTO I SET 1 2 IBM SET 1 IBM SET 2 IBM DEFLTS DEFLT SET CP 210 CP DHN EL...

Page 69: ...printer and how to clean the paper bail rollers It is easier to clean the printer when the cover is open Cleaning and Vacuuming the Printer If the print head carriage does not move smoothly back and f...

Page 70: ...e inside of the cover the bail rollers the single sheet entry the form tractors and the surrounding areas Cleaning the Paper Bail Rollers Clean the platen and paper bail rollers once a month or when s...

Page 71: ...Cleaning the Print Head If the paper is smudged or stained by ink clean the nose of the print head with a dry cloth For removing and installing the print head see the section Replacing the Print Head...

Page 72: ...w ribbon cartridge from the carton Removing the Ribbon Cartridge To remove the ribbon cartridge 1 Turn off the printer 2 Open the top cover For easy removal slide the print head carriage between the s...

Page 73: ...its carriage Be careful of the print head during this operation 2 When placing the new ribbon cartridge on the carriage make sure that the thin ribbon does not become bunched or folded at the print h...

Page 74: ...rint Head To install the print head 1 Connect the flexible cables to each connector Make sure to push them fully into the connectors do not kink the cables 2 Ease the new print head down into the moun...

Page 75: ...r problems that you cannot resolve contact your dealer for assistance This chapter is organized as follows Solving problems Diagnostic functions Solving problems The tables in this section describe co...

Page 76: ...selected on the printer Printing is vertically misaligned jagged Use the printer s vertical alignment function to check the vertical print alignment If necessary adjust the print align ment See the se...

Page 77: ...at the Print Gap lever is set for the thick ness of your paper See Adjusting for Paper Thickness in Chapter 2 Paper Handling Make sure that the paper is not folded creased or torn Make sure that the l...

Page 78: ...our dealer The printer is on but it will not print Make sure that the Ready indicator is lit See Operation of the Control Panel in Chapter 2 Paper Handling If you use the interface cable make sure it...

Page 79: ...computer Hex dump allows you to determine whether the computer is sending the correct com mands to the printer and whether the printer is executing the commands correctly This function is useful to p...

Page 80: ...ed and the paper will automatically advance for viewing after the print ing is complete The message of Bi Dir Align Adjust1 xx is printed An adjustment value is chosen using NEXT and PREVIOUS key The...

Page 81: ...ustment range is 01 15 and the center value is 08 By pressing SETUP EXIT Key the ad justment value for High Speed is determined and the adjustment value for Low Speed is saved 4 Printing new settings...

Page 82: ......

Page 83: ...elescoping BCVL03 864 to 1372 mm 34 to 54 adjustable in height Vertical Printer Stand BEVL03 610 mm 24 with paper box Vertical Printer Stand BUVL03 915 mm 36 order also kit 1A4299K01 for mounting Hori...

Page 84: ......

Page 85: ...8 VDC 110 220 VAC as option Power consumption Not to exceed 150 Watts Interface and connectivity USB2 0 full speed RS232 and Blue Tooth Class 2 ver1 2 Standard IEEE 802 11b Option Data buffer size 64K...

Page 86: ...r Specifications B 2 Impact Resistance Operating Non operating 3G print quality not guaranteed 10 G Dust Proof Corrosion Resis tance Ingress Protection IP rating IP22 No special protection against flu...

Page 87: ...Continuous Form position continuous forms may be printed Paper is loaded and adjusted via keys Forms may be advanced to tear off feature by operator or by host Continuous forms are parked while sin gl...

Page 88: ...5 CP 923 Latin 9 USSR GOST 15 character sets USA France Germany UK Denmark 1 Sweden Italy Spain 1 Japan Norway Denmark 2 Spain 2 Latin America Korea Legal Fonts Resident 13 fonts available Draft Roman...

Page 89: ...ecifications B 5 Barcodes IBM EPSON 9 Barcodes available UPC A UPC E EAN8 EAN13 CODE39 CODE128 CODABAR NW7 INTERLEAVED 2 of 5 INDUSTRIAL 2 of 5 7 Barcodes available UPC A UPC E EAN8 EAN13 CODE39 CODE1...

Page 90: ...r Hours ECMA 132 Letter Test Pattern Draft Quality 321 pph Letter Quality 172 pph Ribbon service life 4 million characters Printer Life 5 million lines or five years Print Head Life 300 million impact...

Page 91: ...Printer and Paper Specifications B 7 Paper Specifications Print Area Print Area for Continuous Forms Wc 102 to 267 mm 4 to 10 5 in Lc 5 08 to 25 4 mm 0 2 to 1 in...

Page 92: ...Printer and Paper Specifications B 8 Print Area for Single Sheets Ws 102 to 267 mm 4 to 10 5 in Hs 76 to 364 mm 3 to 14 3 in Ls 5 08 to 32 mm 0 2 to 1 26 in...

Page 93: ...arbon interleaved Type of Paper Number of Parts Thickness One Part Carbonless Single 47 81 g m2 12 22 lbs bond Two Part Carbonless Top 40 64 g m2 11 17 lbs bond Bottom 40 81 g m2 11 22 lbs bond Three...

Page 94: ...Carbon Interleaved Top 40 64 g m2 11 17 lbs bond Carbon Counted as one sheet Bottom 40 81 g m2 11 22 lbs bond Three Part Carbon Backed Top 40 64 g m2 11 17 lbs bond Carbon Counted as one sheet Middle...

Page 95: ...appendix describes printer commands and their parameters This printer has the following two resident command sets Emulations IBM Proprinter XL24E 2390 Epson EP2 Select the same Emulation on the print...

Page 96: ...ble width characters off DC4 Double width characters on off ESC W n on n 1 off n 0 Double height double width characters ESC n1 n2 m1 m4 n1 4 n2 0 m1 0 m2 0 m3 controls character height and line spaci...

Page 97: ...ts C 3 Function Command Score select ESC n1 n2 m1 m2 n1 2 n2 0 m1 selects score location m1 Score location 0 Underscore 1 Strikethrough 2 Overscore m2 selects score type m2 Score type 0 Cancel 1 Singl...

Page 98: ...255 Preset line spacing to n 72 inch ESC A n 1 n 255 Preset line spacing to n 60 inch in AG mode ESC A n 1 n 255 Set line spacing to 1 6 inch or to the value ESC 2 preset by line spacing command ESC A...

Page 99: ...at column n and right ESC X n m margin at column m 0 n m 255 Set perforation skip by n lines ESC N n 1 n 255 Perforation skip off ESC O Set page length to n lines 1 n 255 ESC C n Set page length to n...

Page 100: ...page 852 3 87 Code page 855 3 89 Code page 857 3 90 Code page 858 3 92 Code page 860 3 94 Code page 862 3 95 Code page 863 3 96 Code page 864 3 97 Code page 865 3 98 Code page 866 3 101 Code page 869...

Page 101: ...F0 018E 01CC 01D6 17 01ED 01C9 018D 01CD 01D7 20 01EE 01CA 018C 01CE 01D8 24 011E 011F 0120 0121 0124 PS 00AB 01A4 00AE 00C6 00C8 Additional Font Global ID for Hex Hf Lf Courier Prestige Gothic Pitch...

Page 102: ...6 0 254 00D8 00FE 6 CPI 12 CPI double wide double hight 0 255 256 256 0100 FFFF 5 CPI 10 CPI double wide double high Note The Hs and Ls Parameters are effective only when hexadecimal 01 decimal 1 is s...

Page 103: ...Ex n 0 Resident Draft 2 Resident Courier 4 Downloaded Draft 6 Downloaded Courier Create download font ESC n1 n2 ID m1 m2 data Bit Image Graphics Single density graphics ESC K n1 n2 data Double densit...

Page 104: ...unit module dots 00 hex 01 hex 02 hex 03 hex 04 hex default 2 dots 2 dots 2 dots 3 dots 4 dots s Space width adjustment s Space width adjustment s is used for fine adjustment for each spaces to match...

Page 105: ...ity followed ESC p n1 n2 n1 is a low byte of command length data in hexadecimal n2 is a high byte of command length data in hexadecimal n1 n2 value should be the value in the following tables If undef...

Page 106: ...ter F Barcode Printed result specified by each barcode standard format Width width of horizontal direction Length length of vertical direction 2 If LF operation is made by an operation switch during p...

Page 107: ...ds undefined code after the character set is changed by the function code the printer will ignore all the barcode data defended by data length parameter n1 n2 and no barcode print is performed 12 When...

Page 108: ...0 Normal 1 Outlined 2 Shaded 3 Outlined and shadowed One line double width characters on SO or ESC SO One line double width characters off DC4 Double width characters on off ESC W n on n 1 off n 0 Do...

Page 109: ...et elite pitch ESC M Set pica pitch ESC P Set 15 CPI ESC g Proportionally spaced characters on off ESC p n on n 1 off n 0 Set inter character space to n 120 inch for draft ESC SP n or n 180 inch for l...

Page 110: ...120 inch for draft 1 ESC n1 n2 or n 180 inch for letter 1 right from left margin n n1 n2 X 256 Move print position n 120 1 inch for draft ESC n1 n2 or n 180 1 inch for letter left or right from the cu...

Page 111: ...b1 255 0 b2 127 Set perforation skip by n lines ESC N n 1 n 127 Perforation skip off ESC O Set page length to n lines 1 n 127 ESC C n Set page length to n inches 1 n 22 ESC C NUL n Set page length to...

Page 112: ...number 0 default is Italics 1 Active character set number 1 default is Graphics 2 Active character set number 2 default is DLL 3 Active character set number 3 default is Graphics d2 d3 Character Set...

Page 113: ...oading Select font ESC n n 0 Resident character set 1 Downloaded character set Select letter or draft quality ESC x n n 0 Draft 1 Letter Select type style ESC k n Bitmap font n 0 Roman 1 Sans serif 2...

Page 114: ...C Z n1 n2 data Select raster image graphics ESC G n1 n2 d n1 1 n2 0 d 1 Raster image graphics mode Print raster image graphics ESC c v h m n1 n2 data Barcode Barcode setup and print ESC B n1 n2 k m s...

Page 115: ...by the printer The host computer should generate the check code 1 Check code is generated automatically by the printer b1 Human Readable Character 0 Print On 1 Print Off Note Human readable character...

Page 116: ......

Page 117: ...er communications Most users do not need the infor mation in this appendix This information is most useful to people who specify how to con figure and install these printers Removing the Connectivity...

Page 118: ...a This line is for receiving data from PC The serial inter face will not accept any data unless DSR is on 4 RTS Request to Send This line will be set high and will remain high after the serial interfa...

Page 119: ...ftware to change options specified as selectable Transmission Asynchronous full duplex Speed 4800 9600 19200 or 38400 baud selectable Data bits 7 or 8 bits selectable Parity bit Even odd or none selec...

Page 120: ...Description XON XOFF DC1 DC3 When the printer is ready to receive data it sends the XON DC1 code hex 11 When fewer than 255 bytes of space remain in the buffer or when the printer is taken offline th...

Page 121: ...USB Function Controller with two FIFO based Endpoints One bidirectional Control Endpoint 0 8 bytes One receive Endpoint 1 1 64 byts The signaling bit rate is 12 Mb s Full speed USB Universal Serial B...

Page 122: ...band 2 4 GHz Communication Range Line of sight distance Approximately 10m This may vary depending on conditions including Obstacles between devices signal quality magnetic fields static electricity el...

Page 123: ...and symbols that are in accordance with the intended languages or usages Note that some character sets even if they have the same character set name may not have certain characters or symbols dependi...

Page 124: ...Character Sets E 2 Code Page 437 Code Page 437 Greek...

Page 125: ...Character Sets E 3 Code Page 850 Code Page 851...

Page 126: ...Character Sets E 4 Code Page 852 Code Page 853...

Page 127: ...Character Sets E 5 Code Page 855 Code Page 857...

Page 128: ...Character Sets E 6 Code Page 858 Code Page 860...

Page 129: ...Character Sets E 7 Code Page 863 Code Page 864...

Page 130: ...Character Sets E 8 Code Page 865 Code Page 866...

Page 131: ...Character Sets E 9 Code Page 869 Code Page 920...

Page 132: ...Character Sets E 10 Code Page 923 Code Page USSR GOST...

Page 133: ...Character Sets E 11 IBM Proprinter Emulation IBM Set 1 and 2 IBM character set 1 and IBM character set 2 IBM Set 1 IBM Set 2...

Page 134: ...acter sets are available USA France Germany UK Denmark 1 Sweden Italy Spain 1 Japan Norway Denmark 2 Spain 2 Latin America Korea and Legal Common Characters The following table shows characters common...

Page 135: ...Character Sets E 13 National Characters The following table shows national characters that differ with languages Character co des correspond to NRs in the preceding table...

Page 136: ......

Page 137: ...erent form re quires our explicit approval We reserve the right to make changes to this manual without notice All care has been taken to ensure accuracy of information contained in this manual However...

Page 138: ...ilding Singapore 669569 Phone 65 6760 8833 Fax 65 6760 1066 www dascom com TALLY REPRESENTATIVES UNITED KINGDOM DASCOM GB Ltd ViewPoint Basing View Basingstoke Hampshire RG21 4RG England Phone 44 0 12...

Reviews: