


Copyright © 2020 DASAN Zhone Solutions
Document Number: 830-04369-01
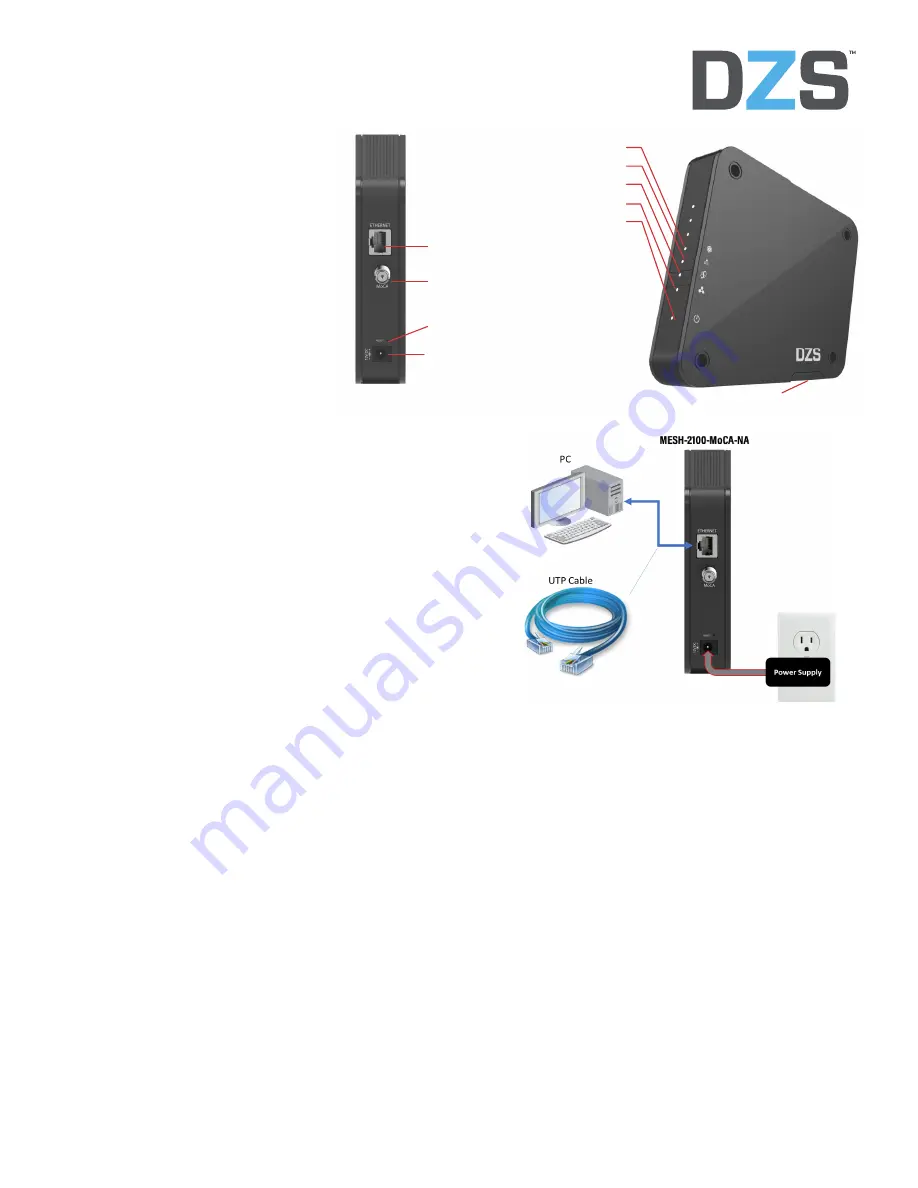
MESH-2100-MoCA-NA
Quick Installation Instructions
Document Number: 830-04369-01
June 2020
Package Contents:
•
1 x MESH-2100-MoCA-NA
•
1 x Quick Install Guide
•
1 x Power supply
Gigabit Ethernet Port LED
WPS LED
MESH LED
POWER LED
Gigabit Ethernet Port
MoCA 2.0 Port
Factory Reset Button
12V DC Power Input
Extendable Base
MoCA 2.0 LED
Installation
For installations with more than one MESH-2100-MoCA-NA,
select one unit to be used as the main MESH controller and
follow the instructions presented on the current document.
1. Mounting
The MESH-2100-MoCA-NA may be mounted on flat surfaces
such as a desktop. The MESH-2100-MoCA-NA is equipped
with an extendable base to enhance stability.
2. Connect Power
a. Plug the round two pin 12V DC power connector of
power converter into the MESH-2100-MoCA-NA power
port
b. Plug the input of power converter into a live AC outlet
c. Verify that the POWER LED on the MESH-2100-MoCA-
NA is solid white indicating local power is on and voltage
is good
See the
MESH-2100-MoCA-NA LED Behavior
section for a
complete description of the LEDs.
3. Configuring SSID and Wi-Fi Key (Optional)
This step is optional. Each MESH-2100-MoCA-NA comes
with a set of default Wi-Fi SSID and passphrase located on
the bottom information label. If using the defaults, step 3 (this
step) may be skipped.
a. Power up the MESH-2100-MoCA-NA as described in the
Connect Power.
This is the main MESH
controller.
b. Use a UTP cable between MESH-2100-MoCA-NA
Ethernet ports and a PC Ethernet port
c. Configure a fixed IP address on your PC, for example
192.168.1.101 (for detailed instructions refer to your
operating system documentation; for Windows OS follow
https://support.microsoft.com/en-us/
help/15089/windows-change-tcp-ip-settings
).
d. Open a web browser and input
http://192.168.1.100
e. When prompted for credentials enter "admin" as user
and for password "DZSXXXXXXXXX" where
"XXXXXXXXX" is the 9-digit serial number found on the
unit label
f. Navigate to
5GHz Wi-Fi > Config
g. Change
SSID
h. Change
Password
i. Click
Save
j. If needed repeat for
2.4Ghz Wi-Fi