Danby DAR170A2WDD Owner'S Use And Care Manual Download Page 3

3

  
  Installation Instructions

1.  Select a place with a strong, level 

fl

 oor. 

2.  Allow 5 inches (12.7 cm) of space between the back of the refrigerator and any adjacent wall. 
3.  Avoid direct sunlight and heat. Direct sunlight could damage the unit. Heat sources nearby will cause higher electricity 

consumption. 

4.  Avoid moist places. Too much moisture in the air will cause frost to form very quickly on the evaporator, and your 

refrigerator will have to be defrosted more frequently.

This unit is 29.94 inches / 76.05 cm wide by 67.26 inches / 170.85 cm high by 28.48 inches / 72.35 cm deep, please make 
sure that you leave the minimum amount of space between the unit and all surrounding walls and vents (see location sec-
tion). Do not cover any of the ventilation openings with any material as the unit needs adequate space to breathe.

Place the appliance 

fi

 rmly on a solid base. Some appliances have adjustable feet on the front side; use them to level the 

appliance 

(some models only)

.

NOTE: This appliance is intended for FREE-STANDING INSTALLATION ONLY, and is NOT intended to be built-in. 
This appliance is approved for INDOOR USE ONLY and is NOT intended for outdoor operation. 

Note: Do not operate this unit where the ambient room temperature is below 5°C (41°F)
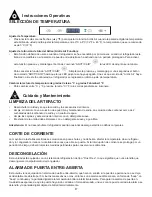
LOCATION

1. Light 

Switch

2. Control 

Panel

3. LED 

Light

4. Airfl ow Outlet
5. Temperature 

Sensor

6. Refrigerator 

Shelf

7. Airfl ow Inlet
8. Vegetable 

Crisper

9. Butter 

Keeper

10.  Adjustable Door Bin
11.  Large Capacity Door Bin
12. Adjustable Feet: 

Please adjust to level your unit.

FEATURES

The unit must be unplugged before installing the handle

1.  The refrigerator ships with the handle inside
2.  To install the handle, remove packaging and position the handle over the 

door handle posts

3.  Once the handle is in position on the posts insert the small hex screws into 

the handle bracket and tighten them with the allen key provided.  Turn until 
snug but do not over tighten

HANDLE INSTALLATION

Summary of Contents for DAR170A2WDD

Page 1: ...nchez la fiche dans une prise de courant correctement install e et mise la terre AVERTISSEMENT Une fiche de mise la terre mal branch e peut entra ner un risque d incendie de choc lectrique ou de bless...

Page 2: ...d or who lack experience or knowledge unless such persons receive supervision or train ing to operate the appliance by a person responsible for their safety Children should be supervised to ensure tha...

Page 3: ...Some appliances have adjustable feet on the front side use them to level the appliance some models only NOTE This appliance is intended for FREE STANDING INSTALLATION ONLY and is NOT intended to be b...

Page 4: ...emove door from unit and set aside Ensure that you do not damage the bottom door spindles F 4 Remove roller caps at bottom of unit E 5 Remove four screws each from both bottom hinges and then swap the...

Page 5: ...Wash the inside with a warm water and baking soda solution The solution should be about 2 tablespoons of baking soda to a quart of water Wash the baskets and interior accessories with a mild detergen...

Page 6: ...ower to unit Power cord is unplugged Temperature control set too high too warm Door is not closed Hot food inserted Door opened too long or too often Air flow obstruction Wrong voltage is being used C...

Page 7: ...horized Danby Service Depot as service must only be performed by a technician qualified and certified for warranty service by Danby Transpor tation charges to and from the service location are not pro...

Page 8: ...sique sensoriel ou mental estdiff rente ou r duite ou par les personnes qui manquent exp rience ou connaissance sauf si ces personnes sont surveill s ou form s par une personne responsable de leur s c...

Page 9: ...les pour mettre les appareils niveau sur certains mod les seulement REMARQUE Cet appareil est pour L INSTALLATION AUTONOME SEULEMENT et n est pas pour l installation int gr e Cet appareil est approuv...

Page 10: ...5 Enlevez les quatre vis des deux charni res inf rieures et changez les charni res inf rieures J Assurez vous que la charni re en forme de C soit sur le c t oppos de la poign e 6 R installez quatre vi...

Page 11: ...rature de votre r frig rateur et ou cong lateur si vous r duisez au minimum le nombre de fois o la porte est ouverte Si le courant reste coup pendant une longue p riode il faut prendre des mesures po...

Page 12: ...rature est trop bas La porte n est pas ferm e La nourriture est chaude La porte est ouverte trop souvent long temps Obstruction de la circulation de l air Le mauvais voltage est utilis Proximit d une...

Page 13: ...en qualifi et certifi pour effectuer un entretien couvert par la garantie de Danby Les frais de transport entre votre domicile et le lieu de l entretien ne sont pas couverts par la pr sente garantie e...

Page 14: ...reducidas o carezcan de experiencia o conocimiento a menos que dichas perso nas reciban una supervisi n o capacitaci n para el funcionamiento del aparato por una persona responsable de su seguridad Lo...

Page 15: ...patas ajustables en la parte frontal se las para nivelarlos s lo algunos modelos NOTAS Este aparato esta destinado solo para INSTALACI N INDEPENDIENTE y no para instalaci n integrada Este refrigerado...

Page 16: ...Saque la puerta de la unidad y d jela a un lado Aseg rese de no da ar los v stagos inferiores de la puerta F 4 Remueva las tapas de los rodillos de la parte de abajo de la unidad E 5 Remueva cuatro to...

Page 17: ...reduce la cantidad de veces que abre su puerta Si la interrupci n de corriente se prolonga por un per odo m s largo deber tomar las medidas pertinentes para conservar sus alimentos CORTE DE CORRIENTE...

Page 18: ...unidad Cable de alimentaci n de corriente est desenchufado Control de temperatura fijada muy bajo muy caliente La puerta no est cerrada Se introdujo alimentos calientes Se abri la puerta demasiadas v...

Page 19: ...hacia el lugar en que se efect e el servicio t cnico no est n cubiertos por esta garant a y son de responsabilidad del comprador Durante los primeros 18 meses cualquier parte en buen estado de este pr...

Page 20: ...___________________ __________________________________________________________________________________________ _________________________________________________________________________________________...

Reviews: