


4-18
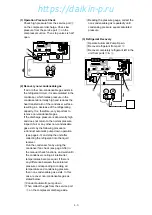
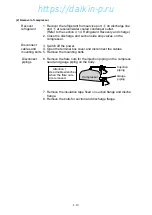
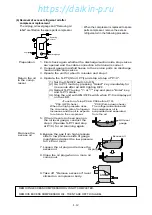
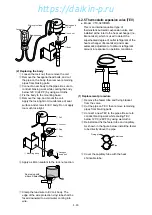
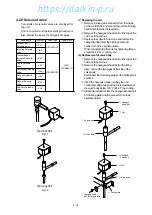
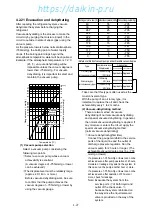
(2) Replacing the body
q
Loosen the lock nut, then remove the coil.
w
Remove the hexagonal head bolts, and cut
the pipe on the body, then remove remaining
pipes from brazing parts.
e
Connect a new body to the pipes. Be sure to
conduct brazing work while cooling the body
below 120˚C (248˚F) by using wet cloths.
r
Fix the body to the mounting base.
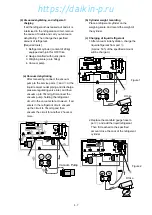
t
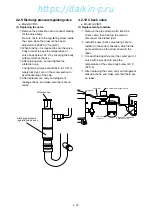
Remove the cap, and mount the coil.
Apply the lock-tight to circumference of seal
surface and screws for EV body. Do not apply
too much lock-tight.
y
Apply a sillicon sealant to the lock nut section.
u
Clamp the lead wire to EV coil body. The
edge of the wire protection vinyl tube shall be
faced downward to avoid water coming into
wire.
e
Body
q
Coil
Binding band
Connector
w
Lock nut
Binding bands
Water-proof tube
y
Cap
q
Coil
w
Lock nut
e
Mounting base
r
Hexagon
head bolt
t
Body
Seal using with
sillicon Sealant
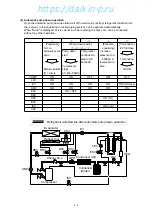
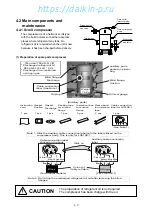
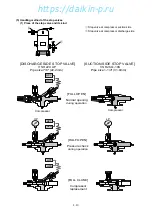
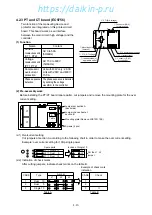
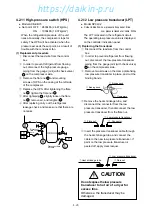
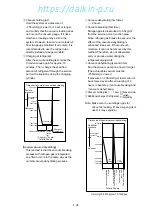
4.2.5 Thermostatic expansion valve (TEV)
●
Model : VTX-3410DMS
This is an internal equalizer type of
thermostatic automatic expansion valve and
installed at the inlet to the heat exchanger (i.e.,
Economizer), which is used to detect the
superheated degree of outlet refrigerant of the
heat exchanger (Economizer) and make
automatic adjustment of optimum refrigerant
amount in response to operation conditions.
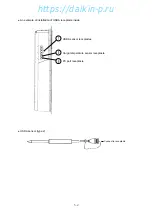
Feeler tube
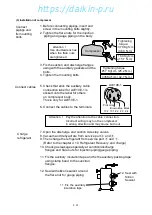
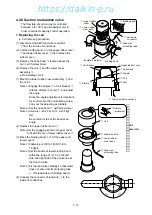
(1) Replacement procedure
q
Remove the feeler tube and fixing bracket
from the valve.
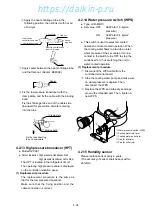
w
Cut the pipe on TEV, then remove remaining
pipes from brazing parts.
e
Connect a new TEV to the pipes. Be sure to
conduct brazing work while cooling TEV
below 120˚C (248˚F) by using wet cloths.
r
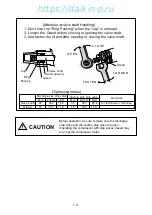
Reinstall and fix the feeler tube and capillary.
As shown in the figure below, install the feeler
tube directly above the pipe.
t
Cover the capillary tube with the heat
shrincable tube.
Feeler tube
Fixing plate
Pipe
https://daikin-p.ru