Installer and user reference guide
VRV system air conditioner
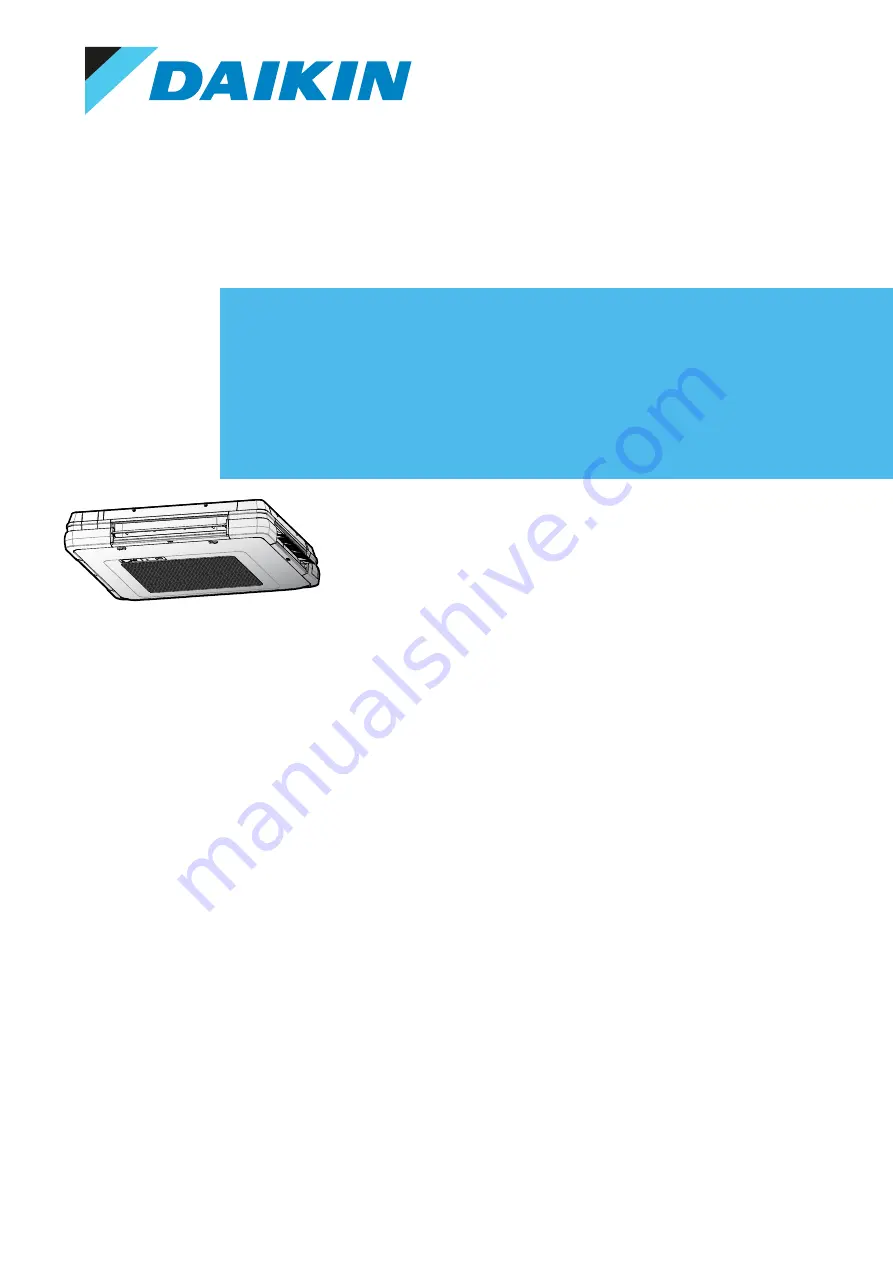
FXUA50AVEBFXUA71AVEBFXUA100AVEB
Page 1: ...Installer and user reference guide VRV system air conditioner FXUA50AVEB FXUA71AVEB FXUA100AVEB ...
Page 2: ... 29 9 Energy saving and optimum operation 30 10 Maintenance and service 31 10 1 Precautions for maintenance and service 31 10 2 Cleaning the unit exterior air filter and suction grille 32 10 2 1 To clean the exterior 32 10 2 2 To clean the air filter 32 10 2 3 To clean the suction grille 33 10 3 Maintenance before a long stop period 34 10 4 Maintenance after a long stop period 34 10 5 About the re...
Page 3: ...nt piping 61 17 2 1 About connecting the refrigerant piping 61 17 2 2 Precautions when connecting the refrigerant piping 62 17 2 3 Guidelines when connecting the refrigerant piping 62 17 2 4 Pipe bending guidelines 63 17 2 5 To flare the pipe end 63 17 2 6 To connect the refrigerant piping to the indoor unit 64 18 Electrical installation 66 18 1 About connecting the electrical wiring 66 18 1 1 Pre...
Page 4: ...of General safety precautions Safety instructions that you must read before installing Format Paper in the box of the indoor unit Indoor unit installation and operation manual Installation and operation instructions Format Paper in the box of the indoor unit Installer and user reference guide Preparation of the installation good practices reference data Detailed step by step instructions and backg...
Page 5: ...eaning of warnings and symbols DANGER Indicates a situation that results in death or serious injury DANGER RISK OF ELECTROCUTION Indicates a situation that could result in electrocution DANGER RISK OF BURNING SCALDING Indicates a situation that could result in burning scalding because of extreme hot or cold temperatures DANGER RISK OF EXPLOSION Indicates a situation that could result in explosion ...
Page 6: ...tact your dealer DANGER RISK OF BURNING SCALDING Do NOT touch the refrigerant piping water piping or internal parts during and immediately after operation It could be too hot or too cold Give it time to return to normal temperature If you MUST touch it wear protective gloves Do NOT touch any accidental leaking refrigerant WARNING Improper installation or attachment of equipment or accessories coul...
Page 7: ...ervice In Europe EN378 provides the necessary guidance for this logbook 2 2 2 Installation site Provide sufficient space around the unit for servicing and air circulation Make sure the installation site withstands the weight and vibration of the unit Make sure the area is well ventilated Do NOT block any ventilation openings Make sure the unit is level Do NOT install the unit in the following plac...
Page 8: ...ion and explosion of the compressor because of air going into the operating compressor Use a separate recovery system so that the unit s compressor does NOT have to operate WARNING ALWAYS recover the refrigerant Do NOT release them directly into the environment Use a vacuum pump to evacuate the installation NOTICE After all the piping has been connected make sure there is no gas leak Use nitrogen ...
Page 9: ...mediately If the valve is NOT closed immediately remaining pressure might charge additional refrigerant Possible consequence Incorrect refrigerant amount 2 2 4 Electrical DANGER RISK OF ELECTROCUTION Turn OFF all power supply before removing the switch box cover connecting electrical wiring or touching electrical parts Disconnect the power supply for more than 10 minutes and measure the voltage at...
Page 10: ...e earth leakage protector CAUTION When connecting the power supply connect the earth cable first before making the current carrying connections When disconnecting the power supply disconnect the current carrying cables first before separating the earth connection The length of the conductors between the power supply stress relief and the terminal block itself MUST be as such that the current carry...
Page 11: ...ox is connected securely Make sure all covers are closed before starting up the unit NOTICE ONLY applicable if the power supply is three phase and the compressor has an ON OFF starting method If there exists the possibility of reversed phase after a momentary black out and the power goes ON and OFF while the product is operating attach a reversed phase protection circuit locally Running the produc...
Page 12: ...to the general public install it in a secured area protected from easy access This unit both indoor and outdoor is suitable for installation in a commercial and light industrial environment WARNING Keep any required ventilation openings clear of obstructions CAUTION This equipment is NOT intended for use in residential locations and will NOT guarantee to provide adequate protection to radio recept...
Page 13: ... advancing capacitor because this unit is equipped with an inverter A phase advancing capacitor will reduce performance and may cause accidents WARNING Use an all pole disconnection type breaker with at least 3 mm between the contact point gaps that provide full disconnection under overvoltage category III WARNING If the supply cord is damaged it MUST be replaced by the manufacturer its service ag...
Page 14: ...ources example open flames an operating gas appliance or an operating electric heater in case the floor area is less than the minimum floor area A m no auxiliary devices which may be a potential ignition source are installed in the duct work example hot surfaces with a temperature exceeding 700 C and electric switching device only auxiliary devices approved by the manufacturer are used in the duct...
Page 15: ...at are included with the unit Using different flare nuts may cause refrigerant gas leakage 3 1 1 Installation space requirements CAUTION The total refrigerant charge in the system cannot exceed the requirements for minimum floor area of the smallest room that is served For minimum floor area requirements for indoor units see the installation and operation manual of the outdoor unit WARNING This ap...
Page 16: ...For the user Installer and user reference guide 16 FXUA50 100AVEB VRV system air conditioner 4P673843 1 2022 01 For the user ...
Page 17: ...duced physical sensory or mental capabilities or lack of experience and knowledge if they have been given supervision or instruction concerning use of the appliance in a safe way and understand the hazards involved Children SHALL NOT play with the appliance Cleaning and user maintenance SHALL NOT be made by children without supervision WARNING To prevent electrical shocks or fire Do NOT rinse the ...
Page 18: ...ttery contains a heavy metal above a certain concentration Possible chemical symbols are Pb lead 0 004 Waste batteries MUST be treated at a specialised treatment facility for reuse By ensuring waste batteries are disposed of correctly you will help to prevent potential negative consequences for the environment and human health 4 2 Instructions for safe operation WARNING Do NOT modify disassemble r...
Page 19: ...lthy to expose your body to the air flow for a long time CAUTION To avoid oxygen deficiency ventilate the room sufficiently if equipment with burner is used together with the system CAUTION Do NOT operate the system when using a room fumigation type insecticide Chemicals could collect in the unit and endanger the health of people who are hypersensitive to chemicals WARNING NEVER touch the air outl...
Page 20: ...t or outlet When the fan is rotating at high speed it will cause injury WARNING NEVER replace a fuse with a fuse of a wrong ampere ratings or other wires when a fuse blows out Use of wire or copper wire may cause the unit to break down or cause a fire CAUTION After a long use check the unit stand and fitting for damage If damaged the unit may fall and result in injury CAUTION Before accessing term...
Page 21: ...the unit before cleaning the unit exterior air filter and suction grille WARNING Do NOT let the indoor unit get wet Possible consequence Electrical shock or fire About the refrigerant see 10 5 About the refrigerant 435 WARNING MILDLY FLAMMABLE MATERIAL The refrigerant inside this unit is mildly flammable WARNING The appliance shall be stored in a room without continuously operating ignition source...
Page 22: ...g devices ventilate the room and contact the dealer where you purchased the unit Do NOT use the unit until a service person confirms that the part from which the refrigerant leaked has been repaired WARNING The R32 refrigerant leakage sensor must be replaced after every detection or at the end of its lifetime ONLY authorised persons may replace the sensor Troubleshooting see 11 Troubleshooting 437...
Page 23: ...cted before resuming operation NOTICE Do NOT use the system for other purposes In order to avoid any quality deterioration do NOT use the unit for cooling precision instruments food plants animals or works of art NOTICE For future modifications or expansions of your system A full overview of allowable combinations for future system extensions is available in technical engineering data and should b...
Page 24: ...il units Item Symbol Value Unit Cooling capacity sensible Prated c A kW Cooling capacity latent Prated c B kW Heating capacity Prated h C kW Total electric power input Pelec D kW Sound power level cooling LWA E dB A Sound power level heating LWA F dB A Contact details DAIKIN INDUSTRIES CZECH REPUBLIC s r o U Nové Hospody 1 1155 301 00 Plzeň Skvrňany Czech Republic A B C D E F FXUA 50 3 8 1 8 6 3 0...
Page 25: ...chemical dust cloth etc The panel may get discoloured or the coating peeled off If it is heavily dirty soak a cloth in water diluted neutral detergent squeeze it well and wipe the panel clean Wipe it with another dry cloth NOTICE NEVER press the button of the user interface with a hard pointed object The user interface may be damaged NOTICE NEVER pull or twist the electric wire of the user interfa...
Page 26: ... used together with the system CAUTION Do NOT operate the system when using a room fumigation type insecticide Chemicals could collect in the unit and endanger the health of people who are hypersensitive to chemicals NOTICE Be sure to turn ON the power 6 hours before operation in order to have power running to the crankcase heater and to protect the compressor This operation manual is for the foll...
Page 27: ...back A function that keeps the room temperature in a specific range when the system is turned off by the user the schedule function or the OFF timer 8 2 1 Basic operation modes The indoor unit can operate in various operation modes Icon Operation mode Cooling In this mode cooling will be activated as required by the setpoint or by Setback operation Heating In this mode heating will be activated as...
Page 28: ...ately 6 to 8 minutes Hot start During hot start the indoor unit fan will stop operation and the following icon will appear on the home screen 8 2 3 Adjusting the airflow direction The following airflow directions can be set Direction Display Fixed position The indoor unit blows air in 1 of 5 fixed positions Swing The indoor unit alternates between the 5 positions Auto The indoor unit adjusts its a...
Page 29: ...ward When starting operation When the room temperature is higher than the controller s setpoint for heating operation including auto operation At defrost operation When the indoor units run continuously for a long time and the airflow direction is Horizontal WARNING NEVER touch the air outlet or the horizontal blades while the swing flap is in operation Fingers may become caught or the unit may br...
Page 30: ...sure the system operates properly Prevent direct sunlight from entering a room during cooling operation by using curtains or blinds Make sure the area is well ventilated Do NOT block any ventilation openings Ventilate often Extended use requires special attention to ventilation Keep doors and windows closed If the doors and windows remain open air will flow out of your room causing a decrease in t...
Page 31: ... this work However as end user you may clean the air filter suction grille and the unit exterior WARNING NEVER replace a fuse with a fuse of a wrong ampere ratings or other wires when a fuse blows out Use of wire or copper wire may cause the unit to break down or cause a fire CAUTION After a long use check the unit stand and fitting for damage If damaged the unit may fall and result in injury NOTI...
Page 32: ... exterior air filter and suction grille CAUTION Turn off the unit before cleaning the unit exterior air filter and suction grille NOTICE Do NOT use gasoline benzene thinner polishing powder or liquid insecticide Possible consequence Discoloration and deformation Do NOT use water or air of 50 C or higher Possible consequence Discoloration and deformation Do NOT scrub firmly when washing the blade w...
Page 33: ... filter up to remove it from the tabs on the top part of the suction grille 2 a c a a b d a 1 1 1 2 2 a Air filter b Bottom end of the air filter c Tab on the bottom part of the suction grille d Tab on the top part of the suction grille 3 Clean the air filter Use a vacuum cleaner or wash with water If the air filter is very dirty use a soft brush and neutral detergent 4 Dry the air filter in the s...
Page 34: ...nd close it steps 2 and 1 in reverse order INFORMATION When closing the suction grille make sure the straps of the suction grille are not pinched anywhere 10 3 Maintenance before a long stop period E g at the end of the season Let the indoor units run in fan only operation for about half a day in order to dry the interior of the units Clean air filters and casings of indoor units see 10 2 Cleaning...
Page 35: ...c heater WARNING Do NOT pierce or burn refrigerant cycle parts Do NOT use cleaning materials or means to accelerate the defrosting process other than those recommended by the manufacturer Be aware that the refrigerant inside the system is odourless WARNING The refrigerant inside the unit is mildly flammable but normally does NOT leak If the refrigerant leaks in the room and comes in contact with f...
Page 36: ...se detection check will occur False detection check 1 The unit starts fan operation on the lowest setting 2 The user interface displays error A0 13 emits an alarm sound and the status indicator blinks 3 The sensor checks if a refrigerant leakage or misdetection occurred No refrigerant leakage detected Result The system resumes normal operation after approximately 2 minutes Refrigerant leakage dete...
Page 37: ...roperly Turn OFF all main power supply switches to the unit If water leaks from the unit Stop operation The operation switch does NOT function properly Turn OFF the power supply If the user interface displays Notify your installer and report the error code To display an error code see the reference guide of the user interface If the system does NOT operate properly except for the above mentioned c...
Page 38: ... malfunctions The following symptoms are NOT system malfunctions 11 1 1 Symptom The system does not operate The air conditioner does not start immediately after the ON OFF button on the user interface is pressed If the operation lamp lights the system is in normal condition To prevent overloading of the compressor motor the air conditioner starts 5 minutes after it is turned ON again in case it wa...
Page 39: ...o stop Operation automatically restarts when the noise ceases A power reset may help to remove this error 11 1 7 Symptom Noise of air conditioners Indoor unit A zeen sound is heard immediately after the power supply is turned on The electronic expansion valve inside an indoor unit starts working and makes the noise Its volume will reduce in about one minute A continuous low shah sound is heard whe...
Page 40: ...staller and user reference guide 40 FXUA50 100AVEB VRV system air conditioner 4P673843 1 2022 01 12 Relocation Contact your dealer for removing and reinstalling the total unit Moving units requires technical expertise ...
Page 41: ...er 4P673843 1 2022 01 13 Disposal NOTICE Do NOT try to dismantle the system yourself dismantling of the system treatment of the refrigerant oil and other parts MUST comply with applicable legislation Units MUST be treated at a specialised treatment facility for reuse recycling and recovery ...
Page 42: ...For the installer Installer and user reference guide 42 FXUA50 100AVEB VRV system air conditioner 4P673843 1 2022 01 For the installer ...
Page 43: ...possible to its final installation position to prevent damage during transport Prepare the path along which you want to bring the unit inside in advance 14 2 Indoor unit 14 2 1 To unpack and handle the unit Use a sling of soft material or protective plates together with a rope when lifting the unit in order to avoid damage or scratches to the unit 1 Lift the unit by holding on to the hanger bracke...
Page 44: ... Paper pattern for installation top part of packing box b General safety precautions c Indoor unit installation and operation manual d Drain hose e Metal clamp f Washer for hanger bracket g Tie wraps h Clamp washer i Insulation piece Large gas pipe j Insulation piece Small liquid pipe k Large sealing pad l Small sealing pad m Elbow n Blocking pad o L shaped piping p Screw q Non woven fabric ...
Page 45: ...nit 45 15 2 About the indoor unit 45 15 3 System layout 45 15 4 Combining units and options 46 15 4 1 Possible options for the indoor unit 46 15 1 Identification 15 1 1 Identification label Indoor unit Location 15 2 About the indoor unit INFORMATION For the operation limits see the technical data of the connected outdoor unit 15 3 System layout INFORMATION The following illustration is an example ...
Page 46: ... case of refrigerant leakage detection E g BRC1H52 user interfaces can generate an alarm of 65 dB sound pressure measured at a distance of 1 m from the alarm Sound data is available in the technical data sheet of the user interface The alarm should always be 15 dB louder than the background noise of the room In case of higher background noise we recommend connecting an external alarm field supply ...
Page 47: ...ual of the optional output PCB An additional Installation box for the optional output PCB is required see the option list of the indoor unit For installation of the installation box refer to the manual of the installation box The wiring between the main PCB and the optional output PCB must be led together with the transmission cable never use the same route as for the power supply cable See 18 2 T...
Page 48: ...ed WARNING The appliance shall be stored in a room without continuously operating ignition sources example open flames an operating gas appliance or an operating electric heater 16 1 1 Installation site requirements of the indoor unit Minimum floor area requirements CAUTION The total refrigerant charge in the system cannot exceed the requirements for minimum floor area of the smallest room that is...
Page 49: ...energy The equipment complies to specifications that are designed to provide reasonable protection against such interference However there is no guarantee that interference will NOT occur in a particular installation It is therefore recommended to install the equipment and electric wires in such a way that they keep a proper distance from stereo equipment personal computers etc In places with weak...
Page 50: ...rection rear straight refrigerant piping right bent refrigerant piping For upward refrigerant piping any discharge pattern can be selected The number in the symbol corresponds with the number of air outlets indicated by the number of symbols on the unit Example b 4 a a Indication on the unit b Number of air outlets Spacing Mind the following requirements mm 2000 d c b e 1500 1500 4000 a a Air outl...
Page 51: ...accidental touching Maximum Depends on the capacity class See 21 1 Field setting 476 INFORMATION Some options may require additional service space Refer to the installation manual of the used option before installation 16 2 Mounting the indoor unit 16 2 1 Guidelines when installing the indoor unit INFORMATION Optional equipment When installing optional equipment also read the installation manual o...
Page 52: ...anger bracket accessory from falling during installation Remove the clamp washer after the unit is mounted b a a Clamp washer accessory b Washer for hanger bracket accessory a 950 d 835 d 835 a 950 mm c b a2 a1 b 4 e f g a1 Top nut field supply a2 Bottom double nut field supply b Washer for hanger bracket accessory c Hanger bracket attached to the unit d Suspension bolt pitch e Gas piping f Liquid...
Page 53: ...er covers 45 3 a a Corner cover To mount the indoor unit 1 For 2 way or 3 way air discharge refer to To block the air outlet for 2 way or 3 way air discharge 454 2 Handle the unit only by the hanger brackets a a a a a Hanger bracket 3 Temporarily hang the unit on the 2 suspension bolts on the air outlet 4 side 4 Insert the remaining 2 suspension bolts into the hanger bracket and fix it securely wi...
Page 54: ...ocking pad accessory for 3 way air discharge INFORMATION For 2 way air discharge the optional blocking pad kit is required Blocking pads accessory can be used for any air discharge pattern See 16 1 Discharge pattern top view 450 Remove the horizontal blade from the air outlet to be blocked 2 1 a b b 1 2 c d a c d a Horizontal blade b Stepper motor c Claw d Bearing 1 Carefully lift the horizontal b...
Page 55: ...d into the space between the upper decoration panel and the insulation 2 Insert the bent parts 2 locations at the ends of the blocking pad a little into the space between the lower decoration panel and insert the blocking pad If the blocking pad is difficult to insert first loosen the screws on both sides of the lower decoration panel and then insert it a b b a 2 2 a a b b A B A Side without pipin...
Page 56: ...ast 1 100 to prevent air from being trapped in the piping Use hanging bars as shown 1 1 5 m a a Hanging bar Allowed Not allowed Condensation Take measures against condensation Insulate the complete drain piping in the building Rising piping If necessary to make the slope possible you can install rising piping Drain hose inclination 0 75 mm to avoid stress on the piping and to avoid air bubbles Mak...
Page 57: ...sory b Drain hose accessory c Metal clamp accessory d Elbow accessory e Longer side of elbow rear piping f Shorter side of elbow upward piping c a b e d c g e d c g 10 15 mm A A A A 5 3 2 d e f 6 90 90 A A A A A B 1 4 3 6 1 2 a Drain pipe connection attached to the unit b Vinyl tape field supply c Drain hose accessory d Metal clamp accessory e Large sealing pad accessory f Drain piping field suppl...
Page 58: ...nd of the metal clamp is wrapped twice 6 Connect the drain piping to the drain hose To check for water leaks The procedure differs depending on whether installation of the system is already completed When installation of the system is not yet completed temporarily connect the user interface and power supply to the unit When installation of the system is not yet completed 1 Temporarily connect elec...
Page 59: ...cal wiring Remove the service cover See 18 2 To connect the electrical wiring to the indoor unit 469 Disconnect the power supply Disconnect the user interface Reattach the service cover See 18 2 To connect the electrical wiring to the indoor unit 469 When installation of the system is already completed 1 Start cooling operation see the reference guide or the service manual of the user interface 2 ...
Page 60: ...ts INFORMATION Also read the precautions and requirements in the 2 General safety precautions 45 CAUTION Piping MUST be installed according to instructions given in 17 Piping installation 460 Only mechanical joints e g braze flare connections that are compliant with the latest version of ISO14903 can be used NOTICE The piping and other pressure containing parts shall be suitable for refrigerant Us...
Page 61: ...r Øp Insulation inner diameter Øi Insulation thickness t 6 4 mm 1 4 8 10 mm 10 mm 9 5 mm 3 8 12 15 mm 13 mm 12 7 mm 1 2 14 16 mm 13 mm 15 9 mm 5 8 17 20 mm 13 mm Øi Øi t Øp Øp If the temperature is higher than 30 C and the humidity is higher than RH 80 the thickness of the insulation materials should be at least 20 mm to prevent condensation on the surface of the insulation 17 2 Connecting the ref...
Page 62: ... gauge set that are exclusively used for R32 installations to withstand the pressure and to prevent foreign materials e g mineral oils and moisture from mixing into the system Install the piping so that the flare is NOT subjected to mechanical stress Do NOT leave pipes unattended at the site If the installation is NOT done within 1 day protect the piping as described in the following table to prev...
Page 63: ...45 90 2 ØA Ø9 5 33 39 12 8 13 2 Ø12 7 50 60 16 2 16 6 Ø15 9 62 75 19 3 19 7 17 2 4 Pipe bending guidelines Use a pipe bender for bending All pipe bends should be as gentle as possible bending radius should be 30 40 mm or larger 17 2 5 To flare the pipe end NOTICE Incomplete flaring may cause refrigerant gas leakage Do NOT re use flares Use new flares to prevent refrigerant gas leakage Use flare nu...
Page 64: ...aining refrigerant unless the components are constructed of materials that are inherently resistant to corrosion or are suitably protected against corrosion WARNING MILDLY FLAMMABLE MATERIAL The refrigerant inside this unit is mildly flammable Refrigerant piping can be connected from 3 directions In case of upward piping remove the pipe port cover and cut out the holes for piping After leading the...
Page 65: ...nit 3 Tighten the tie wrap on the insulation pieces 4 Wrap the sealing pad from the base of the unit to the top of the flare nut For upward and right piping use the attached L shaped piping and insulate on both ends of the L shaped piping a b d b e c a Piping insulation material field supply b Tie wrap accessory c Flare nut connection d Insulation piece Large gas pipe accessory e L shaped piping a...
Page 66: ...power supply system complies with the electrical specifications of the units 2 Connecting the electrical wiring to the outdoor unit 3 Connecting the electrical wiring to the indoor unit 4 Connecting the main power supply 18 1 1 Precautions when connecting the electrical wiring DANGER RISK OF ELECTROCUTION WARNING ALWAYS use multicore cable for power supply cables INFORMATION Also read the precauti...
Page 67: ...ause this unit is equipped with an inverter A phase advancing capacitor will reduce performance and may cause accidents WARNING Use an all pole disconnection type breaker with at least 3 mm between the contact point gaps that provide full disconnection under overvoltage category III WARNING If the supply cord is damaged it MUST be replaced by the manufacturer its service agent or similarly qualifi...
Page 68: ...retainer and the terminal must be longer than the other wires 18 1 3 Specifications of standard wiring components Component Class 50 71 100 Power supply cable MCA a 0 5 A 0 6 A 1 1 A Voltage 220 240 V 220 V Phase 1 Frequency 50 60 Hz Wire sizes 1 5 mm2 3 core wire H07RN F 60245 IEC 66 Transmission wiring For specifications refer to the installation manual of the outdoor unit User interface cable 0...
Page 69: ...ld ALWAYS be at least 50 mm NOTICE Be sure to keep the power line and transmission line apart from each other Transmission wiring and power supply wiring may cross but may NOT run parallel 1 Remove the service cover Remove the 2 screws and slide the service cover out a b a Service cover b Screw 2 User interface cable Route the cable through the frame and connect it to the terminal block P1 P2 3 Tr...
Page 70: ...Non woven fabric accessory c Small sealing pad accessory d User interface cable and transmission cable e Power supply cable f Tie wrap accessory g Terminal block for user interface and transmission wiring h Terminal block for power supply wiring 9 Reattach the service cover Slide the service cover back and fix with 2 screws Complete system example 1 user interface controls 1 indoor unit L N L N L ...
Page 71: ...ly a safety system compatible remote controller can be used as the user interface See technical data sheet for remote controller compatibility e g BRC1H52 82 The user interface has to be put in the same room as the indoor unit For details please refer to the installation and operation manual of the user interface CAUTION In case shielded wire is used connect the shielding to the outdoor unit side ...
Page 72: ...alled on the unit A B a b c A For rear piping outlet B For right piping outlet a Piping opening b Make sure this part does not fall off after cutting c Corner cover 1 Attach the corner cover to the indoor unit 2 Fix the corner cover with the 4 attached screws accessory while pressing the corner cover to make sure there is no gap between the corner cover and the indoor unit a b b a a a b c c c c c ...
Page 73: ...oor unit installation Installer and user reference guide 73 FXUA50 100AVEB VRV system air conditioner 4P673843 1 2022 01 45 1 3 2 2 Close the suction grille by sliding the knobs away from the middle of the unit a a a Knobs ...
Page 74: ...ribes what you have to do and know to commission the system after it is installed Typical workflow Commissioning typically consists of the following stages 1 Checking the Checklist before commissioning 2 Performing a test run for the system 20 2 Precautions when commissioning INFORMATION During the first running period of the unit the required power may be higher than stated on the nameplate of th...
Page 75: ...le consequence Condensate water might drip The refrigerant pipes gas and liquid are installed correctly and thermally insulated There are NO refrigerant leaks There are NO missing phases or reversed phases The system is properly earthed and the earth terminals are tightened The fuses or locally installed protection devices are installed according to this document and have NOT been bypassed The pow...
Page 76: ... see the installation manual of the optional accessory Following setting are only applicable when using the BRC1H52 user interface When using any other user interface see the installation manual or service manual of the user interface Setting Ceiling height This setting must correspond with the actual distance to the floor and the capacity class If the distance to the floor is m Then 1 FXUA50 71 F...
Page 77: ...hen 1 M SW 2500 h light 10 20 0 01 1250 h heavy 02 Notification ON 3 01 Notification OFF 02 Setting Thermostat sensor selection This setting must correspond with how if the user interface thermostat sensor is used When the user interface thermostat sensor is Then 1 M SW Used in combination with indoor unit thermistor 10 20 2 01 Not used indoor unit thermistor only 02 Used exclusively 03 1 Field se...
Page 78: ...heating 24 C 1 C 02 cooling 24 C heating 23 C 2 C 03 cooling 24 C heating 22 C 3 C 04 cooling 24 C heating 21 C 4 C 05 cooling 24 C heating 20 C 5 C 06 cooling 24 C heating 19 C 6 C 07 cooling 24 C heating 18 C 7 C 08 cooling 24 C heating 17 C Setting Auto restart after power failure Depending on the needs of the user you may disable enable the automatic restart after a power failure If you want a...
Page 79: ...ission wiring F2 T1 OFF FORCED T2 Input A b a a Forced OFF b Input A Wiring requirements Wiring specification Sheathed vinyl cord or 2 core cable Wiring size 0 75 1 25 mm2 Wiring length Maximum 100 m External contact specification Contact that can make and break the min load of DC15 V 1 mA This setting must correspond with the needs of the user If you want to change increments to Then 1 M SW Force...
Page 80: ...erly please make sure the following is clear for the user Make sure that the user has the printed documentation and ask him her to keep it for future reference Inform the user that he can find the complete documentation at the URL mentioned earlier in this manual Explain the user how to properly operate the system and what to do in case of problems Show the user what to do for the maintenance of t...
Page 81: ...de Description The R32 sensor has detected a refrigerant leak Safety system error leak detection R32 sensor malfunction R32 sensor end of lifetime 6 months before the R32 sensor end of lifetime Malfunction of indoor unit PCB Drain level control system abnormality Malfunction of freezing protection High pressure control in heating freeze up protection control in cooling Malfunction of fan motor Mal...
Page 82: ...23 Troubleshooting Installer and user reference guide 82 FXUA50 100AVEB VRV system air conditioner 4P673843 1 2022 01 Code Description Room temperature thermistor in remote controller abnormality ...
Page 83: ...er 4P673843 1 2022 01 24 Disposal NOTICE Do NOT try to dismantle the system yourself dismantling of the system treatment of the refrigerant oil and other parts MUST comply with applicable legislation Units MUST be treated at a specialised treatment facility for reuse recycling and recovery ...
Page 84: ...Part numbering is by Arabic numbers in ascending order for each part and is represented in the overview below by in the part code Symbol Meaning Symbol Meaning Circuit breaker Protective earth Connection Protective earth screw Connector A Rectifier Earth Relay connector Field wiring Short circuit connector Fuse Terminal INDOOR Indoor unit Terminal strip OUTDOOR Outdoor unit Wire clamp Residual cur...
Page 85: ...de HAP Light emitting diode service monitor green HIGH VOLTAGE High voltage IES Intelligent eye sensor IPM Intelligent power module K R KCR KFR KHuR K M Magnetic relay L Live L Coil L R Reactor M Stepper motor M C Compressor motor M F Fan motor M P Drain pump motor M S Swing motor MR MRCW MRM MRN Magnetic relay N Neutral n N Number of passes through ferrite core PAM Pulse amplitude modulation PCB ...
Page 86: ...sensor low S PH HPS Pressure switch high S PL Pressure switch low S T Thermostat S RH Humidity sensor S W SW Operation switch SA F1S Surge arrester SR WLU Signal receiver SS Selector switch SHEET METAL Terminal strip fixed plate T R Transformer TC TRC Transmitter V R V Varistor V R Diode bridge Insulated gate bipolar transistor IGBT power module WRC Wireless remote controller X Terminal X M Termin...
Page 87: ...ired service to the product Installation manual Instruction manual specified for a certain product or application explaining how to install configure and maintain it Operation manual Instruction manual specified for a certain product or application explaining how to operate it Accessories Labels manuals information sheets and equipment that are delivered with the product and that need to be instal...
Page 88: ...4P673843 1 2022 01 Copyright 2021 Daikin Verantwortung für Energie und Umwelt ...