


117
①
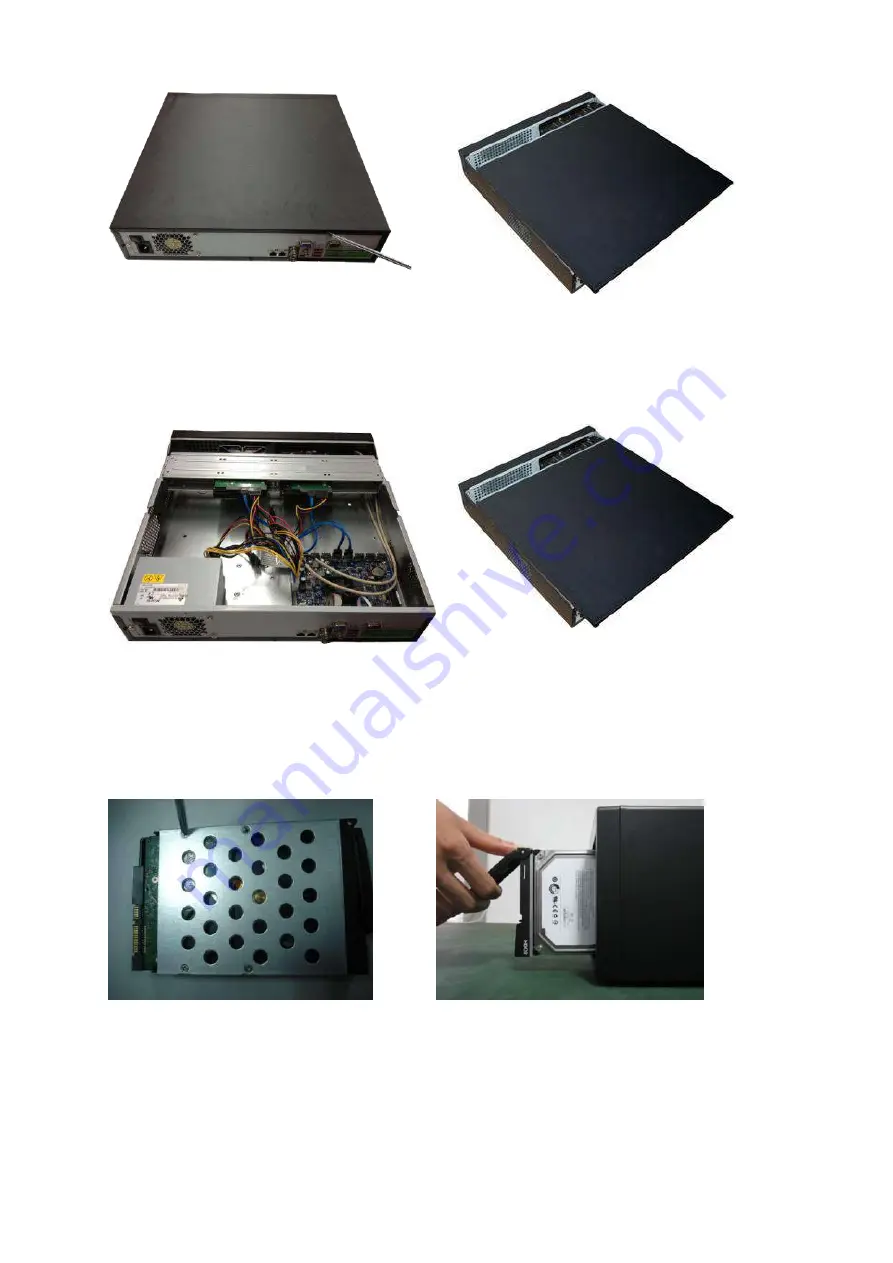
①
Use the screwdriver to loose the screws
of the rear panel and then remove the front
cover.
②
②
Put the HDD to the HDD bracket in
the chassis and then line up the four
screws to the four holes in the HDD.
Use the screwdriver to fix the screws
firmly to secure HDD on the HDD
bracket
③
Connect to the HDD data cable to the main board
and the HDD port respectively. Loosen the power cable
of the chassis and connect another end of the power
cable to the HDD port.
④
After connect the cable, put the front cover
back to the device and then fix screws of the rear
panel.
3.4.6
NVR42V-8P Series
①
Use 4 screws to secure the HDD
②
Put the HDD to the HDD box at the front.
Summary of Contents for DHI-NVR5224-24P-4KS2
Page 1: ...Network Video Recorder User s Manual V4 3 2...
Page 136: ...124 Figure 3 5 3 6 6 NVR42N Series Please refer to Figure 3 6 for connection sample Figure 3 6...
Page 140: ...128 Figure 3 11 3 6 12 NVR42V 8P Series Please refer to Figure 3 12 for connection sample...
Page 141: ...129 Figure 3 12...
Page 155: ...143 Figure 4 15 Step 2 Click device display edit interface See Figure 4 16...
Page 218: ...206 Figure 4 93 Figure 4 94...
Page 238: ...226 Figure 4 110 Figure 4 111 Figure 4 112...
Page 249: ...237 Figure 4 123 Figure 4 124...
Page 251: ...239 Figure 4 126 Click draw button to draw the zone See Figure 4 127...
Page 255: ...243 Figure 4 130 Click Draw button to draw a zone See Figure 4 131 Figure 4 131...
Page 260: ...248 Figure 4 136 Click draw button to draw the zone See Figure 4 137...
Page 273: ...261 Figure 4 148 Figure 4 149...
Page 274: ...262 Figure 4 150 Figure 4 151...
Page 384: ...372 Figure 5 60 Figure 5 61...
Page 385: ...373 Figure 5 62 Figure 5 63...
Page 409: ...397 Figure 5 96 Figure 5 97...