V019231_14_Rad-DX_Manual.docx
Page 10 of 19
3.2 Using the LCD Screen
The Rad-DX can operate in a stand-alone mode with information displayed on the LCD display.
Options for the Rad-DX, such as display types and radiation units, can be set using the
following process:
1.
Connect the Rad-DX device to a power source, either by using the A/C plug or wiring it
directly to the junction box (see Physical Installation, Section 2.2.1)
2.
The following will appear on the LCD screen as the Rad-DX boots up.
3.
The Dose Rate Screen will appear on the LCD screen after the booting sequence is
complete.
4.
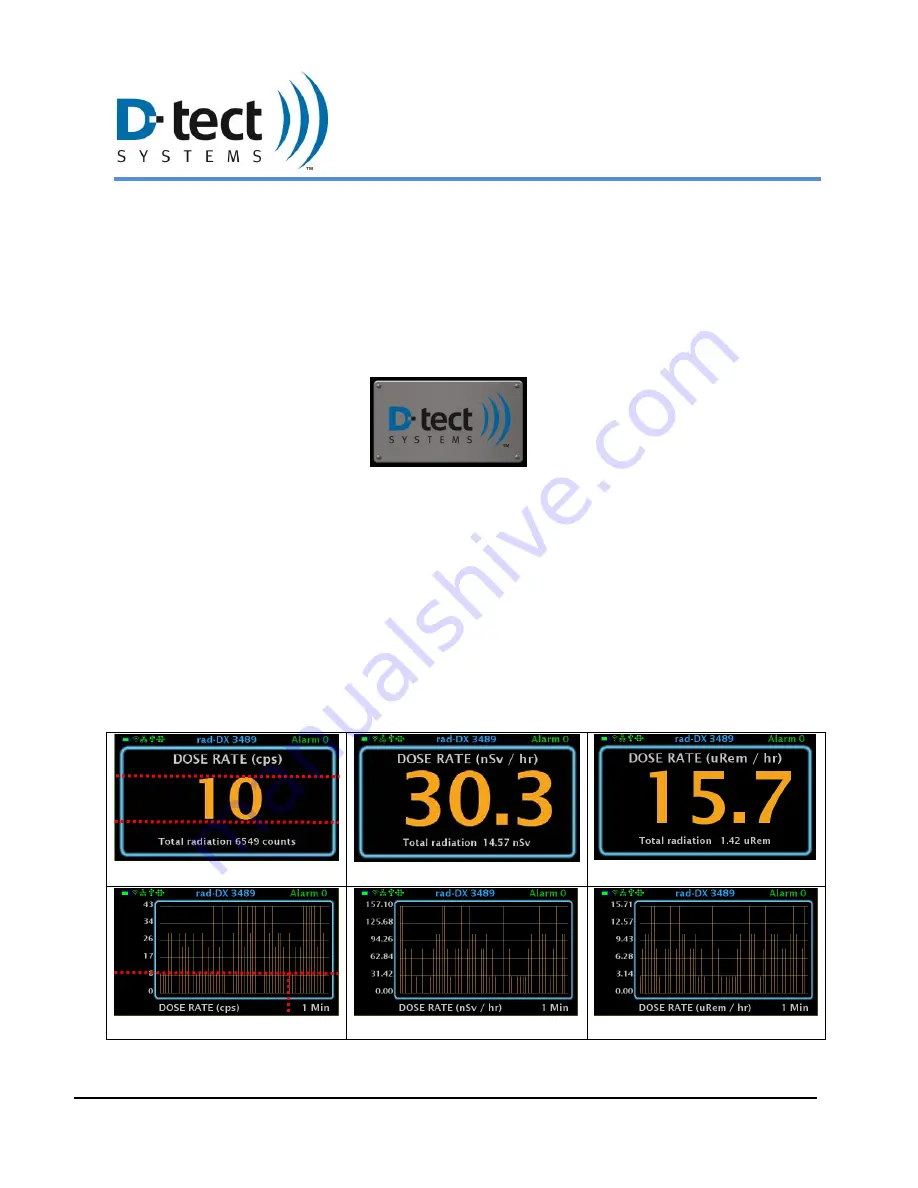
The red lines shown below indicate the touch zone areas for each screen.
Reset the dose to zero by touching “Total radiation.”
Touch “Dose Rate” to change the units displayed.
Change the time frame by touching the time frame displayed in the lower right of the
bar graph screen. The graph can display measurements as they are taken within 1, 6
or 30 minute time slots.
5.
To toggle through the different screens, touch anywhere else on the screen.
Dose Rate (cps)
Dose Rate (nSv/hr)
Dose Rate (uRem/hr)
Bar Graph (cps)
Bar Graph (nSv/hr)
Bar Graph (uRem/hr)
Table 2: LCD Screen Shots: Dose Rate and Bar Graph (CPS, nSv/hr, and uRem/hr)
Figure 6: Boot up Screen


