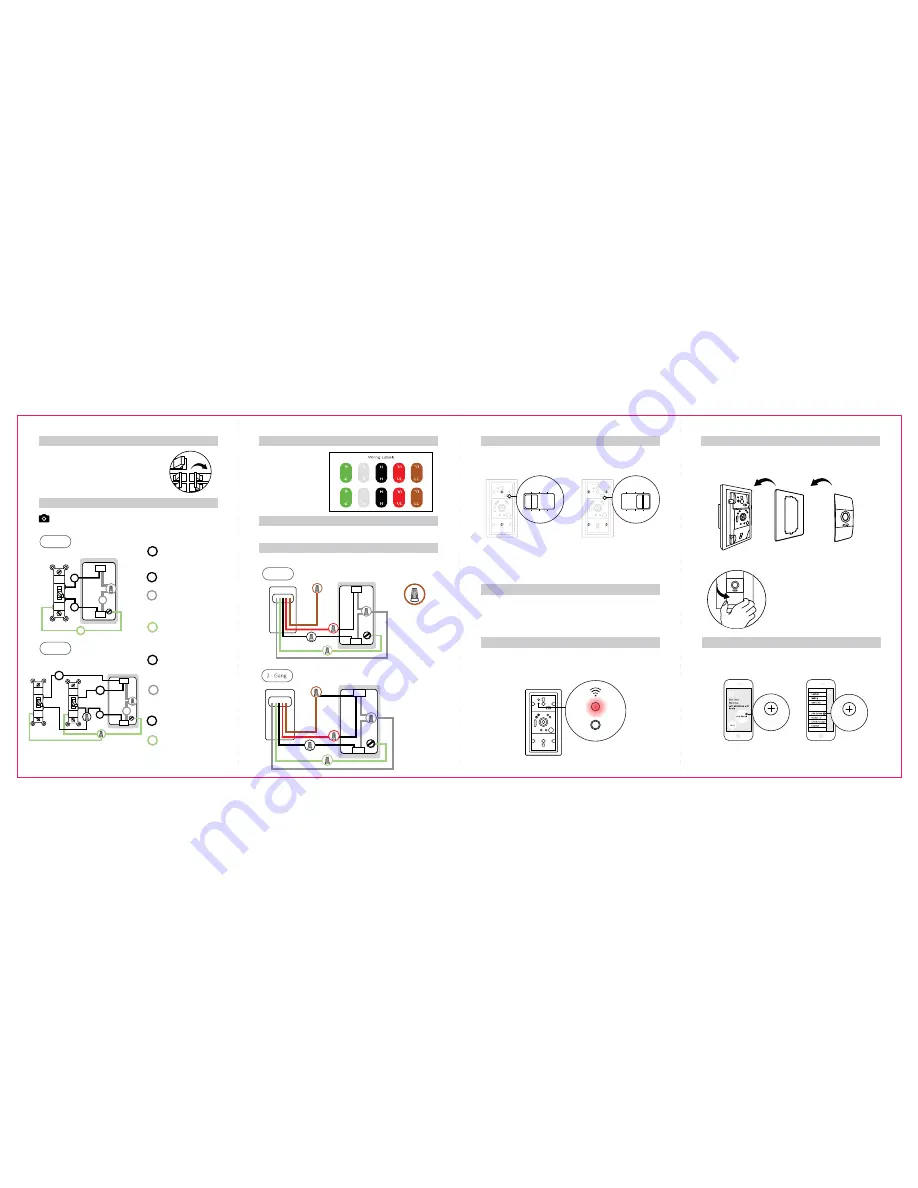
2. Remove Faceplate from Old Switch
Hot Wire (Live)
Required.
Neutral
Required, but not always
present
.
STOP if you do not have it.
Ground
Optional, and not always
present.
Load
Required. You need 2 loads
for 2-gang.
Ground
Optional, and not always
present.
Neutral
Required, but not always
present.
STOP if you do not have it.
Load
Required. You need 1 load
for 1-gang.
Hot Wire (Live)
Required.
1 - Gang
2 - Gang
Take a picture for future reference
1. Turn Off Circuit Breaker
Turn off the power to the light switch at the
main circuit breaker or fuse box.
Important: Flip your light switch a few
times to ensure the power is off.
ON
ON
OFF
OFF
ON
OFF
ON
OFF
Optional, and not always
present.
Required, but not always
present.
STOP if you do not have it.
Required. You need 1 load
for 1-gang.
9. Attach Accessories
10.Configure Komfy Switch
Attach the included faceplate to the Komfy Switch and then put the Komfy
Switch cover with click pads over the faceplate.
Komfy Switch
Faceplate
Download the Komfy App and sign up for a Komfy account. Tap the “Add
Device” button to complete the configuration.
Komfy Switch Cover
With Click Pads
If you want to remove the the switch
cover, pull out at the corners either at the
top or bottom to remove it.
Komfy iSwitch with
Click Pads
Add Device
New User
Existing User
Add Device
3. Wire Labeling
Use the included wiring
labels and attach
the stickers to the
corresponding wires.
Green for “Ground”, white
for “
Neutral”, black for
”Hot”, red for “
Upper
Light” and brown for
“Lower Light”.
5. Wiring
Connect the wires from the Komfy Switch to the old switch wires.
1 - Gang
The unused wire
should be protected
by a wire nut.
Refer to Step 3 for
Color Wiring
Labeling
4. Remove Old Switch
Disconnect the old switch from the electrical box.
7. Turn On The Circuit Breaker
Turn the power back on at the circuit breaker or fuse box.
6. Attach Komfy Switch
1 - Gang:
2 middle screws
Screw the Komfy Switch into the electrical box and then slide the power
selector to 1 or 2. 1-gang and 2-gang have different screws patterns as
shown below:
8. Press and Hold Setup Button for 5 Seconds
When the Wi-Fi LED lights up, press and hold the setup button for 5
seconds until the Wi-Fi LED starts blinking. When the Wi-Fi LED stops
blinking, the Komfy Switch is ready to be configured.
Slide power
selector to “1”.
Slide power
selector to “2”.
1 0 2
P O W E R
1 0 2
P O W E R
S E T U P
2 - Gang:
4 side screws
1
1
2
2
3
4
4
1
3
2
4
1
1
3
Wall Light Switch Outlet
Wall Light Switch Outlet
Wall Light Switch Outlet
Wall Light Switch Outlet
KOMFY
KOMFY
3
2


