User Manual
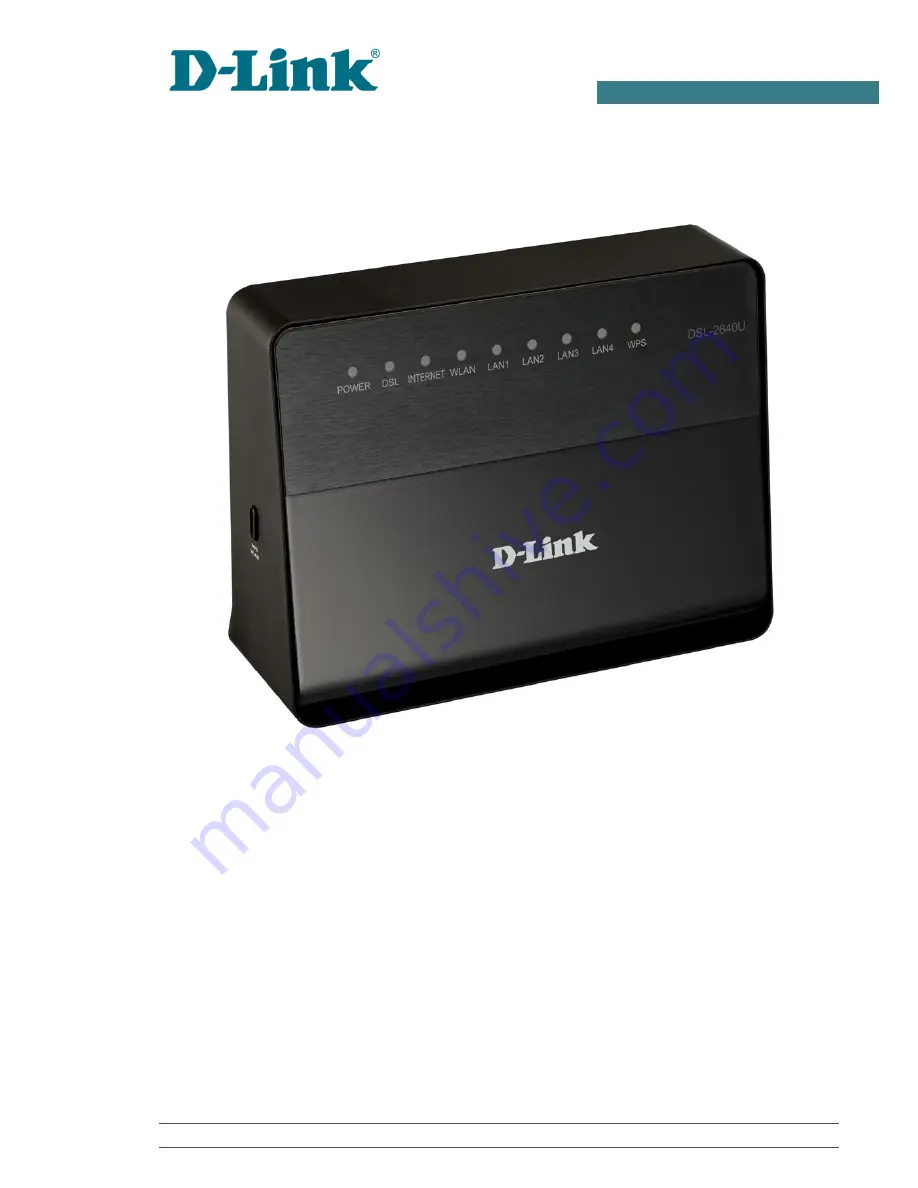
DSL-2640U
Wireless N 150 ADSL2+ Modem Router
June 2013
Page 1: ...User Manual DSL 2640U Wireless N 150 ADSL2 Modem Router June 2013 ...
Page 2: ...25 Configuring Wi Fi Adapter in OS Windows XP 26 Configuring Wi Fi Adapter in OS Windows 7 27 Connecting to Web based Interface 29 Web based Interface Structure 30 Saving and Restoring Settings 33 Chapter 4 Configuring via Web based Interface 35 Click n Connect 35 Creating WAN Connection 37 PPPoE or PPPoA Connection 37 IPoA or Static IP Connection 44 Dynamic IP Connection 50 Bridge Connection 56 C...
Page 3: ...L 115 Remote Access 116 Firewall 118 IP Filters 118 Virtual Servers 121 DMZ 124 Application Rules 125 MAC Filter 127 Control 129 Parent Control 129 URL Filter 132 System 134 Administrator Password 135 Configuration 136 System Log 137 Firmware Upgrade 139 NTP Client 141 Telnet 142 Chapter 5 Operation Guidelines 143 Safety Instructions 143 Wireless Installation Considerations 144 Creating Two Connec...
Page 4: ...o a document Change A name of a menu menu item control field checkbox drop down list button etc 192 168 1 1 Data that you should enter in the specified field Information An important note Document Structure Chapter 1 describes the purpose and structure of the document Chapter 2 gives an overview of the router s hardware and software features and describes its appearance and the package contents Ch...
Page 5: ...orts to connect workstations Due to this feature DSL 2640U represents a moderate priced solution for creating wired networks without an additional switch In addition any Ethernet port of the device can be used to connect to a private Ethernet line Also DSL 2640U can operate as a base station for connecting wireless devices of the standards 802 11b 802 11g and 802 11n The router supports multiple f...
Page 6: ...24 18 12 9 6Mbps 802 11n HT20 150 130 117 104 78 52 39 26 13Mbps HT40 150 130 117 104 78 52 39 26 13Mbps Transmitter Output Power 802 11b 16 5 18 5dBm 802 11g 13 5 16 5dBm 802 11n 13 5 16 5dBm Modulation Schemes 802 11b CCK 11 5 5Mbps DQPSK 2Mbps DBPSK 1Mbps DSSS 802 11g PSK CCK DBPSK DQPSK OFDM BPSK QPSK 64QAM 16QAM 802 11n PSK CCK DBPSK DQPSK OFDM etc The device features are subject to change wi...
Page 7: ...T G 992 4 G lite bis Annex A ADSL2 ITU T G 992 5 Annex A L M WAN Connection Types ADSL PPPoE PPPoA IPoA Static IP Dynamic IP Bridge Ethernet PPPoE Static IP Dynamic IP Bridge Wireless Network IEEE 802 11n standard IEEE 802 11b g compliant Support of guest wireless network WEP data encryption WPA WPA2 security supporting TKIP AES and TKIP AES MAC based access to wireless network PIN and PBC methods...
Page 8: ...e for PPP connections Network Protocols and Functions Additional IP address for LAN interface Static IP routing NAT Network Address Translation DHCP server client relay DNS relay DDNS Support of VLAN IGMP proxy IGMP snooping Firewall and Access Management Functions Network Address Translation NAT Stateful Packet Inspection SPI MAC filtering based on time of day and day of week URL filter Packet fi...
Page 9: ... Saving restoring configuration to from file Support of remote logging Automatic synchronization of system time with NTP server and manual time date setup LEDs POWER DSL INTERNET WLAN LAN 1 4 WPS Power External power adapter DC 12V 0 5A ON OFF power switch Reset to Factory Defaults button WPS WLAN button Operating Temperature From 0 to 40 C from 32 to 104 F Storage Temperature From 20 to 70 C from...
Page 10: ...crash recovery mode DSL Solid green DSL has been synchronized Blinking green Detecting a carrier signal and synchronizing DSL No light No carrier signal INTERNET Solid green A WAN connection ADSL and or Ethernet is established Blinking green The WAN interface is active upstream or downstream traffic Solid red An authorization failure No light The router is in the bridge mode or no WAN connection n...
Page 11: ...traffic LAN 1 4 Solid green A device is connected to the port of the router for the LAN port configured as the WAN port the router is connected to an Ethernet line Blinking green The relevant LAN port is active upstream or downstream traffic WPS Solid green A wireless device is connected to the router s WLAN Blinking green Attempting to add a wireless device via the WPS function Page 11 of 149 ...
Page 12: ...isable the router s wireless network and to quickly add wireless devices to the router s WLAN the WPS function To enable disable the router s wireless network with the device turned on press the button hold for 5 seconds and then release it To use the WPS function with the device turned on press the button and immediately release it Page 12 of 149 ...
Page 13: ...ne LAN 1 4 4 Ethernet ports to connect Ethernet devices One port can be used to connect to a private Ethernet line RESET A button to restore the factory default settings To restore the factory defaults push the button with the device turned on hold it for 5 seconds and then release the button 12VDC IN Power connector ON OFF A button to turn the router on off Page 13 of 149 ...
Page 14: ...e Straight through Ethernet cable CAT 5E Splitter Quick Installation Guide brochure The User Manual and Quick Installation Guide documents in Russian and English are available on D Link website see ftp dlink ru pub ADSL DSL 2640U Description Using a power supply with a different voltage rating than the one included will cause damage and void the warranty for this product Page 14 of 149 ...
Page 15: ...t Explorer 7 and later Mozilla Firefox 5 and later Opera 10 and later For successful operation JavaScript should be enabled on the web browser Make sure that JavaScript has not been disabled by other software such as virus protection or web user security packages running on your computer Wired or Wireless NIC Ethernet or Wi Fi Adapter Any computer that uses the router should be equipped with an Et...
Page 16: ...itter Connect your phone to the PHONE port of the splitter Then connect another phone cable between a phone jack and the ADSL IN port of the splitter 4 To connect the router to an Ethernet line connect the Ethernet cable between any of four Ethernet ports located on the back panel of the router and the Ethernet line 5 Connect the power cord to the power connector port on the back panel of the rout...
Page 17: ... Windows XP 1 Click the Start button and proceed to the Control Panel Network and Internet Connections Network Connections window 2 In the Network Connections window right click the relevant Local Area Connection icon and select the Properties line in the menu displayed Figure 4 The Network Connections window Page 17 of 149 ...
Page 18: ... User Manual Installation and Connection 3 In the Local Area Connection Properties window on the General tab select the Internet Protocol TCP IP line Click the Properties button Figure 5 The Local Area Connection Properties window Page 18 of 149 ...
Page 19: ... an IP address automatically and Obtain DNS server address automatically radio buttons Click the OK button Figure 6 The Internet Protocol TCP IP Properties window 5 Click the ОК button in the connection properties window Now your computer is configured to obtain an IP address automatically Page 19 of 149 ...
Page 20: ...d proceed to the Control Panel window 2 Select the Network and Sharing Center section If the Control Panel has the category view the Category value is selected from the View by drop down list in the top right corner of the window choose the View network status and tasks line under the Network and Internet section Figure 7 The Control Panel window Page 20 of 149 ...
Page 21: ... N 150 ADSL2 Modem Router User Manual Installation and Connection 3 In the menu located on the left part of the window select the Change adapter settings line Figure 8 The Network and Sharing Center window Page 21 of 149 ...
Page 22: ...odem Router User Manual Installation and Connection 4 In the opened window right click the relevant Local Area Connection icon and select the Properties line in the menu displayed Figure 9 The Network Connections window Page 22 of 149 ...
Page 23: ...nual Installation and Connection 5 In the Local Area Connection Properties window on the Networking tab select the Internet Protocol Version 4 TCP IPv4 line Click the Properties button Figure 10 The Local Area Connection Properties window Page 23 of 149 ...
Page 24: ...address automatically and Obtain DNS server address automatically radio buttons Click the OK button Figure 11 The Internet Protocol Version 4 TCP IPv4 Properties window 7 Click the OK button in the connection properties window Now your computer is configured to obtain an IP address automatically Page 24 of 149 ...
Page 25: ... Ethernet line 3 Connect the power cord to the power connector port on the back panel of the router then plug the power adapter into an electrical outlet or power strip 4 Turn on the router by pressing the ON OFF button on its back panel 5 Turn on the router s wireless connection press the WPS WLAN button on its left side panel and hold for 5 seconds 6 Turn on your PC and wait until your operating...
Page 26: ...apter is on Figure 12 The Network Connections window 3 Search for available wireless networks 4 In the opened Wireless Network Connection window select the wireless network DSL 2640U and click the Connect button After that the Wireless Network Connection Status window appears If you perform initial configuration of the router via Wi Fi connection note that immediately after changing the wireless d...
Page 27: ...work status and tasks line under the Network and Internet section Figure 13 The Control Panel window 3 In the menu located on the left part of the window select the Change adapter settings line 4 In the opened window select the icon of the wireless network connection and make sure that your Wi Fi adapter is on 5 To open the list of available wireless networks select the icon of the wireless networ...
Page 28: ...ure 15 The list of available networks 7 Wait for about 20 30 seconds After the connection is established the network icon will be displayed as the signal level scale If you perform initial configuration of the router via Wi Fi connection note that immediately after changing the wireless default settings of the router you will need to reconfigure the wireless connection using the newly specified se...
Page 29: ...ss the Enter key Figure 16 Connecting to the web based interface of the DSL 2640U device 3 On the opened page enter the username and password for the administrator account in the Login and Password fields correspondingly by default the following username and password are specified admin admin Then click the Enter link Figure 17 The login page If the error The page cannot be displayed or Unable to ...
Page 30: ...displayed when the mouse pointer is over the Language caption You can change the language of the web based interface in any menu item Figure 19 Changing the language of the web based interface After selecting the language the notification on unsaved changes will be displayed Click the Save icon to save the current language of the web based interface as the default language The quick settings page ...
Page 31: ...he line the page for editing the LAN interface opens for the detailed description of the page see the LAN section page 89 To configure the router s WLAN parameters left click the SSID of the WLAN the right column of the SSID line After clicking the line the Wi Fi Basic settings page opens for the detailed description of the page see the Basic Settings section page 92 To configure connection to the...
Page 32: ...ble the device s WLAN directly from the advanced settings page To enable the WLAN select the On position of the Enable Disable Wi Fi switch To disable the WLAN select the Off position of the Enable Disable Wi Fi switch The pages of the Advanced section are designed for configuring additional parameters of the router for the description of the pages see the Advanced section page 106 The pages of th...
Page 33: ...search results Saving and Restoring Settings Note that you should regularly save the changes of the router s settings to the non volatile memory The router s web based interface displays the notification on unsaved changes at the top of the page Figure 22 The notification on unsaved changes Place the mouse pointer on the Notifications icon to view the list of unsaved changes and click the relevant...
Page 34: ...r PC Also you can save the router s configuration to your PC via the Backup button on the System Configuration page Click the Factory line to restore the factory default settings Also you can restore the factory defaults via the Factory button on the System Configuration page Also you can restore the factory default settings via the hardware RESET button located on the back panel of the router Use...
Page 35: ...NFIGURING VIA WEB BASED INTERFACE Click n Connect To configure a WAN connection click the Click n Connect link in the Net section Figure 24 Configuring a WAN connection Connect a phone or Ethernet cable to the router see the Connecting to PC section page 16 Click the Next button to continue Page 35 of 149 ...
Page 36: ...e for selecting the connection type On the opened page select the needed choice of the radio button and click the Next button Figure 26 The page for selecting a port or interface On the opened page select a port of interface to which the new connection will be assigned and click the Next button Page 36 of 149 ...
Page 37: ...e Username field enter your login and in the Password and Password confirmation fields the password provided by your ISP As a rule the specified settings are enough to configure a connection of the selected type If you need to specify additional settings open the expert settings mode To do this use the switch in the bottom left corner of the page After switching to the expert settings mode the fol...
Page 38: ...lass of traffic for this connection UBR Unspecified Bit Rate The UBR service is used for applications that allow various delays and losses of packets It is appropriate to use the UBR service for text data image transfer applications as well as messaging distribution retrieval and remote terminal applications UBR With PCR Unspecified Bit Rate with Peak Cell Rate The UBR service is used for applicat...
Page 39: ...ld is displayed Specify a required value in cells per second Non Realtime VBR Non Real time Variable Bit Rate This service can be used for transferring data that have critical response time requirements e g air ticket booking bank transactions and process monitoring When you select this value from the drop down list the Peak Cell Rate Sustainable Cell Rate and Maximum Burst Size fields are display...
Page 40: ...f units transmitted by the interface MAC A MAC address assigned to the interface This parameter is mandatory if your ISP uses MAC address binding In the field enter the MAC address registered by your ISP upon concluding the agreement Also you can set the address of a device connected to the router s LAN at the moment To do this select the relevant value from the drop down list the field will be fi...
Page 41: ...confirmation The confirmation of the entered password to avoid mistypes Service name Displayed for the PPPoE type only The name of the PPPoE authentication server Authentication algorithm Select a required authentication method from the drop down list or leave the AUTO value MTU The maximum size of units transmitted by the interface Keep Alive Select the checkbox if you want the router to keep you...
Page 42: ... some ISPs Contact your ISP to clarify if this checkbox needs to be enabled Static IP Address Fill in the field if you want to use a static IP address to access the Internet PPP debug Select the checkbox if you want to log all data on PPP connection debugging PPPoE pass through Displayed for the PPPoE type only Select the checkbox if you want to allow PPPoE clients of computers from your LAN to co...
Page 43: ...port Select the checkbox to allow the router to use several untagged connections Use VLAN Select the checkbox to allow the router to use tagged VLAN connections VLAN ID An identifier for the VLAN The field is displayed when the Use VLAN checkbox is selected VLAN priority A priority tag for the type of traffic transmitted The field is displayed when the Use VLAN checkbox is selected Click the Next ...
Page 44: ...ess and Netmask fields In the Gateway IP address field enter the IP address of the gateway used by this WAN connection As a rule the specified settings are enough to configure a connection of the selected type If you need to specify additional settings open the expert settings mode To do this use the switch in the bottom left corner of the page After switching to the expert settings mode the follo...
Page 45: ...oS A class of traffic for this connection UBR Unspecified Bit Rate The UBR service is used for applications that allow various delays and losses of packets It is appropriate to use the UBR service for text data image transfer applications as well as messaging distribution retrieval and remote terminal applications UBR With PCR Unspecified Bit Rate with Peak Cell Rate The UBR service is used for ap...
Page 46: ...e used for transferring data that have critical response time requirements e g air ticket booking bank transactions and process monitoring When you select this value from the drop down list the Peak Cell Rate Sustainable Cell Rate and Maximum Burst Size fields are displayed Specify required values Realtime VBR Real time Variable Bit Rate This service is used for delay sensitive applications such a...
Page 47: ... of units transmitted by the interface MAC A MAC address assigned to the interface This parameter is mandatory if your ISP uses MAC address binding In the field enter the MAC address registered by your ISP upon concluding the agreement Also you can set the address of a device connected to the router s LAN at the moment To do this select the relevant value from the drop down list the field will be ...
Page 48: ...be received NAT Select the checkbox if you want one WAN IP address to be used for all computers of your LAN Firewall Select the checkbox to enable protection against ARP and DDoS attacks VLAN displayed for the Static IP type only Allow to create several connections assigned to this port Select the checkbox to allow the router to use several untagged connections Use VLAN Select the checkbox to allo...
Page 49: ... displayed when the Use VLAN checkbox is selected Click the Next button to continue After that the page displaying all specified settings opens Click the Apply button to create the connection or the Back button to specify other settings After clicking the Apply button the page for checking the Internet availability opens see the Checking Internet Availability section page 60 Page 49 of 149 ...
Page 50: ... WAN connection fill in the VPI and VCI fields As a rule the specified settings are enough to configure a connection of the selected type If you need to specify additional settings open the expert settings mode To do this use the switch in the bottom left corner of the page After switching to the expert settings mode the following sections are displayed ATM for ADSL WAN connection Ethernet for Eth...
Page 51: ...QoS A class of traffic for this connection UBR Unspecified Bit Rate The UBR service is used for applications that allow various delays and losses of packets It is appropriate to use the UBR service for text data image transfer applications as well as messaging distribution retrieval and remote terminal applications UBR With PCR Unspecified Bit Rate with Peak Cell Rate The UBR service is used for a...
Page 52: ...a required value in cells per second Non Realtime VBR Non Real time Variable Bit Rate This service can be used for transferring data that have critical response time requirements e g air ticket booking bank transactions and process monitoring When you select this value from the drop down list the Peak Cell Rate Sustainable Cell Rate and Maximum Burst Size fields are displayed Specify required valu...
Page 53: ... of units transmitted by the interface MAC A MAC address assigned to the interface This parameter is mandatory if your ISP uses MAC address binding In the field enter the MAC address registered by your ISP upon concluding the agreement Also you can set the address of a device connected to the router s LAN at the moment To do this select the relevant value from the drop down list the field will be ...
Page 54: ... video streaming to be received NAT Select the checkbox if you want one WAN IP address to be used for all computers of your LAN Firewall Select the checkbox to enable protection against ARP and DDoS attacks VLAN Allow to create several connections assigned to this port Select the checkbox to allow the router to use several untagged connections Use VLAN Select the checkbox to allow the router to us...
Page 55: ... displayed when the Use VLAN checkbox is selected Click the Next button to continue After that the page displaying all specified settings opens Click the Apply button to create the connection or the Back button to specify other settings After clicking the Apply button the page for checking the Internet availability opens see the Checking Internet Availability section page 60 Page 55 of 149 ...
Page 56: ...ADSL WAN connection fill in the VPI and VCI fields As a rule the specified settings are enough to configure a connection of the selected type If you need to specify additional settings open the expert settings mode To do this use the switch in the bottom left corner of the page After switching to the expert settings mode the following sections are displayed ATM for ADSL WAN connection Ethernet for...
Page 57: ...oS A class of traffic for this connection UBR Unspecified Bit Rate The UBR service is used for applications that allow various delays and losses of packets It is appropriate to use the UBR service for text data image transfer applications as well as messaging distribution retrieval and remote terminal applications UBR With PCR Unspecified Bit Rate with Peak Cell Rate The UBR service is used for ap...
Page 58: ...king bank transactions and process monitoring When you select this value from the drop down list the Peak Cell Rate Sustainable Cell Rate and Maximum Burst Size fields are displayed Specify required values Realtime VBR Real time Variable Bit Rate This service is used for delay sensitive applications such as real time video The Rt VBR provides higher network flexibility than the CBR service When yo...
Page 59: ... the MAC address registered by your ISP upon concluding the agreement Also you can set the address of a device connected to the router s LAN at the moment To do this select the relevant value from the drop down list the field will be filled in automatically Click the Next button to continue After that the page displaying all specified settings opens Click the Apply button to create the connection ...
Page 60: ...connection and possible causes of malfunctions are displayed To recheck the status of the WAN connection enter the IP address or name of a host in the Address field or leave the value specified by default ya ru Then click the Recheck button Click the Back button to specify other settings Click the Next button to continue After clicking the Next button the page for configuring wireless connection o...
Page 61: ...If you are not going to use the wireless connection select the Turn off choice of the Mode radio button Click the Next button and then click the Save button on the opened page After clicking the Save button the quick settings page opens If you want to connect portable devices to the Internet via wireless connection select the Router choice of the Mode radio button Click the Next button Page 61 of ...
Page 62: ...anual Configuring via Web based Interface On the opened page in the SSID field specify a new name for the network use digits and Latin characters Figure 45 Page for changing the name of the wireless LAN Click the Next button to continue Page 62 of 149 ...
Page 63: ...twork in the Network key field Use digits and Latin characters After applying this setting the WPA2 PSK authentication type is specified for the router s WLAN When the Open value is selected the Network key field is unavailable After applying this setting the Open authentication type with no encryption is specified for the router s WLAN Figure 46 Page for selecting a security mode for the wireless...
Page 64: ...ge for selecting the operating mode for the wireless network If you are not going to use the wireless connection select the Turn off choice of the Mode radio button Click the Next button and then click the Save button on the opened page After clicking the Save button the quick settings page opens If you want to connect portable devices to the Internet via wireless connection select the Router choi...
Page 65: ...anual Configuring via Web based Interface On the opened page in the SSID field specify a new name for the network use digits and Latin characters Figure 48 Page for changing the name of the wireless LAN Click the Next button to continue Page 65 of 149 ...
Page 66: ...ey field Use digits and Latin characters After applying this setting the WPA2 PSK authentication type is specified for the router s WLAN When the Open value is selected the Network key field is unavailable After applying this setting the Open authentication type with no encryption is specified for the router s WLAN Figure 49 Page for selecting a security mode for the wireless network Click the Nex...
Page 67: ...lect a virtual server template from the drop down list or select Custom to specify all parameters of the new virtual server manually Name Enter a name for the virtual server for easier identification You can specify any name Interface Select a WAN connection to which this virtual server will be assigned Public port begin Public port end A port of the router from which traffic is directed to the IP...
Page 68: ...P Enter the IP address of the server from the local area network To choose a device connected to the router s LAN at the moment select the relevant value from the drop down list the field will be filled in automatically Remote IP Enter the IP address of the server from the external network When needed settings are configured click the Save button After successful creation of the virtual server a n...
Page 69: ... On the Status Network statistics page you can view statistics for WAN connections and LAN ports of the router For each connection the following data are displayed name and state when the connection is on its name is highlighted in green when the connection is off its name is highlighted in red IP address and subnet mask gateway if the connection is established MAC address MTU value and volume of ...
Page 70: ...r User Manual Configuring via Web based Interface DSL Status The information shown on the tabs of the Status DSL status page can be used for troubleshooting and diagnosing connection problems Figure 52 The Status DSL status page Page 70 of 149 ...
Page 71: ...40U Wireless N 150 ADSL2 Modem Router User Manual Configuring via Web based Interface WAN Status The Status WAN status page displays active WAN connections Figure 53 The Status WAN status page Page 71 of 149 ...
Page 72: ...ce DHCP The Status DHCP page displays the information on computers that have been identified by hostnames and MAC addresses and have got IP addresses from the DHCP server of the device as well as the IP address expiration periods the lease time Figure 54 The Status DHCP page Page 72 of 149 ...
Page 73: ...ual Configuring via Web based Interface Routing Table The Status Routing table page displays the information on routes The table contains destination IP addresses gateways subnet masks and other data Figure 55 The Status Routing table page Page 73 of 149 ...
Page 74: ...e 56 The Status Clients page For each device the following data are displayed the IP address the MAC address and the interface to which the device is connected The Clear all button allows to clear the router s ARP table It includes the MAC addresses of the devices connected to the router before and IP addresses assigned to them The MAC addresses of the devices connected to the router in the bridge...
Page 75: ...page displayed specify the relevant values To edit an existing connection left click the relevant line in the table On the page displayed change the parameters and click the Save button To delete an existing connection left click the relevant line in the table On the page displayed click the Delete button To use one of existing WAN connections as a default gateway select the choice of the Default ...
Page 76: ...iption General settings Connection Type A type of network protocol to be used by the connection Available values PPPoE PPPoA IPoA Static IP Dynamic IP Bridge Interface A physical interface to which the new connection will be assigned Leave the DSL new value to create a new interface at the physical layer Name A name for connection for easier identification Enable Select the checkbox to enable the ...
Page 77: ... often cells are sent in an effort to minimize lag or jitter caused by traffic inconsistencies When you select this value from the drop down list the Peak Cell Rate field is displayed Specify a required value in cells per second CBR Constant Bit Rate This service is used for applications that require a constant data rate It is mostly used for transferring uncompressed audio and video e g videoconf...
Page 78: ...ll Rate and Maximum Burst Size fields are displayed Specify required values Figure 59 The page for creating a new connection The VLAN section The VLAN section is displayed for the PPPoE Static IP Dynamic IP and Bridge connection types Parameter Description VLAN Allow to create several connections assigned to this port Select the checkbox to allow the router to use several untagged connections Use ...
Page 79: ...yed for all connection types except for Bridge Figure 60 The page for creating a new connection The Miscellaneous section Parameter Description Miscellaneous Enable IGMP Multicast Select the checkbox to allow multicast traffic from the external network e g video streaming to be received NAT Select the checkbox if you want one WAN IP address to be used for all computers of your LAN Firewall Select ...
Page 80: ...ss the Internet Password confirmation The confirmation of the entered password to avoid mistypes Service name Displayed for the PPPoE type only The name of the PPPoE authentication server Authentication algorithm Select a required authentication method from the drop down list or leave the AUTO value MTU The maximum size of units transmitted by the interface Keep Alive Select the checkbox if you wa...
Page 81: ...r ISP to clarify if this checkbox needs to be enabled Static IP Address Fill in the field if you want to use a static IP address to access the Internet PPP debug Select the checkbox if you want to log all data on PPP connection debugging PPPoE pass through Displayed for the PPPoE type only Select the checkbox if you want to allow PPPoE clients of computers from your LAN to connect to the Internet ...
Page 82: ...WAN connection Netmask Displayed for the Static IP and IPoA types only Enter a subnet mask for this WAN connection Gateway IP address Displayed for the Static IP and IPoA types only Enter an IP address of the gateway used by this WAN connection Vendor ID Displayed for the Dynamic IP type only The identifier of your ISP Optional When all needed settings are configured click the Save button Page 82 ...
Page 83: ...age for creating a new connection The General settings and Ethernet sections Parameter Description General settings Connection Type A type of network protocol to be used by the connection Available values PPPoE Static IP Dynamic IP Bridge Interface Select the value corresponding to the LAN port specified as the WAN port Name A name for connection for easier identification Enable Select the checkbo...
Page 84: ... drop down list the field will be filled in automatically VLAN The VLAN section for this connection type can be used if the VLAN MUX Mode value is selected from the Ethernet WAN type drop down list on the Advanced Interface grouping Make WAN page Allow to create several connections assigned to this port If the checkbox is selected the router is able to use several untagged connections Use VLAN If ...
Page 85: ...ting a new connection The Miscellaneous section Parameter Description Miscellaneous Enable IGMP Multicast Select the checkbox to allow multicast traffic from the external network e g video streaming to be received NAT Select the checkbox if you want one WAN IP address to be used for all computers of your LAN Firewall Select the checkbox to enable protection against ARP and DDoS attacks Page 85 of ...
Page 86: ...word to access the Internet Password confirmation The confirmation of the entered password to avoid mistypes Service name The name of the PPPoE authentication server Authentication algorithm Select a required authentication method from the drop down list or leave the AUTO value MTU The maximum size of units transmitted by the interface Keep Alive Select the checkbox if you want the router to keep ...
Page 87: ...ome ISPs Contact your ISP to clarify if this checkbox needs to be enabled Static IP Address Fill in the field if you want to use a static IP address to access the Internet PPP debug Select the checkbox if you want to log all data on PPP connection debugging PPPoE pass through Select the checkbox if you want to allow PPPoE clients of computers from your LAN to connect to the Internet through this P...
Page 88: ...this WAN connection Netmask Displayed for the Static IP type only Enter a subnet mask for this WAN connection Gateway IP address Displayed for the Static IP type only Enter an IP address of the gateway used by this WAN connection Vendor ID Displayed for the Dynamic IP type only The identifier of your ISP Optional When all needed settings are configured click the Save button Page 88 of 149 ...
Page 89: ...Configuring parameters for the additional local subnet Parameter Description IP Address 2 An alias IP address of the router s IP address Netmask 2 A mask of the additional local subnet NAT 2 Select the checkbox if you want one WAN IP address to be used for all computers of the additional local subnet For the main local subnet you can select the NAT checkbox while creating WAN connection via the Cl...
Page 90: ...r is used to assign IP addresses to clients When this value is selected the External DHCP server IP field is displayed on the page DNS Relay Select the checkbox so that the devices connected to the router obtain the address of the router as the DNS server address Deselect the checkbox so that the devices connected to the router obtain the address transmitted by the ISP or specified on the Advanced...
Page 91: ... IP pair click the Add button In the IP field enter an IP address which will be assigned to the device from the LAN then in the MAC field enter the MAC address of this device In the Host field specify a network name of the device for easier identification optional Also you can create a MAC IP pair for a device connected to the router s LAN at the moment To do this select the relevant value from th...
Page 92: ...nterface Wi Fi In this menu you can specify all needed settings for your wireless network Basic Settings On the Wi Fi Basic settings page you can enable your wireless local area network WLAN and configure its basic parameters Figure 71 Basic settings of the wireless LAN Page 92 of 149 ...
Page 93: ...ork You cannot change the value of this parameter Country The country you are in Select a value from the drop down list Channel The wireless channel number By default channel 6 is specified If you want to use another channel select a value from the drop down list When the auto value is selected the router itself chooses the channel with the least interference Clients Isolation Select the checkbox ...
Page 94: ...pen network authentication type with no encryption is specified for the WLAN The default security settings do not provide sufficient protection for the WLAN Please specify your own security settings The router supports the following authentication types Authentication type Description Open Open authentication with or without WEP encryption WPA PSK WPA based authentication using a PSK WPA2 PSK WPA2...
Page 95: ...ting WEP encryption When the checkbox is selected the Encryption Key WEP 1 field and the Encryption Key WEP as HEX checkbox are displayed Encryption Key WEP as HEX Select the checkbox to set a hexadecimal number as a key for encryption Encryption Key WEP 1 The key for WEP encryption You can specify keys containing 5 or 13 symbols use digits and or Latin characters If the Encryption Key WEP as HEX ...
Page 96: ...y PSK A key for WPA encryption The key can contain digits and or Latin characters WPA2 Pre authentication The checkbox activating preliminary authentication displayed only for the WPA2 PSK authentication type WPA Encryption An encryption method TKIP AES or TKIP AES WPA renewal The time period in seconds at the end of which a new key for WPA encryption is generated When the value 0 is specified for...
Page 97: ...r restrict mode drop down list on the Filter mode tab To open your wireless network for the devices which MAC addresses are specified on the MAC addresses tab and to close the wireless network for all other devices select the Allow value from the MAC filter restrict mode drop down list and click the Change button To close your wireless network for the devices which MAC addresses are specified on t...
Page 98: ...o you can enter the MAC address of a device connected to the router s LAN at the moment To do this select the relevant device from the Known IP MAC addresses drop down list the field will be filled in automatically Then click the Save button To remove a MAC address from the list of MAC addresses select the checkbox located to the left of the relevant MAC address and click the Save button Page 98 o...
Page 99: ...based Interface Station List On the Wi Fi Station List page you can view the list of wireless clients connected to the router Figure 77 The list of the router s wireless clients To view the latest data on the devices connected to the WLAN click the Refresh button Page 99 of 149 ...
Page 100: ...he WPS function helps to configure the protected wireless network automatically Devices connecting to the wireless network via the WPS function must support the WPS function Before using the function you need to configure one of the following authentication types Open with no encryption WPA PSK or WPA2 PSK with the AES or TKIP AES encryption method on the Wi Fi Security settings page Figure 78 The...
Page 101: ...WLAN Encryption key The encryption key specified for the WLAN Device PIN The PIN code of the router This parameter is used when connecting the router to a registrar to set the parameters of the WPS function Client PIN The PIN code of the device newly connected to the router via the WPS function WPS Method A method of the WPS function Select a value from the drop down list PIN Connecting the device...
Page 102: ...llow the next steps 1 Select the WPS Enable checkbox 2 Click the Change button 3 Select the PBC value from the WPS Method drop down list 4 Select the PBC method in the software of the wireless device that you want to connect to the router s WLAN 5 Click the relevant button in the software or press the WPS button on the cover of the wireless device that you want to connect to the WLAN 6 Click the C...
Page 103: ...he wireless device that you want to connect to the router s WLAN 2 Click the relevant button in the software or press the WPS button on the cover of the wireless device that you want to connect to the WLAN 3 Press the WPS WLAN button of the router and immediately release it After clicking the button the WPS LED blinks If the wireless device has been successfully connected to the WLAN the LED stops...
Page 104: ...a Web based Interface Additional Settings On the Wi Fi Additional settings page you can define additional parameters for the router s WLAN Changing parameters presented on this page may negatively affect your WLAN Figure 79 Additional settings of the WLAN Page 104 of 149 ...
Page 105: ...ket Larger packets are fragmented divided DTIM Period The time period in seconds between sending a DTIM a message notifying on broadcast or multicast transmission and data transmission TX Power The router s transmit power in percentage terms Bandwidth Channel bandwidth for 802 11n devices TX Preamble This parameter defines the length of the CRC block sent by the router when communicating to wirele...
Page 106: ...menu you can configure advanced settings of the router define interface groups and allow the router to connect to a private Ethernet line configure a DDNS service add name servers define static routes edit the ADSL connection parameters create rules for remote access to the web based interface Page 106 of 149 ...
Page 107: ...f traffic This function is mostly used in Triple play networks Also on the page you can change the operating parameters of the router s LAN ports and configure the device to connect to a private Ethernet line The Ethernet WAN function allows using any Ethernet port of the router to access the Internet via Ethernet technology When the function is enabled the router is still able to access the Inter...
Page 108: ...transfer mode This parameter defines the data transfer mode for a device connected to the selected LAN port of the router Half half duplex mode Full full duplex mode If you have selected the Auto value of this drop down list the router itself sets the data transfer mode Bitrate Data speed in bytes If you have selected the Auto value of this drop down list the router itself sets the data speed Port...
Page 109: ...et WAN interface VLAN MUX Mode if you need to assign one or more tagged VLAN connections or several untagged connections to the created Ethernet WAN interface 3 Click the Save link If in the future you need to disconnect the LAN port from the private Ethernet line on the Advanced Interface grouping page place the mouse pointer on the port that is used as the WAN port and click the Default line in ...
Page 110: ...to which the new group will be assigned WAN connections of PPPoA and IPoA type cannot be added to groups Use the button to move WAN connections to the right drop down list Click the Save button When you add an interface to the new group it is excluded from the group to which it has been assigned before To edit or remove an existing group select the relevant group on the Advanced Interface grouping...
Page 111: ...drop down list Host name The domain name registered at your DDNS provider User name The username to authorize for your DDNS provider User password The password to authorize for your DDNS provider Interface Select a WAN connection which IP address will be used to access the DDNS service After specifying the needed parameters click the Save button To edit parameters of the existing DDNS service sele...
Page 112: ...ically from your ISP upon installing a connection When you use the built in DHCP server the network parameters including DNS servers are distributed to clients automatically If you want to configure automatic obtainment of DNS servers addresses deselect the Manual checkbox select a WAN connection which will be used to obtain addresses of DNS servers automatically from the Interface drop down list ...
Page 113: ...rk to which this route is assigned Destination netmask The destination network mask Gateway An IP address through which the destination network can be accessed The field is available when the Auto value is selected from the Via Interface drop down list of this line Metric A metric for the route The lower the value the higher is the route priority Optional Via Interface Select an interface connecti...
Page 114: ... an existing route select the checkbox located to the left of the relevant line in the table and click the Save button If you need to specify a host from the LAN as the default route select the Auto value from the Via Interface drop down list enter 0 0 0 0 in the Destination network and Destination netmask fields enter the IP address of the host from the LAN in the Gateway field and then click the...
Page 115: ...g via Web based Interface ADSL The Advanced ADSL page includes the set of ADSL standards that should be defined by an ISP Contact your ISP to set proper parameters Select the relevant options and click the Change button Figure 86 The Advanced ADSL page Page 115 of 149 ...
Page 116: ...d button In the line displayed you can specify the following parameters Parameter Description Name A name for the rule for easier identification You can specify any name Interface A connection through which the web based interface of the router is accessed IP address A host or a subnet to which the rule is applied Mask The mask of the subnet Public port An external port of the router You can speci...
Page 117: ...rface To edit a rule for remote access select a needed field in the relevant line of the table change its value and click the Save button To remove a rule for remote access select the checkbox located to the left of the relevant line in the table and click the Save button Page 117 of 149 ...
Page 118: ...uter add rules for IP filtering create virtual servers define a DMZ configure the Port Triggering function configure the MAC filter IP Filters On the Firewall IP filters page you can create new rules for filtering IP packets and edit or remove existing rules Figure 88 The Firewall IP filters page To create a new rule click the Add button Page 118 of 149 ...
Page 119: ...escription General Name A name for the rule for easier identification Protocol A protocol for network packet transmission Select a value from the drop down list Action Select an action for the rule ACCEPT Allows packet transmission in accordance with the criteria specified by the rule DROP Denies packet transmission in accordance with the criteria specified by the rule IP Addresses Page 119 of 149...
Page 120: ...in automatically If you want to specify a range of IP addresses click the Range icon and enter the starting and ending addresses in the left and right fields correspondingly Ports Source port A port of the source IP address You can specify one port several ports separated by a comma or a range of ports separated by a colon Destination port A port of the destination IP address You can specify one p...
Page 121: ...e Virtual Servers On the Firewall Virtual servers page you can create virtual servers for redirecting incoming Internet traffic to a specified IP address in the local area network Figure 90 The Firewall Virtual servers page To create a new virtual server click the Add button Page 121 of 149 ...
Page 122: ...e used by the new virtual server Select a value from the drop down list Public port begin Public port end A port of the router from which traffic is directed to the IP address specified in the Private IP field Specify the start and the end value for the port range If you need to specify one port enter the needed value in the Public port begin field and leave the Public port end field blank Private...
Page 123: ...filled in automatically Remote IP The IP address of the server from the external network Click the Save button To edit the parameters of an existing server select the relevant server in the table On the opened page change the needed parameters and click the Save button To remove an existing server select the relevant server in the table On the opened page click the Delete button To remove all serv...
Page 124: ...IP address field and click the Change button Note that when the DMZ is enabled all traffic coming to a port of the WAN interface of the router is directed to the same port of the specified IP address Also note that virtual servers have higher priority than the DMZ host In other words if there has been created a virtual server that directs traffic from external port 80 to a port of the device from ...
Page 125: ...tion Rules name A name for the rule for easier identification Interface A WAN connection to which this rule will be assigned Port range Incoming A range of the router s ports which will be open to receive data from the external network incoming traffic Specify the start and the end value for the port range Outgoing A range of the router s ports from which data are transferred to the external netwo...
Page 126: ...ied port range After specifying the needed parameters click the Save button To edit an existing rule for the Port Triggering function select a needed field in the relevant line of the table change its value and click the Save button To remove an existing rule for the Port Triggering function select the checkbox located to the left of the relevant line in the table and click the Save button Page 12...
Page 127: ... the following parameters Parameter Description Source MAC address The MAC address of the source host To choose a device connected to the router s LAN at the moment select the relevant value from the Known IP MAC addresses drop down list the field will be filled in automatically Destination MAC address The MAC address of the destination host Direction Select a direction for which the rule will be ...
Page 128: ...needed parameters click the Save button To edit a rule for filtering select a needed field in the relevant line of the table change its value and click the Save button To remove a rule for filtering select the checkbox located to the left of the relevant line in the table and click the Save button Page 128 of 149 ...
Page 129: ...s and limit access to certain web sites Parent Control On the Control Parent control page you can create rules restricting access to the Internet for computers with specified MAC addresses during particular time periods on particular days Figure 95 The Control Parent control page Rules restricting access for computers with specified MAC addresses are presented as a table To create a new rule click...
Page 130: ...DSL 2640U Wireless N 150 ADSL2 Modem Router User Manual Configuring via Web based Interface Figure 96 The page for adding a new parental control rule Page 130 of 149 ...
Page 131: ...specify any name MAC address The MAC address of the computer to which this rule will be applied Days of implementation Select checkboxes corresponding to the needed days of the week Start time of implementation Hours Minutes Start time of the rule application End time of implementation Hours Minutes End time of the rule application Click the Change button To delete an existing rule select the rele...
Page 132: ... on the Configuration tab then select a needed mode from the URL filter type drop down list Block listed URLs when this value is selected the router blocks access to all addresses specified on the URL addresses tab Block all URLs except listed when this value is selected the router allows access to addresses specified on the URL addresses tab and blocks access to all other web sites Click the Chan...
Page 133: ...e URL address field specify a port as usual you need to specify port 80 for HTTP then click the Save button To remove an address from the list of URL addresses select the checkbox located to the left of the relevant line in the table and click the Save button To disable the URL filter deselect the Enable Disable URL filter checkbox on the Configuration tab then click the Change button Page 133 of ...
Page 134: ... settings to the non volatile memory create a backup of the router s configuration restore the router s configuration from a previously saved file restore the factory default settings view the system log update the firmware of the router configure automatic synchronization of the system time or manually configure the date and time for the router allow or forbid access to the router via TELNET Page...
Page 135: ...rator account used to access the web based interface of the router and to access the device settings via TELNET For security reasons it is strongly recommended to change the administrator password upon initial configuration of the router Figure 99 The page for modifying the administrator password Enter the new password in the Password and Confirmation fields and click the Save button Page 135 of 1...
Page 136: ...u change the router s parameters Otherwise the changes will be lost upon reboot of the router Factory Click the button to restore the factory default settings Also you can restore the factory defaults via the hardware RESET button see the Saving and Restoring Settings section page 33 Backup Click the button and follow the dialog box appeared to save the configuration all settings of the router to ...
Page 137: ...f logging from the drop down list Local the system log is stored in the router s memory and displayed on the Log tab When this value is selected the Server and Port fields are not displayed Remote the system log is sent to the remote host specified in the Server field Local and remote the system log is stored in the router s memory and displayed on the Log tab and sent to the remote host specified...
Page 138: ...e local or global network to which the system log will be sent Port A port of the host specified in the Server field By default the value 514 is specified After specifying the needed parameters click the Change button To disable logging of the system events deselect the Logging checkbox and click the Change button On the Log tab the events specified in the Logging level list are displayed Figure 1...
Page 139: ...e D Link logo in the top left corner of the page If you need to install a newer version of the firmware follow the next steps Attention Do not turn off the router before the firmware upgrade is completed This may cause the device breakdown 1 Download a new version of the firmware from www dlink ru 2 Click the Browse button on the System Firmware upgrade page to locate the new firmware file 3 Click...
Page 140: ...ased Interface 6 Select the Factory line in the top page menu displayed when the mouse pointer is over the System caption 7 Wait until the router is rebooted Log into the web based interface using the default IP address login and password 192 168 1 1 admin admin Page 140 of 149 ...
Page 141: ...llow the next steps 1 Select the NTP value from the Mode drop down list 2 Select your time zone from the drop down list To set the time zone in accordance with the settings of your operating system click the Determine timezone button in the bottom right corner of the page 3 Specify the needed NTP server in the NTP servers field or leave the server specified by default 4 Click the Change button Whe...
Page 142: ...you can enable or disable access to the device settings via TELNET from your LAN By default access is enabled Figure 105 The System Telnet page To disable access via TELNET deselect the On checkbox and click the Change button To enable access via TELNET again select the On checkbox and click the Change button Page 142 of 149 ...
Page 143: ...event overheating do not obstruct the ventilation openings of the router Plug the router into a surge protector to reduce the risk of damage from power surges and lightning strikes Operate the router only from an electrical outlet with the correct power source as indicated on the adapter Do not open the cover of the router Otherwise any warranty will be invalidated Unplug the equipment before dust...
Page 144: ... devices Place your devices so that the signal travels straight through a wall or ceiling instead of at an angle for better reception 3 Building materials make a difference A solid metal door or aluminum studs may have a negative effect on your wireless range Try to position your router access points and computers so that the signal passes through drywalls or open doorways Materials and objects su...
Page 145: ...ted to the LAN 3 port of the router and the laptop connected to the wireless interface of the router To configure the router follow the steps below 1 Go to the Net WAN page and click the Add button 2 Select the Bridge value from the Connection Type drop down list 3 Select the DSL new value from the Interface drop down list 4 Fill in the VPI and VCI fields 5 In the VLAN section select the Allow to ...
Page 146: ...f the router and a WAN connection of Dynamic IP type for the computer connected to the LAN 4 port of the router and the laptop connected to the wireless interface of the router To configure the router follow the steps below 1 Go to the Advanced Interface grouping page 2 Place the mouse pointer on the LAN 3 port and click the Make WAN line in the menu displayed 3 On the opened page select the VLAN ...
Page 147: ...re 108 Two WAN connections for one physical interface 15 Go to the Advanced Interface grouping page 16 Create a group containing the WAN connection of the Bridge type and the LAN 2 port 17 Create another group containing the WAN connection of the Dynamic IP type the LAN 4 port and the wireless interface Figure 109 Groups of ports for the created WAN connections 18 Save the router s settings Page 1...
Page 148: ...Name System DTIM Delivery Traffic Indication Message GMT Greenwich Mean Time IGMP Internet Group Management Protocol IP Internet Protocol IPoA Internet Protocol over ATM ISP Internet Service Provider LAN Local Area Network LCC Logical Link Control LCP Link Control Protocol MAC Media Access Control MTU Maximum Transmission Unit NAT Network Address Translation NTP Network Time Protocol PBC Push Butt...
Page 149: ...poral Key Integrity Protocol UPnP Universal Plug and Play URL Uniform Resource Locator VC Virtual Circuit VCI Virtual Circuit Identifier VLAN Virtual Local Area Network VPI Virtual Path Identifier WAN Wide Area Network WEP Wired Equivalent Privacy Wi Fi Wireless Fidelity WLAN Wireless Local Area Network WPA Wi Fi Protected Access WPS Wi Fi Protected Setup Page 149 of 149 ...