background image

Web User Interface

78

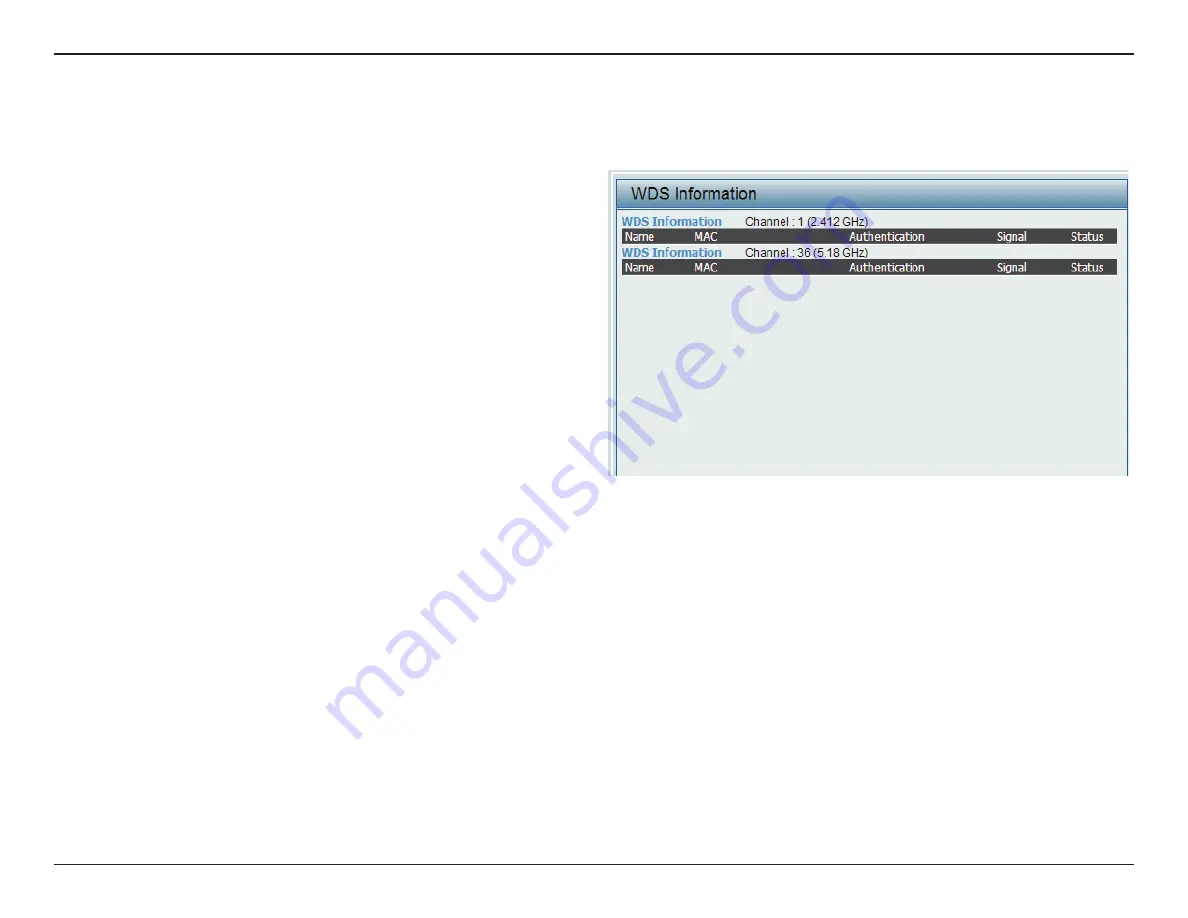
WDS Information Page

This page displays the access points SSID, MAC, band, authentication method, signal strength, and status for the DIS-2650AP’s Wireless Distribution 

System network.

WDS Information:

Name:

MAC:

Authentication:

Signal:

Status:

This window displays the Wireless Distribution 

System information for clients currently 

connected to the DIS-2650AP.

Displays the SSID of the client.

Displays the MAC address of the client.

Displays the type of authentication being 

used.

Displays the client’s signal strength.

Displays the status of the power saving 

feature.

Summary of Contents for DIS-2650AP

Page 1: ...NUCLIAS CONNECT DIS 2650AP User Guide V 1 00 2020 Business Class Networking ...

Page 2: ...User Interface 16 Wireless 17 Access Point Mode 17 WDS with AP Mode 19 WDS Mode 21 Wireless Client Mode 23 Wireless Security 24 Wired Equivalent Privacy WEP 24 Wi Fi Protected Access WPA WPA2 25 LAN 27 IPv6 28 Advanced Settings 29 Performance 30 Wireless Resource Control 32 Multi SSID 34 VLAN 36 VLAN List 36 Port List 37 Add Edit VLAN 38 PVID Settings 39 Intrusion 40 Schedule 41 Internal RADIUS Se...

Page 3: ...Traffic Statistics 80 Log 81 View Log 81 Log Settings 82 Maintenance Section 83 Administration 84 Limit Administrator 84 System Name Settings 85 Login Settings 85 Console Settings 86 Ping Control Settings 86 LED Settings 86 Country Settings 86 DDP Settings 87 Nuclias Connect Settings 87 Firmware and SSL Upload 88 Configuration File Upload 89 Time and Date Settings 90 Configuration and System 91 Sy...

Page 4: ...remendous flexibility compared to traditional hardware based unified managementsystems Configurationcanbedoneremotely Networktrafficanalyticsareavailableataglance inwholeorinpart LoadBalancing Airtime Fairness and Localized Throttling are enabled Nuclias Connect supports multi tenancy so network admins can grant localized management authority for local networks In addition because APs can support ...

Page 5: ...s Authentication via Customizable Captive Portal 802 1x and RADIUS Server POP3 LDAP AD Remote Config Batch Config Multilingual Support Intuitive Interface Multi Tenant Role Based Administration Payment Gateway Paypal Integration and Front Desk Ticket Management For more information on how to use Nuclias Connect with DIS 2650AP please refer to the Nuclias Connect User Guide ...

Page 6: ...DIN rail mounting kit 4 installation scres 3 x 7 mm Bracket System Requirements y Computers with Windows Macintosh or Linux based operating systems with an Ethernet Adapter y Internet Explorer 11 Safari 7 Firefox 28 or Google Chrome 33 and above for web based configuration ...

Page 7: ...d hold for five seconds to reset the access point to the factory default settings Press and hold for one second to reboot the access point 1 Power Status Solid Red Indicates the access point has malfunctioned Blinking Red This LED will blink during boot up Solid Green Indicates that the DIS 2650AP is working properly DIS 2650AP 5G 2 4G ALARM POE PWR2 PWR1STATUS SIGNAL CONSOLE RESET LAN2 LAN1 POE 1...

Page 8: ...the openings on the back of the device Secure the plates with the included mounting screws 2 Remove the DIN rail mounting clip from the back of the device if present 3 Place the mounting brackets attached to the device on the location where you want to mount it and use the brackets as a guide to mark where to drill the screw holes 4 Drill holes on the marks and insert wall anchors appropriate for ...

Page 9: ...DIS 2650AP on a rail 1 Check that the DIN rail is installed properly using at least two screws on each end 2 Fasten the DIN mounting clip to the rear panel of the device using the included mounting screws 3 Position the DIS 2650AP against the rail then tilt it upwards and hook the DIN rail clip on the back of the device against the rail Snap the device into place to complete the installation ...

Page 10: ... be mounted on a standard rack using the included mounting plates To install the device on a rack 1 Attach the mounting brackets to the rear panel of the device using the provided installation screws 2 Use the provided screws to attach the two rear mounting plates to the rack ...

Page 11: ...AP 3 Attach the terminal lug ring at the other end of the grounding cable to an appropriate grounding source Powering the Device The DIS 2650AP can be powered with an 802 3at PoE source or by using the built in terminal adapter This allows dual power inputs using wires from the power source s to be screwed into the terminal connections Using the Terminal Connections 1 Before continuing consult the...

Page 12: ...he switch 3 Use a flat head screwdriver to unscrew the terminal connections that you wish to use 4 Insert the wires into the terminal connectiosn and use the screwdriver to tighten the screws to secure the wires 5 Re insert the terminal block into the socket on the device ...

Page 13: ... The Ethernet port can be connected to an end device Use a standard Category 5 5e 6 RJ 45 Ethernet cable to connect the end device to the DIS 2650AP The port will auto negotiate to the highest possible port speed based on the connected device ...

Page 14: ...dmin 2 Connect the access point and your computer via DPE 311GI PoE injector Manage the access point from the computer Enter dis2650ap local in the address field of your browser Log in to the Administration user interface The default login information is Username admin Password admin 3 Connect the access point and your computer to the same network switch Manage the access point from the computer E...

Page 15: ...ing to configure NTP check perform a ping test with the NTP server In the NTP Server field enter the NTP server to use Then click the Time Zone drop down menu and select the appropriate time zone y Setting System Time Manually From the System Date drop down menu select the Year Month and Day along with the Hour and Minutes ap propriate for the AP y Enable Daylight Saving Click the radio button to ...

Page 16: ...onfigure and monitor the device Launch a web browser type in http dis2650ap local and then press Enter to login The default username and password is admin Most of the configurable settings are located in the menu on the left side of the web GUI which contains sections called Basic Settings Advanced Settings and Status ...

Page 17: ...omthedrop down menu Select Access Point from the drop down menu ServiceSetIdentifier SSID isthenamedesignated for a specific wireless local area network WLAN TheSSID sfactorydefaultsettingisdlink TheSSID can be easily changed to connect to an existing wireless network or to establish a new wireless network The SSID can be up to 32 characters and is case sensitive Select Enable to broadcast the SSI...

Page 18: ... g or 802 11a wireless devices on your network Use the drop down menu to choose Open System Shared Key WPA Personal WPA Enterprise or 802 1x Select Open System to communicate the key across the network WEP Select Shared Key to limit communication to only those devices that share the same WEP settings If multi SSID is enabled this option is not available Select WPA Personal to secure your network u...

Page 19: ...the SSID across the network thus making it visible to all network users Enabling this feature automatically selects the channel that will provide the best wireless performance This feature is not supported inWDS with AP mode The channel selection process only occurs when the AP is booting up All devices on the network must share the same channel Tochangethechannel usethedrop down menu to make the ...

Page 20: ...ple networks Click on the Scan button to search for available wireless networks then click on the available network that you want to connect with Use the drop down menu to choose Open System orWPA Personal Select Open System to communicate the key across the network SelectWPA Personal to secure your network using a password and dynamic key changes No RADIUS server is required ...

Page 21: ... The SSID can beeasilychangedtoconnecttoanexistingwireless network or to establish a new wireless network Enabling this feature automatically selects the channel that will provide the best wireless performance This feature is not supported inWDS mode All devices on the network must share the same channel Tochangethechannel usethedrop down menu to make the desired selection Use the drop down menu t...

Page 22: ...networks then click on the available network that you want to connect with Use the drop down menu to choose Open System or WPA Personal Select Open System to communicate the key across the network Select WPA Personal to secure your network using a password and dynamic key changes No RADIUS server is required ...

Page 23: ...ily changed to connect to an existing wireless network This option is unavailable inWireless Client mode Enablingthisfeatureautomaticallyselectsthechannel that will provide the best wireless performance This feature is not supported inWireless Client mode Thechannelusedwillbedisplayed andmatchesthe AP that the DIS 2650AP is connected to when set to Wireless Client mode Usethedrop downmenutochoose2...

Page 24: ... 64 Bits or 128 Bits Select the 1st through the 4th key to be the active key Input up to four keys for encryption You will select one of these keys in the Key Index drop down menu Hexadecimal HEX digits consist of the numbers 0 9 and the letters A F ASCII American Standard Code for Information Interchange is a code that represents English letters using numbers ranging from 0 127 WEP provides two v...

Page 25: ... is the highest level of wireless security a user can use for wireless today WPA2 is an upgrade ofWPA WPA2 yet again solves some possible security issues found inWPA WPA2 has two variations calledWPA2 Personal PSK and WPA2 Enterprise EAP which is the same as found with WPA WPA Mode Cipher Type Group Key Update Pass Phrase When WPA Personal is selected for Authentication type you must also select a...

Page 26: ...thms AUTO WPA or WPA2 allows you to use both WPA and WPA2 When WPA Enterprise is selected you must also select a cipher type from the drop down menu Auto AES or TKIP Select the interval during which the group key will be valid 1800 is the recommended value as a lower interval may reduce data transfer rates Enable or disable Microsoft Network Access Protection Enter the IP address of the RADIUS ser...

Page 27: ...icIP DHCP ischosenhere Choosethisoptionif youhaveaDHCPserverinyournetwork WhenDynamic IP DHCP isselected theotherfieldsherewillbegrayed out Pleaseallowabout2minutesfor theDHCPclient to be functional once this selection is made If you wish to assign a static IP address to the DIS 2650AP choose Static IP Manual Assign a static IP address that is within the IP address range of your network Enter the ...

Page 28: ...utoischosenhere ChoosethisoptiontheDIS 2650AP can get IPv6 address automatically or use Static to set IPv6 address manually OtherfieldsherewillbegrayedoutwhenAutoisselected Enter the LAN IPv6 address used here Enter the LAN subnet prefix length value used here Enter the LAN default gateway IPv6 address used here ...

Page 29: ...sSectionuserscanconfigureadvancedsettingsconcerningPerformance MultipleSSID VLAN Security QualityofService APArray Web Redirection DHCP Server Filters and Scheduling The following pages will explain settings found in the Advanced Settings section in more detail ...

Page 30: ...ansfer rate of wireless adapters on the wireless LAN TheAPwilladjustthebasetransferratedependingonthebase rateoftheconnecteddevice Ifthereareobstaclesorinterference the AP will step down the rate This option is enabled in Mixed 802 11g and 802 11b mode for 2 4 GHz and 802 11a only mode for 5 GHz The choices available are Best Up to 54 54 48 36 24 18 12 9 6 for 5 GHz and Best Up to 54 54 48 36 24 1...

Page 31: ... error rate in some installations due to increased sensitivity to radio frequency installations SelectEnableorDisable InternetGroupManagementProtocolallowstheAPtorecognizeIGMPqueriesandreportssentbetween routers and an IGMP host wireless STA When IGMP snooping is enabled the AP will forward multicast packets to an IGMP host based on IGMP messages passing through the AP Adjust the multicast packet ...

Page 32: ...wireless client connections minus the number of 2 4GHz wireless client connections If the number of 5GHz wireless client connections minus the number of 2 4GHz wireless client connec tions exceed this value the extra 5GHz wireless client connections will be forced to connect to the 2 4GHz band and not the 5GHz band Enter the maximum 5G connection attempts allowed before the 5G preferred function w...

Page 33: ... or 0 When this network utilization threshold is reached the device will pause one minute to allow net work congestion to dissipate Use the drop down menu to select the criteria of disconnecting the wireless clients Available options are RSSI and Data Rate When RSSI is selected in the Aging out drop down menu select the percentage of RSSI here When the RSSI of wireless clients is lower than the sp...

Page 34: ... name designated for a specific wireless local area network WLAN The SSID s factory default setting is dlink The SSID can be easily changed to connect to an existing wireless network or to establish a new wireless network Enable or Disable SSID visibility Enabling this feature broadcasts the SSID across the network thus making it visible to all network users The Multi SSID security can be Open Sys...

Page 35: ...rsonalorWPA Enterprise youmustalsochooseaWPAmodefromthedrop downmenu AUTO WPAorWPA2 WPA2Only orWPAOnly WPAandWPA2usedifferentalgorithms AUTO WPAorWPA2 allowsyoutouseboth WPA andWPA2 In addition you must configure CipherType and Group Key Update Interval Select Auto AES orTKIP from the drop down menu Select the interval during which the group key will be valid The default value of 1800 seconds is r...

Page 36: ...assigned to VLANs as they are physical ports Any packet which enters the DIS 2650AP without a VLAN tag will have a VLAN tag inserted with a PVID The VLAN List tab displays the current VLANs VLAN Status VLAN Mode UsetheradiobuttontotoggletoEnable Next go to the Add EditVLAN tab to add or modify an item on theVLAN List tab The currentVLAN mode is displayed VLAN List ...

Page 37: ...ort on the switch for handlingVLAN tagged packets as described in the IEEE 802 1Q standard VLAN Status Port Name TagVID UntagVID PVID Use the radio button to toggle to Enable Next go to the Add Edit VLAN tab to add or modify an item on theVLAN List tab The name of the port is displayed in this column TheTaggedVID is displayed in this column The UntaggedVID is displayed in this column The PortVLAN ...

Page 38: ...e VLANs Once you have made the desired changes click Save to have your changes take effect VLAN Status VLAN ID VLAN Name Use the radio button to toggle to Enable Provide a number between 1 and 4094 for the Internal VLAN Enter the VLAN to add or modify Add Edit VLAN ...

Page 39: ...uto Assign Status as well as to configure various types of PVID settings Click Save button to have your changes take effect VLAN Status PVID Auto Assign Status Use the radio button to toggle between Enable and Disable Use the radio button to toggle PVID auto assign status to Enable PVID Settings ...

Page 40: ...The following is a definition of the listed AP cat egories y Valid An AP which is authenticated to the net work with encryption is classified as valid y Neighbor A detected AP with a weak signal strength is classified as a suspect neighbor y Rogue An AP that has been installed on the secure network without explicit authorization y New An alternative category From the AP List select a detected AP a...

Page 41: ... scheduling rule in the field provided Use the drop down menu to select the desired SSID Thisread onlyfieldindicatesthecurrentSSIDinuse To create a new SSID go to theWireless Settings window Basic Settings Wireless Toggle the radio button between AllWeek and Select Day s If the second option is selected check the specific days you want the rule to be effective on Check this box to have your settin...

Page 42: ...e user to enable or disable the RADIUS account Click the icon in the delete column to remove the RADIUS account We suggest you limit the number of accounts to below 30 User Name Password Status RADIUS Account List Enter a name to authenticate user access to the internal RADIUS server Enter a password to authenticate user access to the internal RADIUS server The length of your password should be 8 ...

Page 43: ...n feature allows users to add IP MAC address mapping to prevent ARP Spoofing attack ARP Spoofing Prevention Gateway IP Address Gateway MAC Address This check box allows you to enable the ARP Spoofing prevention function Enter a gateway IP address Enter a gateway MAC address ...

Page 44: ...ations Allocate specific BW for SSID Rule Type Usethedrop downmenutoEnabletheBandwidth Optimization function Enter the downlink bandwidth of the device in Mbits per second EntertheuplinkbandwidthofthedeviceinMbits per second APwilldistributetheaveragebandwidthforeach client Specify the maximum bandwidth for each connected client Reserve certain bandwidth for future clients The weight of 11b g n an...

Page 45: ...n menu to toggle the wireless band between 2 4GHz and 5GHz Use the drop down menu to select the SSID for the specified wireless band Enter the download speed limit in either Kbits sec or Mbits sec for the rule Enter the upload speed limit in either Kbits sec or Mbits sec for the rule ...

Page 46: ...om the drop down list SSID Index Specify from drop down list the SSID index Hotspot 2 0 OSEN Allow Cross Connection Manage P2P DGAF Proxy ARP L2TIF Chooseenabletoturnonhotspot2 0function EnableOSUServer onlyauthenticatedlayer 2 EncryptionNetwork OSEN toindicatethatthe hotspot uses a OSEN network type Choose enable to allow cross connection for clients Choose enable to allow P2P Thisoptionconfigure...

Page 47: ...or this network Choose enable if the network has Additional Steps required for Access Choose enable to indicate that emergency services are reachable through this device Specify group venue belongs to Specify type of venue Specifynameofvenue Choosefromthedrop down list a language used in the name Specify a homogenous extended service set ESS ID that can be used to identify a specific service provi...

Page 48: ...connection Set to 1 if the WAN link is symmetric upload and download speeds are the same or set to 0 if not Set to 1 if the Access Point or the network is at its max capacity or set to 0 if not The downlink speed of the WAN connection setinkbps Ifthedownlinkspeedisnotknown set to 0 TheuplinkspeedoftheWANconnectionsetin kbps Iftheuplinkspeedisnotknownsetto0 WAN Metrics ...

Page 49: ...etoamobiledeviceafter it authenticates to the network List one or more domain names for the entity operating the AP Identifies service providers or groups of roaming partners whose security credentials can be used to connect to a network ListofallNAIrealmsavailablethroughtheBSS Identifiesthe3GPPcellularnetworksavailable through the AP Identifies the availability of common IP protocols TCP UDP IPse...

Page 50: ...that the OSU server supports in order of priority Choosefromdropdownlistwhichconfiguration set to use Choose from drop down list language to use Specifyalistofoneormorenamesindifferent languages which will allow the device to display the OSU Friendly Name in alternative languages based on the language slected in the setting of the mobile device Specify OSU Network Access Identifier Choosetheservic...

Page 51: ...idth OSU Icon Height OSU Icon Type OSU Icon File Path Specify icon name Specify width of the icon in pixels Spcify length of the icon in pixels Specifiy icon file type where the icon type is any mim type graphic format Specify location of icon file ...

Page 52: ... 4GHz or 5GHz Select the SSID for this Authentication Selectthecaptiveportalencryptiontypehere Options to choose from are Web Redirection Username Password Passcode Remote RADIUS LDAP and POP3 In this section we ll discuss the Web Redirection option Default setting is Enable when select Web Redirection Only Select whether to use either HTTP or HTTPS here After selecting either http or https enter ...

Page 53: ...s that is within the IP address range of your network Enter the subnet mask All devices in the network must share the same subnet mask Enter the IP address of the gateway router in your network Enter a DNS server IP address This is usually the local IP address of your gateway router ...

Page 54: ...entication Select the captive portal encryption type here Options to choose from are Web Redirection Username Password Passcode Remote RADIUS LDAP and POP3 In this section we ll discuss the Username Password option Default isDisableor select Enable to enable the website redirection feature Select whether to use either HTTP or HTTPS here After selecting either http or https enter the URL of the web...

Page 55: ...selection is made Assign a static IP address that is within the IP address range of your network Enter the subnet mask All devices in the network must share the same subnet mask Enter the IP address of the gateway router in your network Enter a DNS server IP address This is usually the local IP address of your gateway router Enter the username for the new account here Enter the password for the ne...

Page 56: ...al encryption type here Options to choose from are Web Redirection Username Password Passcode Remote RADIUS LDAP and POP3 In this section we ll discuss the Passcode option Default isDisableor select Enable to enable the website redirection feature Select whether to use either HTTP or HTTPS here After selecting either http or https enter the URL of the website that will be used in the space provide...

Page 57: ...er the subnet mask All devices in the network must share the same subnet mask Enter the IP address of the gateway router in your network Enter a DNS server IP address This is usually the local IP address of your gateway router Enter the number of ticket that will be used here Enter the duration value in hours for this passcode Select the last active date for this passcode here Year Month and Day s...

Page 58: ...ose from are Web Redirection Username Password Passcode Remote RADIUS LDAP and POP3 Inthissectionwe lldiscusstheRemoteRADIUSoption Default is Disable or select Enable to enable the website redirection feature Select whether to use either HTTP or HTTPS here After selecting either http or https enter the URL of the website that will be used in the space provided Select to Enable or Disable the Capti...

Page 59: ...k All devices in the network must share the same subnet mask Enter the IP address of the gateway router in your network Enter a DNS server IP address This is usually the local IP address of your gateway router Enter the RADIUS server s IP address here Enter the RADIUS server s port number here Enter the RADIUS server s shared secret here Select the remote RADIUS server type here Currently only SPA...

Page 60: ... Password Passcode Remote RADIUS LDAPandPOP3 Inthissectionwe lldiscusstheLDAP option Default is Disable or select Enable to enable the website redirection feature Select whether to use either HTTP or HTTPS here Afterselectingeitherhttp orhttps entertheURL ofthewebsitethatwillbeusedinthespaceprovided Select to Enable or Disable the Captive Portal with its IP interface feature here Enter the VLAN Gr...

Page 61: ...r the LDAP server s IP address or domain name here Enter the LDAP server s port number here Select the authentication mode here Options to choose from are Simple and TLS Enter the LDAP server account s username here Enter the LDAP server account s password here Enter the administrator s domain name here Enter the LDAP account attribute string here This string will be used to search for clients Ent...

Page 62: ...tive portal encryption type here Options to choose from are Web Redirection Username Password Passcode Remote RADIUS LDAP and POP3 In this section we ll discuss the POP3 option Default isDisableor select Enable to enable the website redirection feature Select whether to use either HTTP or HTTPS here After selecting either http or https enter the URL of the website that will be used in the space pr...

Page 63: ...t is within the IP address range of your network Enter the subnet mask All devices in the network must share the same subnet mask Enter the IP address of the gateway router in your network Enter a DNS server IP address This is usually the local IP address of your gateway router Enter the POP3 server s IP address or domain name here Enter the POP server s port number here Select the connection type...

Page 64: ...k the Upload button to initiate the upload Upload Login Style From Local Hard Drive Login Page Style List Inthisfieldthepathtotheloginstylefilethatwill be uploaded will be displayed Alternatively the path can be manually entered here Select the wireless band and login style that will beusedineachSSIDhere ClickDownloadbutton todownloadthetemplatefileforloginpageand Click Del button to delete the te...

Page 65: ...Select the wireless band for MAC Bypass Select the SSID for MAC Bypass EntereachMACaddressthatyouwishtoinclude in your bypass list and click Add When a MAC address is entered it appears in this list Highlight a MAC address and click the Delete icon to remove it from this list TouploadaMACbypasslistfile clickBrowseand navigatetotheMACbypasslistfilesavedonthe computer and then click Upload Todownloa...

Page 66: ...nction as a DHCP server Input the first IP address available for assignment on your network Enter the number of IP addresses available for assignment IPaddressesareincrementsoftheIPaddressspecifiedinthe IP Assigned From field Dynamic Pool Settings All devices in the network must have the same subnet mask to communicate Enter the subnet mask for the network here Enter the IP address of the gateway ...

Page 67: ...ttings to assign the same IP address to a device every time you start up The IP addresses assigned in the Static Pool list must NOT be in the same IP range as the Dynamic Pool After you have assigned a static IP address to a device via its MAC address click Apply the device will appear in the Assigned Static Pool at the bottom of the screen You can edit or delete the device in this list Enter the ...

Page 68: ...rhas assigned using the dynamic pool setting The MAC address of a device on the network that is assigned an IP address from the DHCP dynamic pool The current corresponding DHCP assigned IP address of the device ThelengthoftimethatthedynamicIPaddress will be valid These are the IP address pools of the DHCP serverassignedthroughthestaticpoolsettings The MAC address of a device on the network that is...

Page 69: ...ressesintheAccessControlList Allotherdevices not on the list will be rejected Select Reject to reject the devices with MAC addressesontheAccessControlList Allotherdevices not on the list will be accepted Enter each MAC address that you wish to include in your filter list and click Apply WhenyouenteraMACaddress itappearsinthislist Highlight a MAC address and click Delete to remove it from this list...

Page 70: ...ilter Filter State Click the drop down menu to enable or disable the filter state By default this feature is disabled IP Address Enter the IP address or network address Subnet Mask Enter the subnet mask of the IP address or networks address IP Address List When an IP address is entered it appears in the list Highlight a IP address and click Delete icon to remove it from the list Upload IP Filter F...

Page 71: ... will cause the wireless segment associated with the AP to be disassociated from the AP The default is Enable When disabled all data fromtheEthernettoassociatedwirelessdevices will be blocked Wireless devices can still send data to the Ethernet ThedefaultvalueisEnable whichallowsstations to intercommunicate by connecting to a target AP When disabled wireless stations cannot exchangedataonthesameMu...

Page 72: ...nk bandwidth rates in Mbits per second These values are also used in the QoS and Traffic Manager windows Once the desired uplink and downlink settings are finished click the Save button to have your changes take effect Downlink Bandwidth Uplink Bandwidth The downlink bandwidth in Mbits per second The uplink bandwidth in Mbits per second Uplink Downlink Setting ...

Page 73: ...anges take effect Enable QoS Downlink Bandwidth Uplink Bandwidth Check this box to allow QoS to prioritize traffic Use the drop down menus to select the four levels of priority Click the Save button when you are finished DownlinkBandwidth Thedownlinkbandwidth in Mbits per second This value is entered in the Uplink Downlink Setting window Uplink Bandwidth The uplink bandwidth in Mbits per second Th...

Page 74: ...peed Use the drop down menu to Enable the traffic manager feature Select Deny or Forward to determine how to deal with unlisted client traffic The downlink bandwidth in Mbits per second This value is entered in the Uplink Downlink Setting window The uplink bandwidth in Mbits per second This value is entered in the Uplink Downlink Setting window Enter the name of the traffic manager rule Enter the ...

Page 75: ...on the user can monitor and view configuration settings of the access point Here the user can also view statistics about client information WDS information and more The following pages will explain settings found in the Status section in more detail ...

Page 76: ...ation like firmware version Ethernet and wireless parameters as well as the information regarding CPU and memory utilization Device Information This read only window displays the configuration settings of the DIS 2650AP including the firmware version and the device s MAC address ...

Page 77: ... MAC Band Authentication RSSI Power Saving Mode This window displays the wireless client information for clients currently connected to the DIS 2650AP Displays the SSID of the client Displays the MAC address of the client Displays the wireless band that the client is connected to Displays the type of authentication being used Displays the client s signal strength Displays the status of the power s...

Page 78: ...n System network WDS Information Name MAC Authentication Signal Status ThiswindowdisplaystheWirelessDistribution System information for clients currently connected to the DIS 2650AP Displays the SSID of the client Displays the MAC address of the client Displays the type of authentication being used Displays the client s signal strength Displays the status of the power saving feature ...

Page 79: ...Interface 79 Statistics Displays wired interface network traffic information Ethernet Traffic Statistics Thispagedisplaystransmittedandreceived count statistics for packets and bytes Ethernet Traffic Statistics ...

Page 80: ...s Displays throughput transmitted frame received frame and WEP frame error information for the AP network WLAN Traffic Statistics This page displays wireless network statistics for data throughput transmitted and received frames and frame errors ...

Page 81: ...ssociate with AP and web login The web page holds up to 500 logs View Log The AP s embedded memory displays system and network messages including a time stamp and message type The log information includes but is not limited to the following items cold start AP upgrading firmware client associate and disassociate with AP and web login The web page holds up to 500 logs View Log ...

Page 82: ... notification Outgoing mail server SMTP Clickthedrop downmenutoselecttheSMTP server type options include Internal Gmail Hotmail Authentication Check the box to enable the authentication of the email notification SSL TLS ChecktheboxtoenabletheSSL TLSfunction From Email Address Enter the email address To Email Address Enter the email address Email Server Address Enter the email server address SMTP P...

Page 83: ...ection the user can monitor and view configuration settings of the access point Here the user can also view statistics about client information WDS information and more The following pages will explain settings found in the maintenance section in more detail ...

Page 84: ...ay various hidden administrator parameters and settings Click Save when done Limit Administrator VLAN ID Limit Administrator IP IP Range Check the box provided and the enter the specificVLANIDthattheadministratorwill be allowed to log in from Check to enable the Limit Administrator IP address Enter the IP address range that the administrator will be allowed to log in from and then click the Add bu...

Page 85: ...DNS The default name is dis2650ap Login Settings Each of the five main categories display various hidden administrator parameters and settings User Name Old Password New Password Confirm Password Enter a user name The default is admin When changing your password enter the old password here When changing your password enter the new password here The password is case sensitive A is a different chara...

Page 86: ...D Status Country Settings Select your country Select a Country Choose from the drop down list the country your device is located Console Settings Each of the five main categories display various hidden administrator parameters and settings Status Console Protocol Time out Status is enabled by default Uncheck the box to disable the console Select the type of protocol you would like to use Telnet or...

Page 87: ...ct Settings Choose to enable or disable Nuclias Connect Enable Nuclias Connect Choose from drop down list to enable or disable Nuclias Connect DDP Settings Choose to enable or disable DDP Status Click to disable By default it is enabled ...

Page 88: ...irmware version is displayed above the file location field After the latest firmware is downloaded click on the Choose File button to locate the new firmware Once the file is selected click on the Open and Update button to begin updating the firmware Please don t turn the power off while upgrading You can upload an updated language pack from the device here Click on the Choose File button to locat...

Page 89: ... files of the access point Browse to the saved configuration file you have in local drive and click Open and Upload to update the configuration Click Download to save the current configuration file to your local disk Note that if you save one configuration file with the administrator s password now after resetting your DIS 2650AP and then updating to this saved configuration file the password will...

Page 90: ... date settings Check to enable the AP to get system time from an NTP server from the Internet Enter the NTP server IP address Use the drop down menu to select your correctTime Zone Check the box to enable Daylight Saving Time Use the drop down menu to select the correct Daylight Saving offset A user can either manually set the time for the AP here or click the Copy Your Computer s Time Settings bu...

Page 91: ...llows the user to restart the unit perform a factory reset or clear the language pack settings Logout allows the user to safely log out from the access point s web configuration Help allows the user to read more about the given options to configure without the need to consult the manual The following pages will explain settings found in the configuration and system section in more detail ...

Page 92: ...ry reset of the access point or clear the added language pack Restart the Device Restore to Factory Default Settings Clear Language Pack Click Restart to restart the DIS 2650AP Click Restore to restore the DIS 2650AP back to factory default settings Click to clear the current Language pack running ...

Page 93: ...r Interface 93 Help The help page is useful to view a brief description of a function available on the access point in case the manual is not present Help Scroll down the Help page for topics and explanations ...

Page 94: ... people can have access to data in any location within the operating range of their WLAN Management decisions based on real time information can significantly improve the efficiency of a worker Low implementation costs WLANs are easy to set up manage change and relocate Networks that frequently change can benefit from WLAN s ease of implementation WLANs can operate in locations where installation ...

Page 95: ...s to be almost 3 feet 1 meter thick At a 2 degree angle it looks over 42 feet 14 meters thick Position devices so that the signal will travel straight through a wall or ceiling instead of at an angle for better reception 4 Building Materials make a difference A solid metal door or aluminum studs may have a negative effect on the range Try to position access points wireless routers and computers so...

Page 96: ...Makesurenothingischecked ClickOK Go to the Advanced tab and click the button to restore these settings to their defaults Click OK three times Close your web browser if open and open it Accessthewebmanagement OpenyourwebbrowserandentertheIPaddressofyourD Linkaccesspointintheaddressbar Thisshouldopenthelogin page for your the web management Ifyoustillcannotaccesstheconfiguration unplugthepowertothea...

Page 97: ...ype ipconfig and press Enter This will display the IP address subnet mask and the default gateway of your adapter If the address is 0 0 0 0 check your adapter installation security settings and the settings on your router Some firewall software programs may block a DHCP request on newly installed adapters How to check your IP address If you are connecting to a wireless network at a hotspot e g hot...

Page 98: ...tep 3 Highlight Internet Protocol TCP IP and click Properties Step 4 Click Use the following IP address and enter an IP address that is on the same subnet as your network or the LAN IP address on your router Example If the router s LAN IP address is 192 168 0 1 make your IP address 192 168 0 X where X is a number between 2 and 99 Make sure that the number you choose is not in use on the network Se...

Page 99: ...rsonal Enterprise WEP 64 128 bit Wireless Frequency Range 2 4 to 2 4835 GHz and 5 15 to 5 85 GHz Power Input 12 to 48 V DC terminal block dual input 802 3at PoE Antenna Type 2x Detachable 2 5 dBi Omni antennas 2 4GHz 2x Detachable 3 dBi Omni antennas 5GHz LED Displays PWR1 PWR2 POE ALARM 2 4G 5G STATUS SIGNAL Temperature Operating 20 C to 65 C Storing 40 C to 80 C Humidity Operating 10 90 non cond...

Page 100: ...Antenna Patterns 100 Antenna Patterns Antenna Patterns Orientation H Plane E Plane 2 4 GHz Wall DIN rail Mounted 5 GHz Wall DIN rail Mounted ...

Reviews: