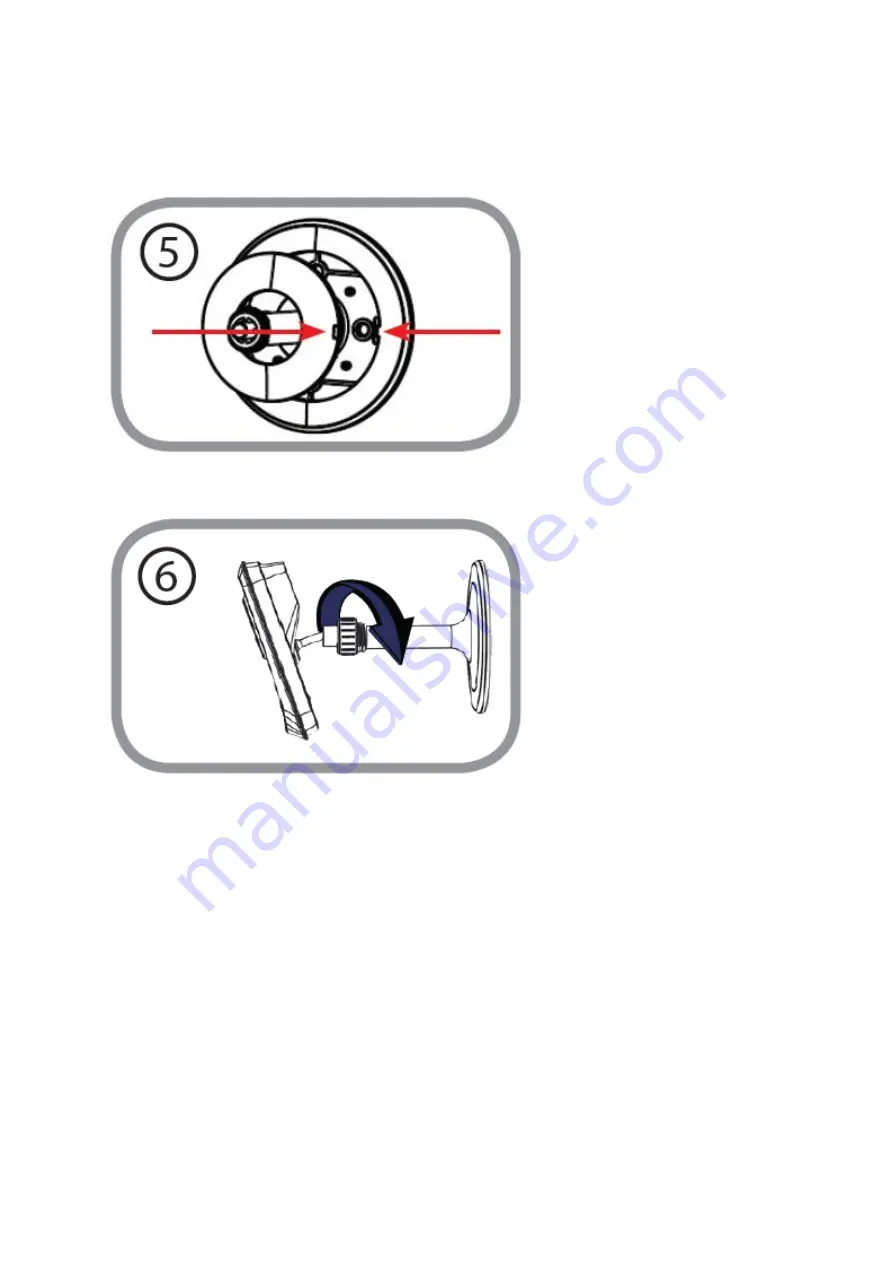
Step 5: Place the base cover back on to the base. Make sure to align the base cover notch,
with the mounting base for future removal. Afterwards, reattach the camera head onto the
mounting base.
Step 6:
Adjust the angle of the camera as desired, then tighten the collar on the camera
stem to lock it in place.
10.
What can I do when Active X fails to install during my mydlink
camera setup?
Step 1: If you have any software firewalls installed (Norton, McAfee, Kaspersky), try
temporarily disabling them and running the wizard again.
Step 2: Ensure you are running the latest setup wizard. Please visit
http://mydlink.com/support to download the latest version for your mydlink camera.
Step 3: Check your web browser settings. Ensure that the security level is set to
Summary of Contents for DCS-942L
Page 4: ......
Page 5: ...Step 4 4 Confirm that the LED on the rear of the camera is lit solid green...
Page 12: ...Step 5 Log in to your mydlink account to view and manage your DCS 942L http www mydlink com...
Page 19: ...Step 3 Select the camera and click on Settings Step 4 Select the Motion Detection checkbox...
Page 21: ...Step 6 Click Finish to save the motion detection area configuration...
Page 22: ...Step 7 Click Save to save the current configuration and activate motion detection...
Page 39: ...Tap the camera that you wish to view the live feed for from the list which appears...
Page 48: ...Green No Motion Detected Red Motion Detected...
Page 58: ...Step 5 Check the option Enable Audio on Active Channel and click OK...


