


5.3
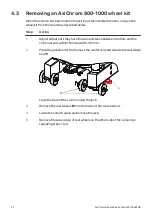
Removing an AxiChrom 1200-1600 wheel kit
When the column has been rolled into position at the intended location, remove the
wheel kit from the column as described below.
Step
Action
1
Make sure that the wheels of the AxiChrom 1200-1600 wheel kit are
immobilized, so that the column cannot begin to roll unexpectedly, before
disconnecting the moving equipment from the attachment hitch
connection.
2
If the column has been moved to a new location, measure the distance
between the column feet and the floor. Adjust the feet as necessary so that
all of the column feet are the same distance from the floor.
NOTICE
Do not adjust the feet of AxiChrom 1200-1600 columns
out from the column stand more than 220 mm from the
base of the column stand to the floor.
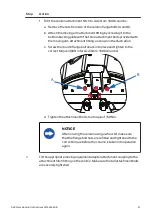
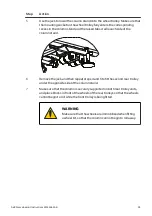
3
Place the jack under the front crossbeam of the column stand, immediately
to one side of the front trolley.
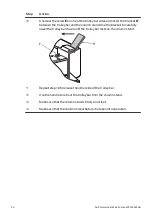
4
Use the jack to lift the front of the column until it is no longer supported by
the front trolley and spacer unit, and then remove the front trolley and spacer
unit.
5
Lower the column until it is supported on the column feet at the front of the
column, as well as on the two rear wheel trolleys.
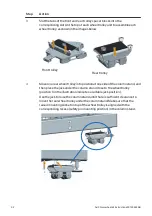
6
Place the jack under the column stand, immediately in front of one of the rear
wheel trolleys.
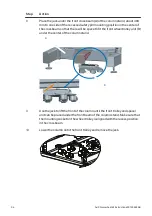
7
Use the jack to raise the column until it is just high enough from the floor for
the rear trolley beside the jack to be removed.
8
Remove the rear trolley located beside the jack, and then lower the column
onto the column foot at that side of the column. Remove the jack.
9
Place the jack under the column stand, immediately in front of the remaining
rear wheel trolley.
10
Use the jack to raise the column until it is just high enough off the floor for the
remaining rear trolley to be removed.
36
AxiChrom wheel kit Instructions 29145462 AB


