1/21
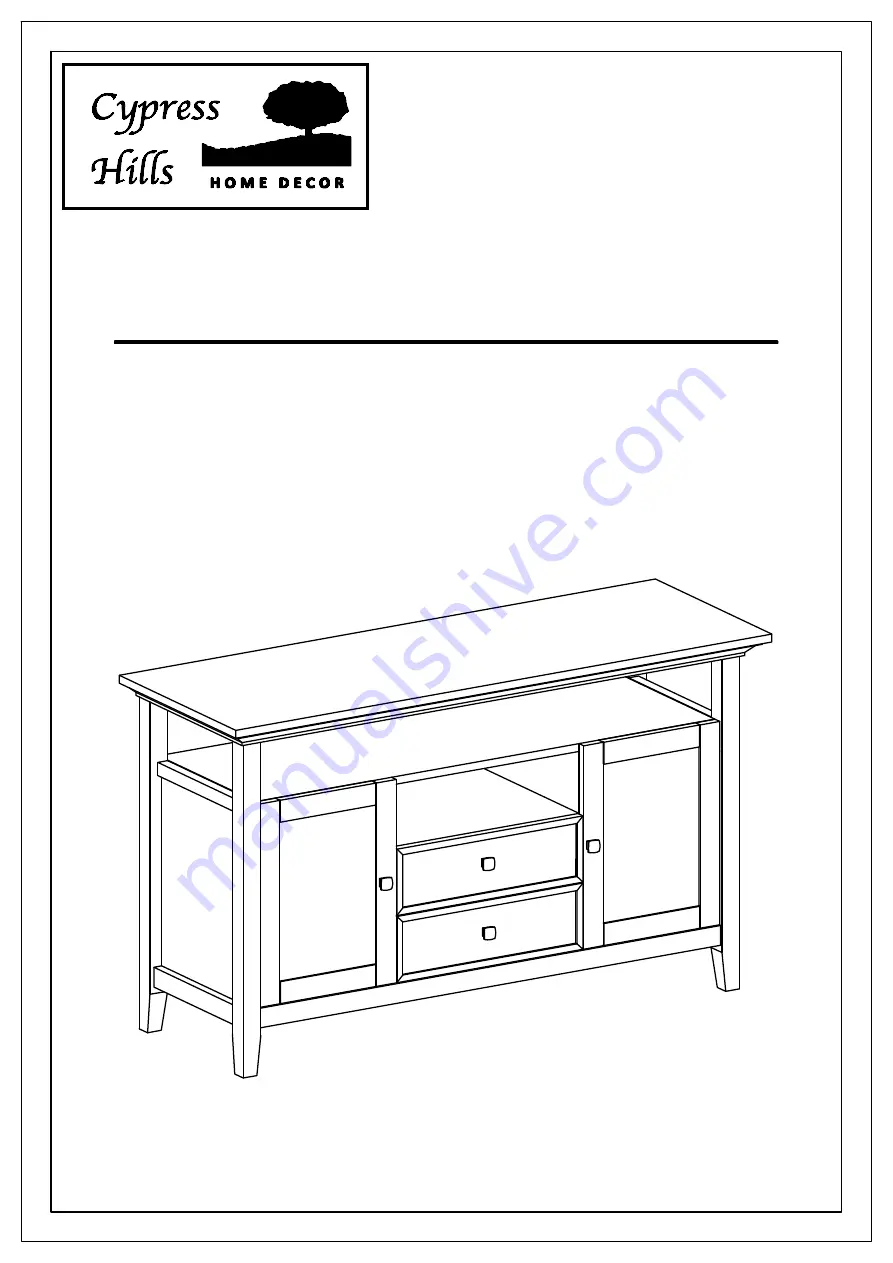
GREYSTONE TALL TV MEDIA STAND
ASSEMBLY INSTRUCTIONS
MODEL # AXCRGREY15
Page 1: ...1 21 GREYSTONE TALL TV MEDIA STAND ASSEMBLY INSTRUCTIONS MODEL AXCRGREY15...
Page 2: ...2 21 DO NOT RETURN FOR REPLACEMENT PARTS OR OTHER INQUIRIES PLEASE CONTACT US AT 1 800 667 8992 PLEASE ENSURE TO HAVE THE COLLECTION NAME AND DESCRIPTION FROM THE PACKAGING OR INSTRUCTION BOOKLET...
Page 3: ...o and or video equipment Do not move furniture without shelves or drawers unloaded Furniture can collapse or tip over onto a child and cause physical injury or death This TV Stand does not come with l...
Page 4: ...in order to obtain another kit before using the furniture Identify all the parts and hardware Do not discard of the packaging until you have checked that you have all of the parts and hardware requir...
Page 5: ...ly works to balance the humidity in your home so it is constant Dry indoor air can suck enough moisture from its surroundings to do permanent damage to wood causing it to crack or split Remember that...
Page 6: ...Y 2 AL B C DL E F RIGHT SIDE QTY 1 AR RIGHT DIVIDER QTY 1 DR TOP BACK PANEL QTY 1 G1 Front Avant Front Avant Front Avant Front Avant Front Avant Warning Label PRE ASSEMBLY INFORMATION MODEL AXCRGREY15...
Page 7: ...BLY INFORMATION MODEL AXCRGREY15 NEED HELP For help with assembly or if you are missing a part Please call customer service at 1 800 667 8992 DRAWER FRONT QTY 2 JL K L M MIDDLE SHELF QTY 1 LEFT DRAWER...
Page 8: ...DLE M4 X 25mm QTY 4 SETS 9 MAGNET AND PLATE QTY 2 SETS PHILLIPS SCREW M4 X 15mm QTY 24 CAM LOCK PIN CAM LOCK QTY 26 SETS 10 11 a M 4 X 2 5 m m Q T Y 2 1 i s e x t r a b M 4 X 1 5 m m Q T Y 1 c M 4 X 2...
Page 9: ...9 21 B G1 H M F C F AL AR DL DR E E G2 Front Avant Front Avant Front Avant Front Avant COMPONENTS KEY DIAGRAM MODEL AXCRGREY15 I L K JL JR...
Page 10: ...ign Cam Lock Pins with pre drilled holes and attach Drawer Sides JL JR 3 Insert two Cam Locks 9 into pre drilled holes on each Drawer Side JL JR 4 Use flathead screwdriver to secure Cam Locks 1 Slide...
Page 11: ...h Drawer Back K using two Allen Key Screws 1 through pre drilled holes on each Side JL JR 3 Use Allen Key 2 to tighten Screws Do not over tighten NOTE The screwdriver is not included in the hardware p...
Page 12: ...Divider DL DR 2 Align Cam Lock Pins with pre drilled holes and attach Middle Shelf M 3 Insert six Cam Locks 9 into pre drilled holes on Middle Shelf M 4 Use flathead screwdriver to secure Cam Locks 9...
Page 13: ...ert three Cam Locks 9 into pre drilled holes on each Divider DL DR 4 Use flathead screwdriver to secure Cam Locks 5 Attach Bottom Shelf C to Dividers DL DR using six Allen Key Screws 1 three screws on...
Page 14: ...3 Insert six Cam Locks 9 into pre drilled holes on Top Shelf H 4 Use flathead screwdriver to secure Cam Locks 5 Attach Sides AL AR to Bottom Shelf C using six Allen Key Screws 1 three screws on each...
Page 15: ...Attach Back Panels G1 G2 to back frame of TV Stand using twenty five Phillips Screws Round Head 6 through pre drilled holes 2 Use Phillips Screwdriver to tighten screws STEP 9 NOTE The screwdriver is...
Page 16: ...pre drilled holes on Doors E 2 Use Phillips screwdriver to attach Handle 8 to Doors E 8 4 10 STEP 11 Front Avant 1 Attach Adjustable Hinges 10 on Door E to each Side AL AR using Phillips Screws 4 int...
Page 17: ...t follow instructions 1 Side adjustment 4 mm To move the door towards the side panel loosen screw I and tighten screw II To move the door away from the side panel loosen screw II and tighten screw I 2...
Page 18: ...oles on Door E 2 Attach Magnets 7 using Phillips Screws 5 into guide holes on Divider D 3 Use Phillips screwdriver to snugly tighten screw STEP 14 1 Use four Shelf Supports 3 for each Cabinet Shelf F...
Page 19: ...STEP 15 19 21 ASSEMBLY MODEL AXCRGREY15 P X 1 Insert assembled drawers into glides on assembled TV stand Note Levelers on bottom of legs can be adjusted if floor is uneven...
Page 20: ...is not included in the hardware pack WARNING Serious or fatal crushing injuries can occur from furniture tip over If the furniture tip over restraint kit is not in the box please contact our customer...
Page 21: ...y tap until the flange on the anchor is against the wall surface 4 Position the bracket over the anchor and use the longer screw to securely attach the bracket to the wall 5 Place the furniture so the...