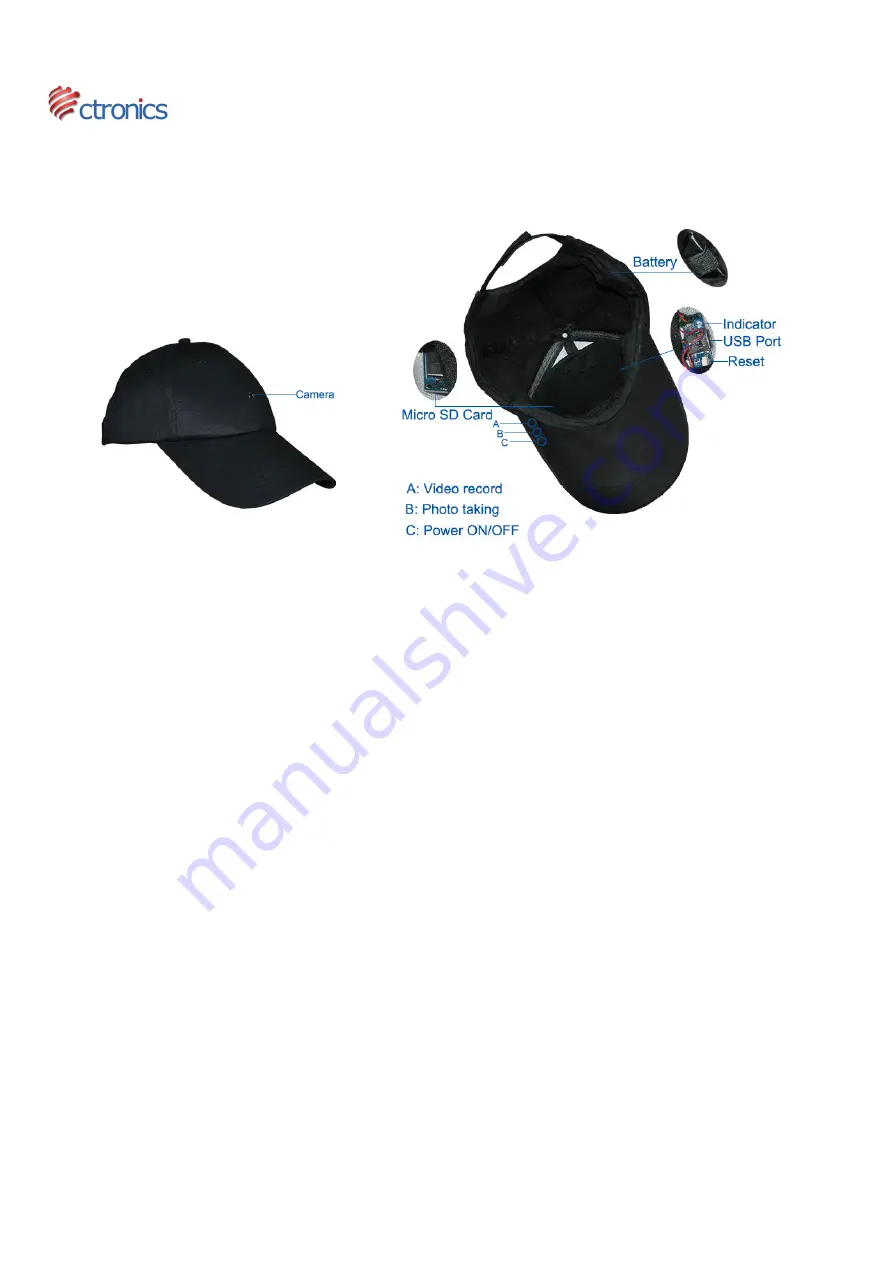
CT-CAP720P
INSTRUCTION MANUAL
www.ctronicssecuritycameras.com
Feature
* 1280*720
* Video recording with audio
* Photo taking
* Vibration
Key instructions:
A: Video record
B: Photo taking
C: Power ON/OFF
1. Operating
1) Power on
: Push and hold the
C
Power button
for 3 seconds.There will be a long vibration indicating that the camera module has
been turned on.(The indicator lighs will go on steady red meaning the camera module is in STANDBY MODE)
2) Recording Video
: Insert a Micro SD Card to Micro SD Card slot, and then hold on the
Power button
for three seconds to turn the
device on. Press the
A button
to start recording.It will have 3 vibration pulses indicating that recording has begun.(The indicator light
will flash Red and Blue during recording).To stop recording,push
A button
again,you will feel 1 short vibration indicating that
recording has stopped.(The indicator will be a steady Red)
3) Photo taking:
Press the
B button
you will feel 1 short vibration indicating that a photo has been captured(Note: You must be in
standby mode to capture photos)
4) Power off:
Press the
C
Power button
for three seconds to turn the device off. While holding the button you will fell a Vibration and
see light indicator turns off.
5) Uploading Files:
The cap camera are designed as a plug-n-play USB device.Making sure the device is powered off before connect
to a computer with the supplied USB cable. A window on the computer will pop up allowing you to view the folder containing your
file(s). The directory of saved files can be found in
\DCIM\100DSCIM\
.
Note:
Depending on system configurations, the time to identify the removable disk will vary slightly. If the device is not being
recognized after 30 seconds, unplug the USB cable and plug back into the computer. If the computer is still unable to identify the
hardware, make sure that your operating system, driver and USB cable are all ok.
6) Charging
:Insert the supplied USB Cable into the USB port located on the right side of the camera module.Then connect the other
end of the cable to a USB port on a computer to begin charging.Once the camera is fully charged,a blue indicator light will come on.It’s
recommended to continue charging 30 minutes after the blue indicator light comes on to obtain a max charge.


