background image

Summary of Contents for 2225405

Page 1: ...2225405 TOP MOUNT REFRIGERATOR Table of Contents 2 www crosley com ...

Page 2: ...ERATOR FEATURES 11 Refrigerator Shelves 11 Lateral Adjustable Shelf 11 Crispers and Meat Drawers 12 Crisper Humidity Control 12 Chilled Meat Drawer 12 Wine or Can Bottle Rack 13 Utility or Egg Bin 13 FREEZER FEATURES 13 Freezer Shelf 13 Adjustable Half width Freezer Shelf 13 Pull out Freezer Floor 13 DOOR FEATURES 14 Door Rails 14 Can Racks and Door Bins 14 Adjustable Utility Compartment Tray 14 F...

Page 3: ...nto a grounded 3 prong outlet Do not remove ground prong Do not use an adapter Do not use an extension cord Disconnect power before servicing Replace all panels before operating Remove doors from your old refrigerator Use nonflammable cleaner Keep flammable materials and vapors such as gasoline away from refrigerator Use two or more people to move and install refrigerator Disconnect power before i...

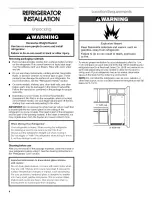
Page 4: ...igerator is heavy When moving the refrigerator for cleaning or service be sure to protect the floor Always pu I the refrigerator straight out when moving it Do not wiggle or walk the refrigerator when trying to move it as floor damage could occur E pJosion Hazard Keep flammabJe materiaJs and vapors such as gasoline away from refrigerator Failure to do so can resuJt in death e ptosion or fire To en...

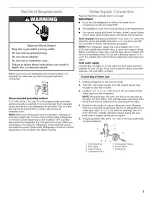
Page 5: ...in above freezing Tools required Standard screwdriver 7 _6in and _ 2 in open end wrenches or two adjustable wrenches V4in nut driver and drill bit hand drill or electric drill properly grounded NOTE Your refrigerator dealer has a kit available with a V4in 6 35 ram saddle type shutoff valve a union and copper tubing Before purchasing make sure a saddle type valve complies with your local plumbing c...

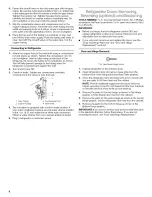
Page 6: ...water conditions require a second water strainer install it in the 1 4in 6 35 mm water line at either tube connection Obtain a water strainer from your nearest appliance dealer 5 Plug in refrigerator or reconnect power TOOLS NEEDED 6 in hex head socket wrench No 2 Phillips screwdriver flat head screwdriver _ _ein open end wrench flat 2 in putty knife IMPORTANT Before you begin turn the refrigerato...

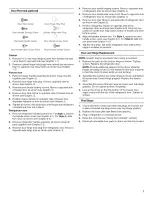
Page 7: ... 4 5 Remove door handle seal screw front Move to opposite side of refrigerator door as shown see Graphic 7 6 Remove door stop Move to opposite side of refrigerator door as shown see Graphic 5 7 Position refrigerator handle on opposite side of the refrigerator door as shown see Graphic 6 3 Drive top two screws in handle first Align lower portion of handle and drive bottom screw 8 Align refrigerator...

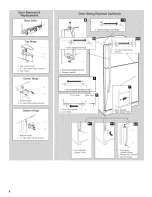
Page 8: ...2 5A_ Hex Head Hinge Screws 2 i1 PI g 1 Cabinet Hinge Hole Plugs 1 Flat Head Handle Screws 2 Freezer Handle Door Handle Sealing Screws Front View Side View _1 i 1 Door Stop Screw 1 2 2 Door Stop 1 Door Handle Screw Cover I Y 1 1 _ Hex_Head Hinge Screws 1 Door Handle Seal Screw Front 2 l Flat Head Handle Screw 2 Refrtgerator Handle 3 Handle Screw ...

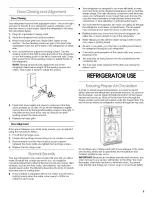
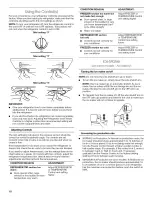
Page 9: ...ear air being forced over the condenser by the condenser fan You may hear water running into the drain pan during the defrost cycle REFRIGERATOR USE 5 Open both doors again and check to make sure that they close as easily as you like If not tilt the refrigerator slightly more to the rear by turning both leveling screws to the right It may take several more turns and you should turn both leveling s...

Page 10: ...perature very warm CONDITION REASON ADJUSTMENT FREEZER section too warm ice Adjust FREEZER or not made fast enough TEMPERATURE Control Door opened often or large one setting higher amount of food added or very cold room temperature can t cycle often enough Heavy ice usage REFRIGERATOR section too cold Controls not set correctly for your conditions Adjust REFRIGERATOR or TEMPERATURE Control one set...

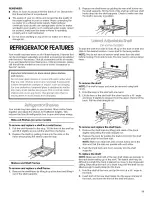
Page 11: ... shelf before moving it from side to side You may need to remove larger items To remove the shelf NOTE The shelf is heavy and must be removed using both hands 1 2 Hold the back of the shelf with one hand Lift the front of the shelf with the other hand to a 45 angle and lower it slightly to release it from the upper channel of the track Pull the shelf straight out Your model may have glass or wire ...

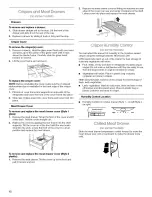
Page 12: ... back Pull the cover straight out 2 Replace the cover by guiding the rear hooks into the shelf supports Tilt the cover up at the front until the rear hooks drop into the slots Lower the front of the cover to a level position and replace the meat drawer To remove and replace the meat drawer cover Style 2 plastic 1 Remove the meat drawer Tilt the cover up at the front and pull it forward and out You...

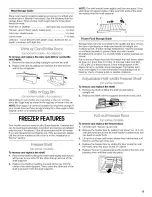
Page 13: ... freezer guide or reliable cookbook Depending on your model you may have a one two or three piece bin Eggs may be stored in the egg tray or loose in the bin No rI Store eggs in a covered container for long term storage If your model does not have an egg storage bin store eggs in their original carton on an interior shelf FREEZER FEATURES Your model may have some or all of these features Features t...

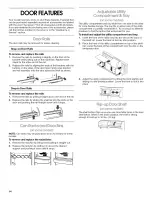
Page 14: ...rail straight down until it stops Ad ustc b e u ty The utility compartment and tray slide from one side to the other for more flexible storage The tray fits on either side of the utility compartment or partially underneath it Try moving it to different positions to find the option that works best for you To install and adjust the utility compartment and tray 1 Insert the front of the utility tray ...

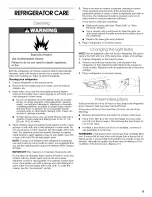
Page 15: ... gaskets If accidental contact does occur clean plastic part with a sponge and mild detergent in warm water Dry thoroughly with a soft cloth To order the cleaner see the Accessories section 5 6 There is no need for routine condenser cleaning in normal home operating environments If the environment is particularly greasy or dusty or there is significant pet traffic in the home the condenser should ...

Page 16: ... home put everything back and refer to the Refrigerator Installation section for preparation instructions Also if your refrigerator has an automatic ice maker remember to reconnect the water supply to the refrigerator TROUBLESHOOTING Trythe solutions suggested here first in order to avoid the cost of an unnecessary service call Your refrigerator will not operate Is the power cord unplugged Plug in...

Page 17: ...itional flushing Run additional water through the water dispenser to flush the water filtration system more thoroughly at least 2 to 3 gal 8 to 12 L or 6 to 7 minutes initially Discard discolored ice The water dispenser will not operate properly Has the water system not filled The water system needs to be filled the first time it is used Use a sturdy container to depress the water dispenser until ...

Page 18: ... Features section for more information Are the gaskets sticking Clean gaskets and the surface that they touch Rub a thin coat of paraffin wax on the gaskets following cleaning Does the refrigerator wobble or seem unstable Level the refrigerator See the Door Closing and Alignment section Were the doors removed during product installation and not properly replaced Remove and replace the doors accord...

Page 19: ...19 ...

Page 20: ...er installation acts of God or use of products not approved by Whirlpool Corporation 5 Any food loss due to product failure 6 Repairs to parts or systems resulting from unauthorized modifications made to the appliance 7 Replacement parts and repair labor costs for units operated outside the United States 8 Any labor costs for replacement of the water filter during the limited warranty period WHIRL...

Reviews: