background image

Using Sound Blaster Live!     15

)!/

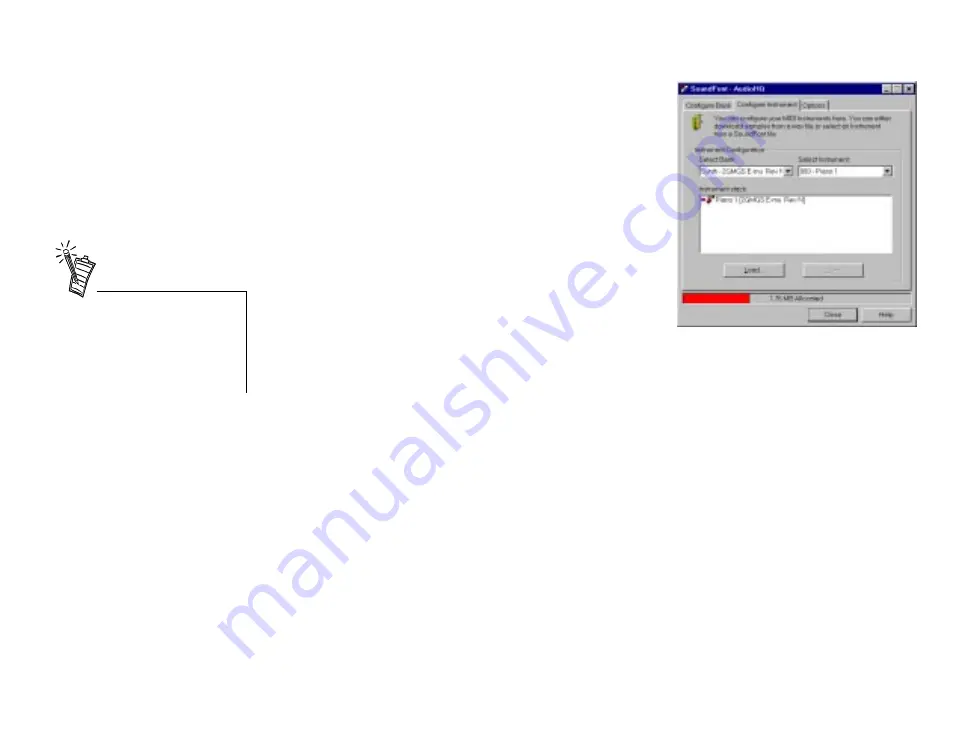
To configure an instrument:

1. In the SoundFont dialog, click the Configure 

Instrument tab.

2. In the Select Bank list, select the bank whose 

instruments you want to configure.

3. In the Select Instrument list, select the instrument to 

configure.
In the Instrument Stack, you may see an instrument 
entry although you did not load an instrument on this 
page. The instrument can be found in a bank loaded on 
the Configure Bank tab page.

4. Click the Load button and load a SoundFont or single-

instrument (for example, .WAV) file.
The last file loaded always appears at the top of the 
Instrument Stack with an arrow pointing to it.

5. To clear an instrument from the stack, select the instrument and then click the Clear button.
6. For faster processing of SoundFont files, the files are loaded into memory. You need to set the 

maximum amount of cache memory your SoundFont files can occupy, so that your system 
performance does not suffer from insufficient memory. You can also set the caching algorithm for 
a balanced system performance.

Setting the maximum amount of 
cache memory for SoundFont files 
does not mean setting aside or 
reserving the space. The space can 
still be used by your computer or 
other files, if needed.

Summary of Contents for Live 5.1

Page 1: ...SoundBlaster Live 5 1 User Guide On line Version ...

Page 2: ...shall obtain a Return Merchandise Authorization RMA number from the nearest support center and be responsible for all efforts and costs incurred in transporting mailing shipping insuring the defective hardware or item s to and from the support center A copy of a dated proof of purchase e g a store receipt should be enclosed in the returned package with the RMA number clearly indicated on the outsi...

Page 3: ... 889 8 889 889 A B 8 889 8 889 889 889 8 889 889 889 889 8 889 889 889 889 889 8 889 889 8 889 889 889 889 889 889 889 889 889 889 889 8 B C B 8 08 90 B 8 B 8 C D B 9 D D 0 0 8 D B 889 889 889 C 889 9 9 D E0 8 8 B D D A 0 F 3 F 3 0 0 C G D 3 3 1 1 4 3 1 1 D G 1 1 1 1 1 1 1 1 1 1 5 1 3 ...

Page 4: ...tested according to the FCC CISPR22 85 requirement for Class B devices and found compliant with the following standards EMI EMC ANSI C63 4 1992 FCC Part 15 Subpart B This device complies with part 15 of the FCC Rules Operation is subject to the following two conditions 1 This device may not cause harmful interference and 2 This device must accept any interference received including interference th...

Page 5: ...ive Software 6 Setting Up Joystick Drivers in Windows NT 4 0 7 Creative Software 8 Additional Sound Blaster Live Applications 8 Sound Blaster Live Experience 9 Creative Diagnostics 9 Creative Launcher 9 Options 9 Groups 10 Surround Mixer 11 Main Section 11 Mixer Section 11 Analog Digital Output 12 Bass Redirection 12 Dolby Digital AC 3 Decoding 12 AudioHQ 13 SoundFont Control 14 ...

Page 6: ...dio 19 Creative PlayCenter 2 20 Creative Recorder 20 Creative LAVA 21 PixAround PixMaker Creative Edition 21 Positioning Your Speakers 22 Connecting Optional Devices 23 Recording and Content Authoring 24 Sound Blaster Live 25 PCI Bus Mastering 25 EMU10K1 25 Stereo Digitized Voice Channel 25 AC 97 Codec Mixer 25 Volume Control 26 Dolby Digital AC 3 Decoding 26 Creative Multi Speaker SurroundTM CMSS...

Page 7: ...tions 28 Digital Audio Options 28 MS DOS Mode Utilities 29 SBECFG EXE 29 SBEMIXER EXE 29 SBESET EXE 30 SBEGO EXE 30 Software 30 Sound 31 Surround Mixer 33 Insufficient SoundFont Cache 34 Joystick 34 I O Conflicts 35 Windows NT 4 0 35 Encore DVD Player 36 ...

Page 8: ...e highest fidelity and absolute clarity Combine it with a four or five speaker setup and you ll experience realistic 3D audio EAX in supported games and enjoy your movies with true surround sound The Live Ware upgrade program keeps your Sound Blaster Live card up to date supporting future technologies functionality and features To create your own music or audio content in the future Sound Blaster ...

Page 9: ...stallation Included applications may need higher system requirements or microphone for basic functionalities Refer to the documentation for individual applications for details Through Live Ware new features and applications are always available so you may experience the latest technology and extend the life of your card Each upgrade rejuvenates your audio card allowing you to experience new functi...

Page 10: ...ation are included The following illustration shows the basic components necessary for a complete installation Phillips Screwdriver not included Audio Card Creative Audio Software and Applications Refer to the colored insert for specific information about your audio card ...

Page 11: ... audio output Also supports headphones TAD Modem Audio I O Provides a mono connection from a standard voice modem and transmits microphone signals to the modem Rear Out jack Connects to powered speakers or an amplilfier for audio output CD SPDIF connector Connects to a SPDIF output on a CD ROM AUX connector Connects to internal audio sources such as TV tuner MPEG or other similar cards SPDIF Exten...

Page 12: ... cover 4 Locate a PCI slot to accommodate the audio card Remove the slot cover from your computer save the screws to secure the audio and extension cards 1 2 3 4 PCI slot for audio card Remove or disable any existing audio card and its driver from your computer Refer to the manufacturer s documentation for details Before you remove the computer cover touch a grounded metal surface to discharge sta...

Page 13: ...udio card s CD audio connector Optionally connect the CD SPDIF cable from your CD ROM or PC DVD to the audio card s CD SPDIF connector 5 6 CD audio connector 7 CD or PC DVD audio connector CD audio connector Use the MIDI In jack of the audio extension card to connect a MIDI input device connect a gamepad to the audio card You can connect only one MIDI device to Sound Blaster Live at a time If you ...

Page 14: ...nector to the digital audio connector of the CD ROM or PC DVD drive CD ROM drive Line Out Joystick MIDI GamePad Line out Microphone MPC to MPC 4 pin audio cable Rear Out Sound Blaster Live To analog input of FourPointSurround speakers MPC to MPC 2 pin audio cable PC DVD drive Line In Cassette CD player Synthesizer etc Mic In Connects to Optical Digital I O card or Drive Connects to digital speaker...

Page 15: ...tion program does not run follow the instructions below to set up AutoPlay 1 Click Start on the Windows Taskbar choose Settings and click on Control Panel 2 In the Control Panel window double click the System icon 3 In the System Properties dialog click the Device Manager tab and select your CD ROM drive 4 Click the Properties button 5 In the Properties dialog click the Settings tab and select Aut...

Page 16: ... Unlisted Or Updated Driver from the List of Drivers and then click the OK button 5 Insert the Windows NT 4 0 CD ROM into the CD ROM drive 6 In the Install Driver dialog type E DRVLIB MULTIMED JOYSTICK X86 E is the CD ROM drive letter and then click the OK button 7 On the Add Unlisted Or Updated Driver dialog select Analog Joystick Driver and then click the OK button 8 On the Microsoft Joystick Co...

Page 17: ...e LAVA PixAround PixMaker Creative Edition Each of the applications included with Sound Blaster Live provides online help to guide you during the use of that software To run a Creative Software application 1 Click Start on the Windows Taskbar select Programs select Creative select Sound Blaster Live and click on the application you want to open Applications included with Sound Blaster Live are occ...

Page 18: ...e access to Creative applications The Creative Launcher is installed at the top of your screen If it does not appear move your mouse pointer to the top of the screen As the pointer reaches the top of the screen it changes to a pointing hand and the Creative Launcher displays as a bar window The Launcher consists of the System Menu icon the Creative logo at the top left corner the web site icon the...

Page 19: ... within each group on the Launcher The Live Task tab on the Launcher offers a task oriented form to help you select the correct application for a task The application can be launched with its associated Super Environment Presets using the Launcher The controls are arranged intuitively I want to perform a task With Super Environment preset You can create and save new Super Environment presets in Cr...

Page 20: ... to switch between three different views EAX Select and create environments position audio sources within the configuration space Speaker Set up speakers and perform a speaker output test Spectrum Select and display the spectrum analyzer during playback or recording The Mixer section allows you to Mix sounds from various audio input sources when playing or recording Adjust the volume level for the...

Page 21: ...rected and added to the low frequency source effects LFE channel to produce deeper subwoofer output To enable bass redirection 1 On the Surround Mixer click the Speaker button 2 In the Speaker view click the Speaker Selection button and select 5 1 speaker mode 3 Click the Advanced button 4 In the dialog click the Bass Redirection button 6 789 Dolby Digital decoding allows Sound Blaster Live to dec...

Page 22: ...udio devices on your computer AudioHQ can be accessed by using any of the following methods Click the AudioHQ tab in Creative Launcher Click Start on the Taskbar select Programs select Creative select Sound Blaster Live and click on AudioHQ Click the AudioHQ icon located at the bottom right corner of your Windows desktop ...

Page 23: ... an arrow 4 To replace a SoundFont file click the file and then click the Replace button 5 To clear a bank from the stack select the bank and then click the Clear button A variation bank can only be cleared by clearing its main bank 6 Repeat Steps 3 4 or 5 as required By stacking a SoundFont file instead of replacing one with the other you may return to the original sounds or use the new selection...

Page 24: ...rument for example WAV file The last file loaded always appears at the top of the Instrument Stack with an arrow pointing to it 5 To clear an instrument from the stack select the instrument and then click the Clear button 6 For faster processing of SoundFont files the files are loaded into memory You need to set the maximum amount of cache memory your SoundFont files can occupy so that your system...

Page 25: ...io devices for audio playback The EMU8008 chip or higher on your audio device allows multiple simultaneous Wave playback sessions therefore you can play several games at the same time and enjoy the sounds from them all 2 To set maximum simultaneous Wave playback sessions On the Wave tab page drag the Maximum Simultaneous Wave Playback slider to the right to set a higher number of wave playback ses...

Page 26: ...rst connect a MIDI input device to your audio card and then select that device in Creative Keyboard To test an instrument 1 In Creative Keyboard click the bank and the instrument you want 2 Click the keys on the keyboard to test the sound If you have an external MIDI input device you may find it easier to use Use mouse to Select multiple notes to play simultaneously Use the right mouse button to c...

Page 27: ...s environments to help you get started EAX Control can be also be accessed from Creative Surround Mixer Online help gives detailed instructions on how to Configure master effects Add or remove effects from an environment Specify the effect type Specify the degree or amount of the effect Edit an effect all the way down to its parameters or building blocks Configure source effects that is set the am...

Page 28: ...ist click the Browse button to locate and open the application 2 In the Speaker Output box click the speaker output to configure 3 In the Linked Super Environment box click the Super Environment preset you want to associate with the application speaker output combination This combination trio is automatically set 4 If you want AutoEA to monitor this application s activity clear the Do not monitor ...

Page 29: ...8 B CB 8 B CB 5 7 Recorder allows you to record sounds or music from various input sources such as a microphone or audio CD and save them as Wave wav files For details on how to use Recorder see the Creative PlayCenter online help ...

Page 30: ...d by LAVA or create your own environments and scenarios for your animation 2 PixMaker CE lets you create your own 360 interactive PixAround scenes web pages and postcards in three steps snap stitch and publish You can also insert audio spots in your scenes that play audio files when clicked Also included with PixMaker CE is PixScreen which lets you view PixAround scenes Navigate around a 360 PixAr...

Page 31: ...corner of the room With FourPointSurround Digital speakers from Cambridge SoundWorks for example DTT3500 5 1 digital you can experience crystal clear gaming sequences or music from the Digital DIN connection A minijack to DIN cable is bundled with the speaker set for this connection Or connect an analog 5 1 channel speaker system such as the Cambridge Soundworks DeskTop Theater 5 1 DTT2200 or your...

Page 32: ...aster Live Digital Output Connect for downmix audio only when a Dolby Digital AC 3 decoder speaker system is not available Digital DIN MPEG2 decoder Dolby Digital AC 3 SPDIF In Dolby Digital AC 3 SPDIF Out jack Analog Line and Rear Inputs Digital DIN FourPointSurround Digital Speaker System Creative PC DVD and DeskTop Theater 5 1 Digital Speaker System Connects to the Optical Digital I O card or L...

Page 33: ...andard 5 drive bay of your computer and for easy access to the connectors on its front panel The Headphones and Microphone inputs utilize jacks for high quality connectivity Digital I O Module Optical Digital I O card Live Drive MIDI devices MIDI devices Second analog Line In for an additional recording device Line In 2 Digital In Out Digital DIN MIDI In MIDI Out Digital device e g DAT MiniDisc Re...

Page 34: ...uality digital mixing and equalization Up to 32 MB of sound RAM mapped to host memory A True 16 bit Full Duplex operation 16 bit and 8 bit digitizing in stereo and mono modes Playback of 64 audio channels each at an arbitrary sample rate ADC recording sampling rates 8 11 025 16 22 05 24 32 44 1 and 48 kHz Dithering for 8 bit and 16 bit recording BC Mixes EMU10K1 audio sources and analog sources su...

Page 35: ...ener Line level analog Line input via stereo jack on rear bracket Mono Microphone analog input via stereo jack on rear bracket CD_IN line level analog input via 4 pin Molex connector on card AUX_IN line level analog input via 4 pin Molex connector on card TAD line level analog input via 4 pin Molex connector on card CD_SPDIF digital input via 2 pin Molex connector on card accepting sampling rates ...

Page 36: ...e Command Prompt Only option and then press the ENTER key Some older games may have difficulty detecting the Sound Blaster Live card at certain resource settings Typically these games would expect the card to be at a fixed set of resources and would fail to load if those resources are not detected If you have older MS DOS games that do not work properly try changing the Sound Blaster Live SB16 Emu...

Page 37: ...e games allow you to set the MIDI port address They must match the MIDI address in the Resources list on the Resources tab page of the Creative Sound Blaster Live SB16 Emulation Properties dialog The same values can be found under MPU 401 General MIDI Roland MT 32 LAPC 1 Emulation displayed by SBECFG EXE in MS DOS mode Remember to enable the MT 32 MIDI patch with the SBEMIXER program if you select...

Page 38: ...es with particular volume levels or within the SBEMIXER screen The settings for SBEMIXER EXE are independent of the Creative Mixer settings in Windows 95 98 To set SBEMIXER values in the command line At the DOS prompt type the SBEMIXER command in a single line SBEMIXER S x W x C x M x Square brackets denote optional parameters Parameter Specifies S x Synth volume x can be a value from the range 0 ...

Page 39: ...Specifies Axxx SB interface s base I O address Ix IRQ line used by the audio interface Dx First DMA channel used by the audio interface Hx Second DMA channel used by the audio interface Pxxx MPU 401 UART interface s base I O address dx SB Emulation mode For x 1 is Off 0 is On wx Set x to 1 to use the Windows assigned resource configuration Set x to 0 to use your user assigned resource configuratio...

Page 40: ...he current audio file To switch to an appropriate environment 1 Open the Environmental Audio control utility OR Display Creative Launcher It is found at the top or bottom of your screen you may have to bring your pointer to the edge of the screen to display Launcher And then click the Environments tab 2 In the Environment list select No effects or an appropriate environment Check the following The...

Page 41: ... mode and must connect to digital speakers to hear the sound from your audio card Possible causes Speaker volume if any is not set properly External amplifier or speakers are connected to the wrong jack Hardware conflict Speakers selection in the Environment deck of Surround Mixer is incorrectly selected Original Sound in either the Master or Source tab pages of Environmental Audio is set at or ne...

Page 42: ...balance in Windows Volume Control is at the opposite end compared to the position to which you panned the source in the Environment deck of Surround Mixer To solve this problem 1 Open the other mixer Windows Volume Control and center the balances for all the audio input sources This ensures that analog sources do not turn mute when you pan them in Surround Mixer To solve this problem Dissociate th...

Page 43: ...e is 2 MB 2GMGSMT SF2 1 2 The audio card s joystick port conflicts with the system s joystick port To solve this problem Disable the audio card s joystick port and use the system port instead The program may use the system processor timing to calculate the joystick position When the processor is fast the program may determine the position of the joystick incorrectly assuming that the position is o...

Page 44: ...System Properties dialog click the Device Manager tab 4 Under the Sound Video And Game Controllers entry select the conflicting audio card driver indicated by an exclamation mark and click the Properties button 5 In the Properties dialog click the Resources tab 6 Make sure that Use Automatic Settings is selected and click the OK button 7 Restart your system to allow Windows 95 98 to reassign resou...

Page 45: ...e General tab page of the Creative Disc Detector dialog select Enable Disc Detector 3 Click the Players tab 4 Select the DVD Disc entry and then click the Select Player button 5 In the Players Properties dialog click the Browse button 6 Browse to C Program Files Creative PC DVD Encore and double click the entry ctdvdply The Name box now displays the entry ctdvdply 7 Click the OK button twice to cl...

Reviews: