background image

Summary of Contents for 486.24311

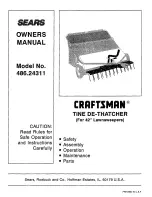
Page 1: ...24311 CAUTION Read Rules for Safe Operation and Instructions Carefully CRRFTSI4RN TINE DE THATCHER For 42 Lawnsweepers Safety Assembly Operation Maintenance Parts Sears Roebuck and Co Hoffman Estates IL 60179 U S A F_RfNTED IN U S A ...

Page 2: ...f this equipment Be aware of changing conditions on slopes Refer to safety rules in the vehicle owner s manual concerning safe operation on slopes STAY OFF OF STEEP SLOPES Always operate up and down a slop_ never across the face of a slope This equipment should be operated at reduced speed on rough terrain along creeks and ditches and on hillsides to prevent tipping and loss of control Do not driv...

Page 3: ...3 4 Lg Carriage Bolt 5 16 18 x t Lg Carriage Bolt 5 16 18 x 3 4 Lg J K L M I 23 t5 1 Flat Washer 5 16 Std Wrt Lock Washer 5 16 Tooth Lock Washer Hairpin Cotter 3 32 Hex Nut 5 16 Hex Lock Nut 5 16 Palnut 1 4 Palnut 3 8 Ftat Washer 1 1 2 O D N O P Q R t 1 1 3 2 Knob Grip Height Adjustment Handte Grip Height Adjustment Strap Angle Bracket Hitch Arm Mount Bracket ...

Page 4: ...hers 5 16 lock washers and 5 16 hex nuts Tighten See figure 1 NOTE Tines must be seated between dimples and against front edge of tine shield TOOTH LOCK WAS_ SPRING 5 16 x 3 4 CARRIAGE BOLT TINE SHIELD FRONT FIGURE 1 Place one end of the spring alignment rod against a hard surface and use a hammer to tap a 1 4 palnut onto the rod Assemble a t 2 flat washer six spring tines all facing the same dire...

Page 5: ...T _ HOLE Assemble the hftch arm mount brackets to the top of the tine shield using a 5 16 x 3 4 hex bolt a 5 16 lock washer and a 5 16 hex nut for each bracket See figure 5 5 16 x 3 4 HEX HITCH ARM MNT BRKT _ FIGURE 5 Assemble the hitch mount bars to the outside of the angle brackets using two 5 16 x 3 4 he bolts and two 5 16 hex lock nuts Fasten through the slotted holes in the bars Tighten so th...

Page 6: ...ex nuts which fasten the ends of the sweeper hitch tubes together Assemble the channel hitch bracket to the hitch tubes using two new 5 16 x 3 t 4 hex bolts and re using the original 5 16 lock washers and 5 I6 hex nuts See figure 9 5 16 HE NUT ORIGINAL 5 16 LOCK WASHER 7 5 16 x 3 1 4 HEX BOLT FIGURE 9 Remove the height adjustment handle from the sweeper keeping all of the hardware for use with the...

Page 7: ...hard surface Using a hammer tap the palnut onto the solid end of the pivot rod Place the de thatcher underneath the hitch tubes in front of the sweeper Connect the hitch mount bars to the hitch mount arms using the pivot rod and the 3 32 hairpin cotter as shown in figure 12 NOTE If the hitch mount bars do not line up as shown with the hitch mount arms the angle brackets at the rear of the tine shi...

Page 8: ...or raise it to the transport position and then retighten the knob SETTING THE OPERATING POSITION There are adjustment slots to help achieve proper height and leveling of the de thatcher during sweeping Proper adjustment of the tine shield and spring tines is important for effective performance Drive the towing vehicle and Eawnsweeper de thatcher onto smooth tevel ground or paved surface Set the sw...

Page 9: ...are digging excessively into the soil raise the height setting of the de thatcher If the front tines pull back and don t achieve a flippin action slightly raise the front end of the de thatcher CUSTOMER RESPONSIBILITIES Read and follow the maintenance schedule and the maintenance procedures listed in this section MAINTENANCE SCHEDULE Fill in dates as you complete regular service Check for loose fa...

Page 10: ...19 13 18 8 16 2 12 20 27 18 19 13 2O 6 15 19 1 3 ...

Page 11: ...k WaSher 5 16 Hex Nut 5 16 18 Thread 1 Height Adjustment Lever 1 Spring Alignment Rod 1 Pivot Rod 2 Hitch Mount Bar 1 Height Adjustment Handle 2 Hitch Arm Mount Bracket 3 Angle Bracket 2 Hex Bolt 5 16 18 x 3 1 4 Lg 12 Hex Bolt 5 16 18 x 3 4 Lg 13 Carriage Bolt 6 16 18 x 3 4 Lg 15 Tooth Lock Washer 5 16 I D 20 43572 21 43943 22 43064 23 44326 24 46831 25 43081 26 43720 27 726 0106 47306 1 3 2 1 1 1...

Reviews: