11
OPERATION
REMOVING BITS
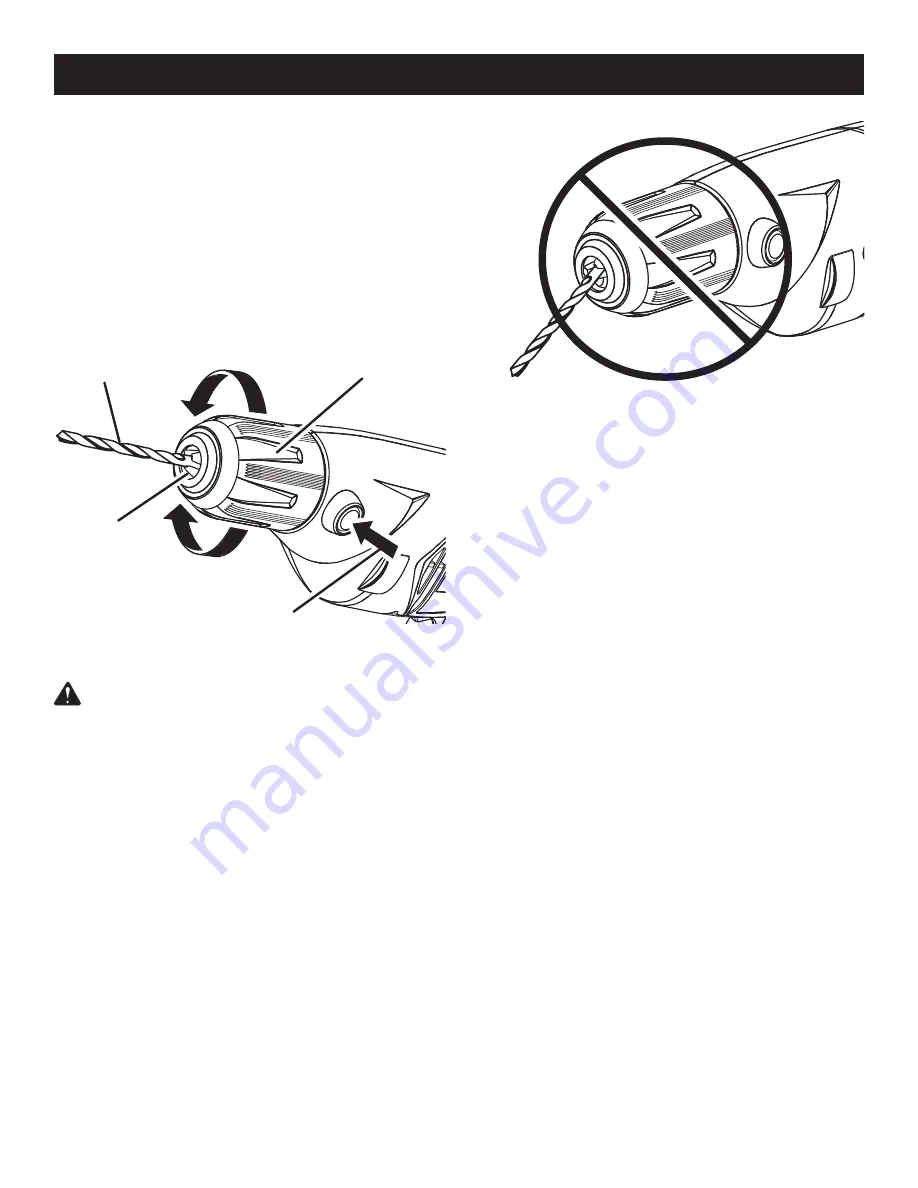
See Figure 3.
n
Unplug the drill.
n
Depress the spindle lock button.
n
While keeping the button depressed, rotate the chuck
in either direction until it clicks into a position that will
not allow it to rotate.
n
Keeping the spindle lock button depressed, rotate the
chuck counterclockwise to open the chuck jaws.
n
Remove the drill bit.
RIGHT
WARNING:
Make sure to insert the drill bit straight
into the chuck jaws. Do not insert the drill bit into the
chuck jaws at an angle then tighten, as shown in fig-
ure 4. This could cause the drill bit to be thrown from
the drill, resulting in possible serious personal injury
or damage to the chuck.
NOTE:
Rotate the chuck body in the direction of the arrow
marked
LOCK
to tighten the chuck jaws.
n
Rotate the chuck clockwise to tighten the chuck jaws
securely on the bit.
n
Rotate the chuck body slightly to release the spindle
lock.
Fig. 4
WRONG
INSTALLING BITS
See Figures 3 - 4.
n
Unplug the drill.
n
Depress the spindle lock button.
n
While keeping the button depressed, rotate the chuck
in either direction until it clicks into a position that will
not allow it to rotate.
n
Keeping the spindle lock button depressed, rotate the
chuck counterclockwise to open the chuck jaws.
n
Insert the drill bit.
Fig. 3
DRILL BIT
UNLOCK
(RELEASE)
CHUCK
JAWS
LOCK
(TIGHTEN)
CHUCK
BODY
DEPRESS SPINDLE LOCK
BUTTON TO ENGAGE


