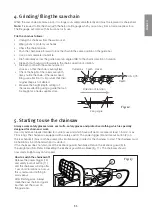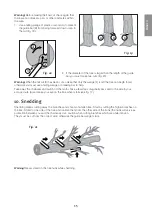
14
EN
GL
IS
H
9. Tree felling
This chainsaw is not intended for felling, but mostly for small jobs such as removing branches and sawing
logs. However, it can be used on exception for felling small trees.
Ask someone who knows how to use
a chainsaw for advice if you are in the least unsure of how to use the chainsaw.
Protective equipment should always be used for forestry work: Helmet with ear defenders and visor, chainsaw
trousers or leggings, chainsaw boots or shoes with non-slip soles and toe caps and of course a first aid kit.
Also use work clothes in a visible colour that stands out.
• Small trees can often be felled with one cut almost entirely through the whole trunk and pushed in
the correct direction by hand or by a shoulder. (Do not cut completely through, save a little of the trunk to be
used as a hinge).
• Larger trees require directional cuts. Directional cuts determine the direction of the fall.
2
1
2
3
1
2
1
2
3
1
Warning!
Always make sure that you have an escape
route ready. If needed take away bushes and branches
that are in the way. The best escape route (A) is
diagonally behind the felling direction.
Warning!
Always make sure to stand on the uphill
position of the tree if the ground is uneven at the site of
felling, as it with great probability that the tree will glide
or roll downward after felling.
Note:
The tree’s felling direction (B) is determined
by directional felling. Check before felling if the tree
leans somewhat towards one direction or another or if
the branches are much larger on one side of the tree
so that the tree has a natural fall direction.
10
A
10
B
10
C
10
F
Warning!
Never fell a tree alone or if there is risk for it falling onto something which can be damaged, house, fence etc.
Get help from a professional. Never fell a tree close to a power line or telephone line. Check that there are
no onlookers or pets close by before you begin cutting. Look up often and check that no one is approaching
the risk area.
Normal tree felling consists of two cutting phases, directional cutting (C) and felling cut (D).
Start with the top directional cut (C) on the side
of the tree which is facing the felling direction.
Then make a bottom directional cut horizontally
so that it will meet the top directional cut (do not
cut too far). The directional cut should be broad
enough so that it will steer the tree during a large
part of the fell as possible.
Warning!
Never walk in front of a tree where you
have made a directional cut.
Make the fell cut (D) from the other side of
the tree and 3-5 cm over the botton directional
cut.
NEVER cut through the remaining trunk completely. Always leave a hinge (F). It is the hinge that steers
the tree during the fall. If the tree is completely cut through you will loose control of the direction of the fall
and the tree can fall in any direction. Place a felling wedge or breaking bar in the felling cut before the cutting
has been completed. If you cut the entire fell cut before placing a felling wedge or breaking bar in the cutting
track the tree can bend backwards and clamp down on the guide bar. Before felling the tree check that no
onlookers or pets are within the risk area.
45º
3–5 cm
3/4
1/4
10
D
Fig. 17
Fig. 18
Summary of Contents for YT4755
Page 83: ...83...


