Service Manual Ponygraphic
Chapter 6
Service Procedures
6.3
6.1.2. Replacing the internal Rechargeable batteries
The Pony graphic Unit is supplied by 2 rechargeable Nickel Cadmium Batteries (2.4 Volt, 1200
mAh), soldered to the mother board.
The life duration of the batteries depends strongly from how they are used (frequent charges
and discharges stress the elements). When you verify that the autonomy of the system is
unacceptably reduced (this can occur normally in 2 years), it is time to replace the batteries.
Procedure
1. Be sure that the Pony graphic is off.
2. Open the rear panel of the Pony graphic as the described in the chapter
"Disassembling the Pony graphic - Pony graphic Unit".
3. Disassemble the Mother board from the front case (4 screws fixes the PCB to the
plastic case).
4. Unsolder the terminals of the batteries from the PCB and pull them out gently.
5. Place the new batteries paying attention to fix the thermistor on the older battery as
found before the replacement.
6. Solder the connections of the batteries on the PCB.
7. Reassemble the Pony graphic unit.
Parts required
For the mentioned procedure you need the following items:
P/N
Description
6.2. Electronics
6.2.1. Display
contrast
Adjustment
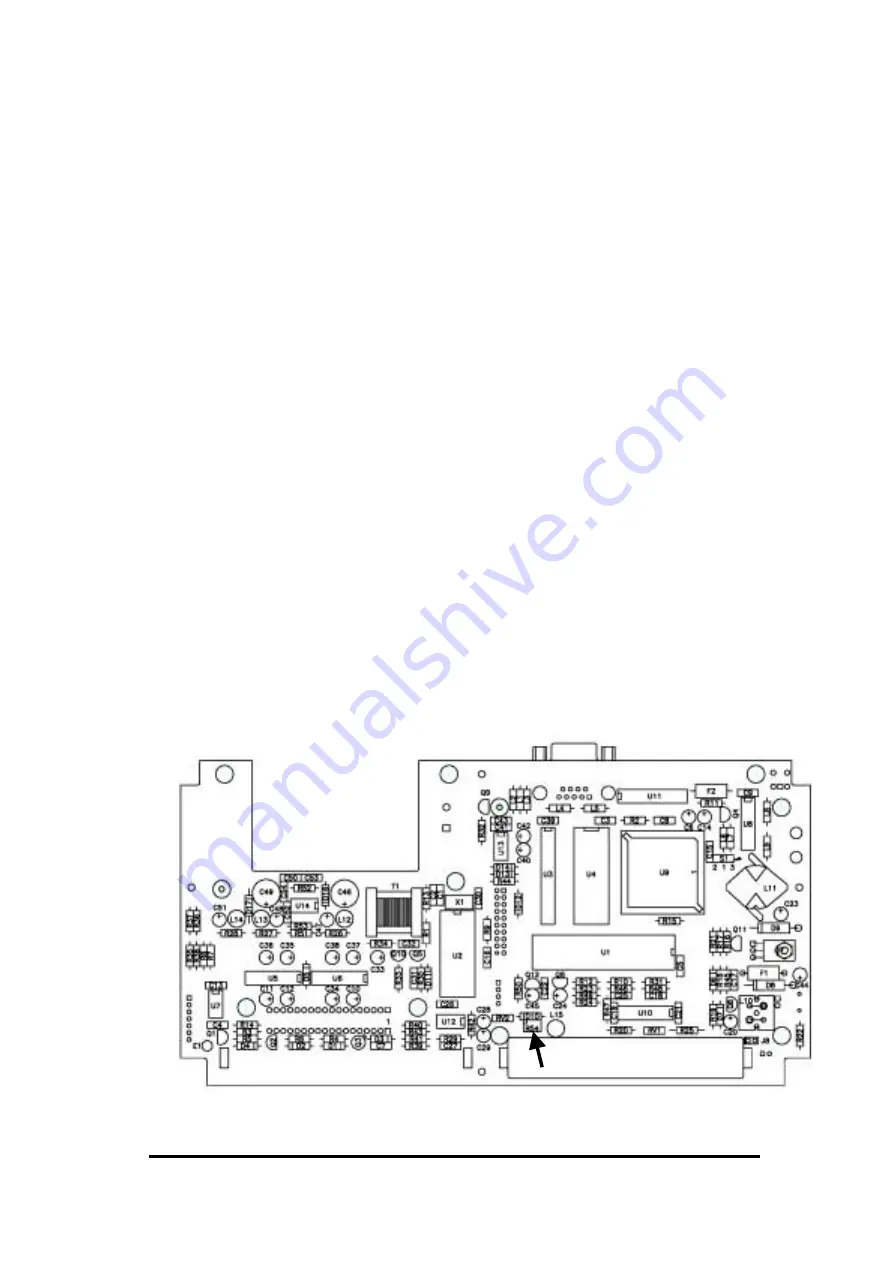
This is necessary when the it is not possible to se any data on the display of pony graphic, one
has to adjust the LCD contrast electronically.
Procedure
1. Switch off the Pony graphic and completely charge the batteries
2. Wait until the green led is blinking.
3. Wait for 20-30 minutes with the system off in order to bring the LCD display to the
ambient temperature (the LCD contrast is compensated for the ambient temperature
but, during recharging the sensor is affected by the heating of the batteries).
4. Open the rear panel of the Pony graphic as the described in the section
"Disassembling the Pony graphic - Pony graphic Unit".
1. Turn on the Pony graphic and adjust the Contrast R54 trimmer until the contrast meets
the requirement.
2. Reassemble the Pony graphic unit.
Display Adjustment R54


