background image

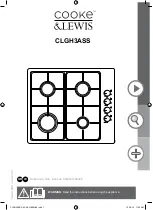
CLGH3ASS

CLGH3ASS - V

ersion: 01

GB IE

Built-in Gas Hob - Barcode: 5052931268382 

WARNING

: Read the instructions before using the appliance.

CLGH3ASS-C&L-A5-GB-IM-08.indd   1

10/18/13   11:30 AM

Summary of Contents for CLGH3ASS

Page 1: ...CLGH3ASS CLGH3ASS Version 01 GB IE Built in Gas Hob Barcode 5052931268382 WARNING Read the instructions before using the appliance CLGH3ASS C L A5 GB IM 08 indd 1 10 18 13 11 30 AM...

Page 2: ...02 x 1 03 x 2 01 x 1 04 x 1 05 x 2 06 x 1 07 x 3 CLGH3ASS Built in Gas Hob 1 1 08 x 4 09 x 3 4 x 25 mm 10 x 1 CLGH3ASS C L A5 GB IM 08 indd 2 10 18 13 11 30 AM...

Page 3: ...eference Getting started 04 Your product 04 Before you start 04 Safety 05 In more detail 09 Operation 09 Care and maintenance 12 Troubleshooting 13 Recycling and disposal 13 Technical and legal inform...

Page 4: ...but contact Customer Services on 0844 800 1128 UK 0144 75261 Ireland Check the package and make sure you have all of the parts listed Decide on the appropriate location for your product The specificat...

Page 5: ...ing the manufacturer s instructions This appliance complies with all current European safety legislation however the Manufacturer must emphasise that this compliance does not prevent the surfaces of t...

Page 6: ...they are older than 8 and supervised Keep the appliance and its cord out of reach of children less than 8 years Means for isolating the appliance must be incorporated in the fixed wiring in accordanc...

Page 7: ...liance We also recommend that great care be taken during use and cleaning Read the cleaning and maintenance sections for this appliance carefully A steam cleaner is not to be used The appliance is not...

Page 8: ...ation ensure that the local distribution conditions nature of the gas and gas pressure and the adjustment of the appliance are compatible The adjustment conditions for this appliance are stated on the...

Page 9: ...nts In more 1 2 4 A B C D E F E B D F A C Reference Description Qty A Left pan support 1 B Semi rapid burner 1 C Right pan support 1 D Semi rapid burner 1 E Rapid burner 1 F Auxiliary burner 1 Note Th...

Page 10: ...to the type of appliance and its individual features Manual ON switch this is always possible even if the electric current is off Turn the knob corresponding to the selected burner in a counter clock...

Page 11: ...ric fan Intensive or prolonged use of the appliance may require additional ventilation such as opening a nearby window or increased ventilation efficiency obtained by increasing the power of the mecha...

Page 12: ...frequently with soapy water Never use abrasive powders Avoid leaving acid or alkaline substances on the enamel parts vinegar lemon juice salt tomato juice etc and washing the enamel parts while they...

Page 13: ...appliance do not try to take it apart and call customer services Recycling and disposal Environmental protection Waste electrical products should not be disposed of with household waste Please recycle...

Page 14: ...W x H x D 580 x 90 x 500 mm Net weight 7 3kg USER CHARACTERISTICS BURNER TYPE MAX OUTPUT MIN OUTPUT G20 20mbar G30 28 30mbar Cooking zone Kw Kw Nozzle size mm Cons M h Nozzle size mm Cons g h Small Au...

Page 15: ...SED SPUR OUTLET FUSE ON EUR UK Direct Connection If the appliance is being connected directly to the mains an omnipolar circuit breaker must be installed with a minimum opening of 3mm between contacts...

Page 16: ...ecting the mains supply ensure that the mains voltage corresponds to the voltage on the rating plate inside the appliance WARNING THIS APPLIANCE MUST BE EARTHED The appliance is supplied with a 3 core...

Page 17: ...he following table details the requirements based on the kitchen volume L x W x H in m The above requirements also allow use of a gas oven and grill but if there are any other fuel burning appliances...

Page 18: ...hod of connection and best engineering practice Changing the nozzles Caution The hob installation and burner changes must be carried out by a competent person e g a gas safe registered fitter Note The...

Page 19: ...m the tap set for standard pressure The knob is found on the bar of the tap itself 3 Place the tap bar on the work top use a small screwdriver that fits the gold screws located at the lower part of th...

Page 20: ...d any further call outs during this prescribed period will be covered by GAA on the replacement appliance Should any person other than an authorized engineer modify or attempt to repair the appliance...

Page 21: ...no fault is found then GAA reserves the right to charge for the call out at the going rate In the course of the service work carried out it may be necessary to remove the built in appliance from its f...

Page 22: ...modifications and the corresponding transpositions from the national law Standard EN 60335 2 102 2006 Standard EN 60335 1 2002 A1 2004 A12 2006 A2 2006 Standard EN 50366 2003 A1 2006 Comply with the...

Page 23: ...around the appliance for easier dissipation of heat and low power consumption Sufficient clearance is required around the appliance The gap between the hob and any cupboard above it should be at least...

Page 24: ...ut the supplied seal along the underside edge of the hob ensuring the ends overlap Cut out worktop to the template dimensions with suitable equipment 06 x 1 10 x 1 06 470mm 550 mm CLGH3ASS C L A5 GB I...

Page 25: ...25 03 04 Note For electrical connection see Technical and legal information section 07 x 3 09 x 3 09 30mm 40mm 07 09 07 CLGH3ASS C L A5 GB IM 08 indd 25 10 18 13 11 30 AM...

Page 26: ...Notes CLGH3ASS C L A5 GB IM 08 indd 26 10 18 13 11 30 AM...

Page 27: ...Notes CLGH3ASS C L A5 GB IM 08 indd 27 10 18 13 11 30 AM...

Page 28: ...GB IE B Q plc Chandlers Ford Hants SO53 3LE United Kingdom www diy com CLGH3ASS C L A5 GB IM 08 indd 28 10 18 13 11 30 AM...

Reviews: