background image

Hardware Installation

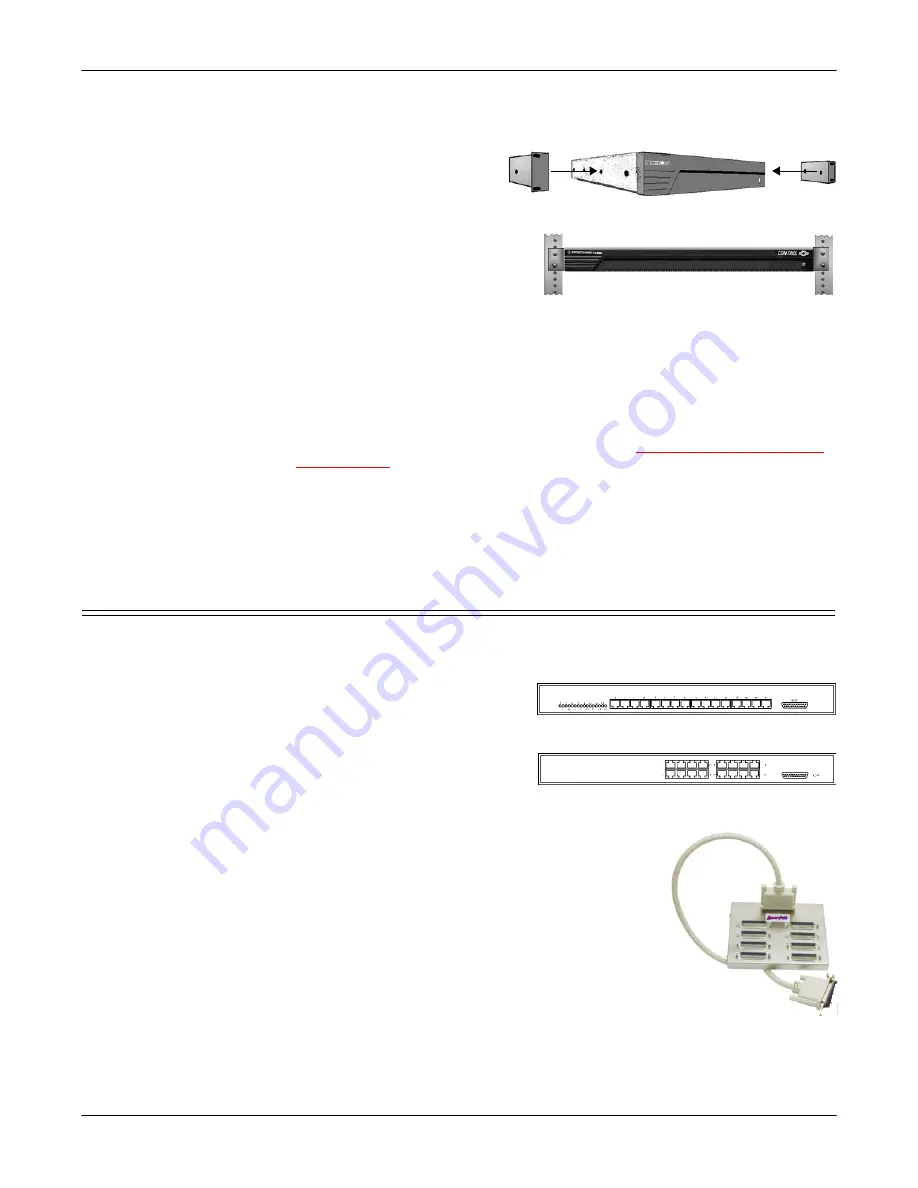
Installing a Rack Mount Interface Box

Installing a Rack 
Mount Interface Box

The RM16-RJ45 design allows you to stack several units on a shelf, or you can 
mount it directly into a rack.

1.

Place the unit on a stable 
surface, or attach the L 
brackets to the interface 
using the screws supplied 
with the unit, and attach the L bracket into your rack.

Note:

You can mount the unit 
facing in either direction. 

2.

Attach the 3-foot cable or the 3-
foot and the 10-foot cables 
together between the interface 
and the board.

Note:

The cables are interchangeable. You may connect either or both cables 
depending upon the distance between the board and the rack. The 
maximum distance permitted between the interface box and board is 15 
feet.

3.

Use the software installation and configuration document for your operating 
system, with the driver to complete your installation.

For the latest software and documentation, go to 

http://support.comtrol.com/

download.asp

.

Note:

After installing the hardware, you must install the device driver for your 
operating system.

4.

Verify that the ports are functioning properly and connect your peripheral 
devices.

RocketPort Interfaces 

The RocketPort CompactPCI 16-port provides several interface options:

Rack Mount models are available with RJ45 connectors (back panels shown).

-

16-Port RS-232 (with red 
LEDs)

-

16-Port RS-422 (with red 
LEDs)

-

16-Port RS-232 with 
integrated status LEDs. The 
yellow LEDs show receiving 
activity. The green LEDs 
show transmitting activity.

Standard interface boxes are available in several 
configurations:

-

RS-232 mode-only or switch-selectable RS-232/
422; both models have female DB25 connectors.

-

Surge interface box with enhanced surge 
protection that is switch-selectable RS-232/422 
with male DB25 connectors.

Note:

RS-422 supports up to 10 multidrop devices.

Summary of Contents for RocketPort CompactPCI

Page 1: ...The RocketPort CompactPCI 16 supports operation in PCI buses with either 5 volt or 3 3 volt bus interface signaling The RocketPort CompactPCI uses a 36 MHz processor that is specifically designed to process asynchronous serial communications The RocketPort CompactPCI uses Application Specific Integrated Circuits ASICs technology to replace most hardware components including the processor and the s...

Page 2: ...ppropriate procedure Installing a Standard Interface Box below Installing a Rack Mount Interface Box on Page 3 Installing a Standard Interface Box 1 Attach the male end of the RocketPort cable to the board and the female end to the connector labeled Host on the interface box Note The male DB25 port labeled Host is reserved for connection to the RocketPort controller and no user accessible signals ...

Page 3: ... for your operating system with the driver to complete your installation For the latest software and documentation go to http support comtrol com download asp Note After installing the hardware you must install the device driver for your operating system 4 Verify that the ports are functioning properly and connect your peripheral devices RocketPort Interfaces The RocketPort CompactPCI 16 port prov...

Page 4: ...th the standard 8 and 16 port DB25 interface boxes Pins 2 to 3 Pins 4 to 5 to 22 Pins 6 to 8 to 20 Wire the following pins together for an RS 422 loopback plug Pins 15 to 19 Pins 17 to 25 Pin RS 232 Signal RS 422 Signal 1 Not used Not used 2 TxD Not used 3 RxD Not used 4 RTS Not used 5 CTS Not used 6 DSR Not used 7 Signal ground Signal ground 8 DCD Not used 9 to 14 Not used Not used 15 Not used Rx...

Page 5: ...ed with the Rack Mount interfaces Pins 4 to 5 Pins 1 to 8 Pins 2 to 6 to 7 Specifications The following tables illustrate RocketPort CompactPCI conditions and specifications Pin RS 232 RS 422 1 RTS TxD 2 DTR Not used 3 GND Tied to ground on the card but it is not used in the cable 4 TxD TxD 5 RxD RxD 6 DCD Not used 7 DSR Not used 8 CTS RxD Pin 1 Pin 8 RJ45 Receptacle Pin 1 1 8 Plug Top View Cable ...

Page 6: ...recognized Yes RocketPort CompactPCI Specification Baud rate 50 to 230 4K baud Bus interface CompactPCI Control by device driver Data bits Parity Stop bits 7 or 8 Odd Even None 1 or 2 Current consumption 5V 12V 12V 3 3V 330 mA 220 mA 320 mA 340 mA Dimensions 100 mm x 160 mm Heat output 32 BTU HR Serial ports expansion slot 16 Interfaces depending upon model RS 232 and or RS 422 Mean time between f...

Page 7: ... an experienced radio TV technician for help Labeling Requirements FCC 15 19 This equipment complies with Part 15 of FCC Rules Operation is subject to the following two conditions This device may not cause harmful interference and This device must accept any interference received including interference that may cause undesired operation Modifications FCC 15 21 Changes or modifications to this equi...

Page 8: ...the diagnostic program to Confirm that the hardware is functioning Determine resolutions to conflicts during installation Provide you with the ability to stress test the boards For example you may want to run the diagnostics overnight to evaluate a possible problem You will need loopback plugs for each port that you want to stress test If you need additional loopback plugs you can use the appropri...

Page 9: ... document or to the suitability of the Comtrol product for any particular purpose Specifications subject to change without notice Some software or features may not be available at the time of publication Contact your reseller for current product information Item Your System Information Model number Serial number Interface type Operating system type and release Device driver version PC make model a...

Reviews: