background image

8-2

<頁頁頁頁頁頁>

Maintenance

browser action during the process as doing so may cause problems to your camera system.

Caution!

You may only cross-import profile among identical camera models.

Reset All Settings to Default

This will reset IP camera to its factory default settings, producing the same result as pressing the hardware 
reset button at the back of camera.  If you need to perform hardware reset, refer to the Troubleshooting chap-
ter.

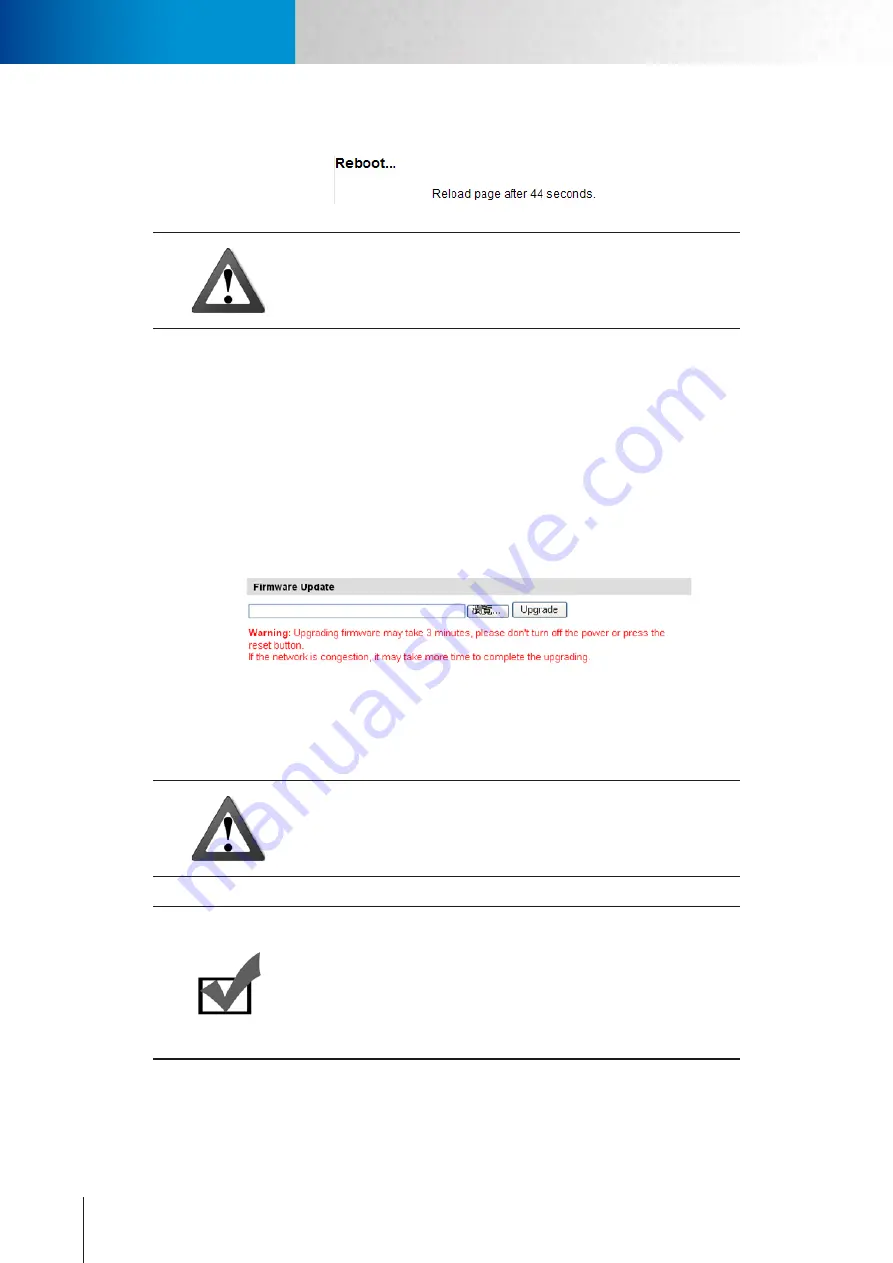
Firmware Update

You can download the latest firmware from Compro’s website (www.comprousa.com/en/supports.html). Af-
ter downloading the firmware, please log in to the setup page of your IP camera and click [Maintenance] on 
the top menu and then look for firmware update section. Press the [Browse] button and locate the download-
ed firmware file and press [Upgrade] button to update camera firmware. Once the update process begins, it 
must not be interrupted. 

Figure 8-2. Firmware update

If you log in to the live view page after camera is rebooted and find that some icons are in the wrong place, 
try pressing [Ctrl] + [F5] to force a cache refresh of your browser.

Caution!

Before updating firmware, please close all other browser windows and 
background applications that are consuming network bandwidth.

Note:

Should you inadvertently close the browser window during firmware up-
grade, DO NOT unplug the power cable or reset the camera immediately. 
Instead, try waiting for 3-5 minutes to see if the camera can complete 
the upgrade process, as the new firmware might have been successfully 
uploaded to the camera system and is still in the process of being written 
into the flash memory.

Compro TN2200 - User’s Manual

Summary of Contents for TN2200

Page 1: ...V2 110118 Network Camera TN2200 Model No V1 130906...

Page 2: ...triction No part of this document may be copied or reproduced in any form or by any means without the prior written consent of Compro Technology Inc Disclaimer Compro Technology makes no warranties wi...

Page 3: ...ome App 3 6 Using a PoE Switch 3 6 Using a Non PoE Switch 3 7 Install C4Home App and Add Camera 3 7 Install Camera from PC 3 8 Using a PoE Switch 3 8 Using a Non PoE Switch 3 8 Installing Camera Softw...

Page 4: ...ing Setup 6 12 Recording History 6 13 Date Setup 6 13 Multi Camera 6 14 OSD Setting 6 14 Chapter 7 Event Viewer 7 1 Chapter 8 Maintenance 8 1 Information 8 1 Log 8 1 Maintenance 8 1 Reboot Camera 8 1...

Page 5: ...E Equipment 11 1 Examples of Port Forwarding Setup on Routers 11 1 Abocom WAA813rn Port Forwarding Setup 11 1 ASUS RT N12 Virtual Server Setup 11 2 D Link DIR 655 Virtual Serve Setup 11 2 TP LINK wr10...

Page 6: ...Compro TN2200 User s Manual...

Page 7: ...try to correct the interference by one of the following measures Reorient or relocate the receiving antenna Increase the separation between the equipment and receiver Connect the equipment into an ou...

Page 8: ...e using this manual pay attention to some symbols and notations that are used to draw atten tion to special situations such as Caution Information provided here is critical to prevent damage to the pr...

Page 9: ...ng the camera to the wall mount base must be used with rubber o ring 2 Rubber O ring Prevents water from entering the casing 1 Hex key For removing the camera s top cover 1 Installation Guide Providin...

Page 10: ...ive view in M JPEG mode only PoE switch or PoE midspan PoE injector with IEEE 802 3af Class 3 support For Internet Access Cable or DSL Modem Subscription with an Internet Service Provider ISP Camera L...

Page 11: ...the memory card in order to release it Composite video jack For connecting to a standard TV and helping you adjust camera angle during installation Lens Fixed iris F 2 0 f 1 96mm Reset button Press a...

Page 12: ...2 4 Camera Layout Compro TN2200 User s Manual...

Page 13: ...ng you can drill a cable hole on the mounting surface and then mount the camera without using the wall mount base The following sections explain 2 dif ferent mounting options Using Wall Mount Base 1 U...

Page 14: ...ew holes as circled to avoid moisture entering the casing Afterwards re attach the camera s top cover and secure the screws tightly with the supplied hex key Rubber O ring Figure 3 5 Rubber O ring Not...

Page 15: ...the camera Or use the supplied drill template B to drill the mounting holes Then drill a cable hole if you need to run the cable through the mounting surface Rubber O ring 80 mm Cable Hole Figure 3 8...

Page 16: ...video jack to the video input jack of your TV to aid you in lens adjustment Reset Button CompositeVideo Output microSD card slot Figure 3 10 Composite video output Adjust Pan Tilt To adjust the camer...

Page 17: ...rees of tilt adjustment 40 90 Figure 3 12 Tilt adjustment 4 Having obtained the optimal result tighten the tilt adjustment screws and re attach the top cover to complete the operation Change SD Memory...

Page 18: ...d network camera and install it from C4Home app Using a PoE Switch If the Ethernet ports on your network switch router support PoE connect your camera in the following way Midspan PoE Injector PoE Swi...

Page 19: ...ttach a RJ 45 Ethernet cable not supplied in the package from the OUT RJ 45 connector on PoE injector to the Ethernet port of the network camera 3 Make sure your smartphone is able to go to internet v...

Page 20: ...ter If your Ethernet cable from PC has been connected to your Cable ADSL modem please re connect it to the non PoE Ethernet port of your network switch router 2 Ethernet port of the camera Use the bun...

Page 21: ...nds before powering on the camera again Important Compro PF 100 PoE injector is incompatible with Compro TN2200 net work camera See List of Compatible PoE Equipment in the appendix for the important c...

Page 22: ...process of the hardware and software for your IP camera You will be asked to se lect the displayed language first Then please click on IP Camera Setup and select the camera you wish to install The fi...

Page 23: ...word setup 3 Please check the camera name date and time setting Figure 3 21 Camera configuration 4 Choose whether to use C4Home ser vice to remotely access your camera C4Home is a platform for viewing...

Page 24: ...ice is en abled Figure 3 23 Device IP Obtain 6 Select the orientation of your IP cam era between Wall Mount or Ceiling Mount You can also change the ori entation setting later via the camera s browser...

Page 25: ...ng camera 9 The iWizard performs system diagnosis based on your network settings and alert you for inappropriate settings marked with a exclamation mark icon Figure 3 27 System diagnosis 10 The iWizar...

Page 26: ...3 14 Compro TN2200 User s Manual...

Page 27: ...ndows system Non IE web browsers such as FireFox and Safari are also support ed after a VLC plug in installation 3 View the live video stream on the mobile web browser of your iPhone iPod Android phon...

Page 28: ...r tablet on hand C4Home Login Page Start the C4Home app from your smartphone you can login here with your own Account ID and Password If you forgot your password please click the Forgot your password...

Page 29: ...ch the live video Event Page List all the happened events by time includes the camera online offline and motion detection You can click the listed event to watch iveview Watch the live video of networ...

Page 30: ...pp is almost the same features with iOS version the Android version app also provide Enable Disable Vibrate and Refresh Media Store in app setup page And also the Android version app support 4 camera...

Page 31: ...ion of the monitored area via Internet Explorer which comes with all Win dows based computer system Please refer to the following steps to watch live view on WebVUer 1 Open the Internet Explorer 2 Ent...

Page 32: ...Compro ActiveX 6 And then the reconfirmation dialog box will come up Please press Install to install the ComproClien tActiveX cab on your system Note Compro ActiveX components only support 32 bit Inte...

Page 33: ...d to enable ports 80 and 554 default HTTP RTSP port used by the camera in your firewall and link them to the internal IP address of the camera Should you have more than one IP cameras please increase...

Page 34: ...ew your camera video from a remote location over the Internet first you need to configure port forwarding on the network router to which your IP camera is connected see the remote viewing section in t...

Page 35: ...of just one 2 User needs to enable DDNS function and obtain a valid Dynamic DNS DDNS address as detailed in ear lier sections of this manual 3 Ensure that an active internet connection is available fo...

Page 36: ...4 10 Accessing via 3GPP Mobile Phone ComproTN2200 Network Camera...

Page 37: ...am 2 or switch to multi channel mode or auto scan mode Stream 2 can be enabled and configured in video settings Live video panel Live video feed from the camera You can switch to full screen mode by r...

Page 38: ...m live view A preview win dow will pop up upon hitting this button the size of the preview image is forced as 320 by 240 pixels Right click on the preview image and choose Save Image As to save the sn...

Page 39: ...ideo display and then the digi tal zoom control window will pop up 2 Check Enable Digital Zoom option and set desired zoom ratio by dragging the adjustment bar Then set the area to be enlarged by drag...

Page 40: ...5 4 Icons on Live View Page Compro TN2200 User s Manual...

Page 41: ...p right location in the live view screen Then the setup page as shown in the picture below will be displayed You can configure the detailed settings of your IP camera here Figure 6 1 Main setup page Y...

Page 42: ...s played Check 3GPP Mode box to enable the viewing of secondary stream on a 3GPP capable cell phone Standard If you have connected the camera s video output to the video input of your TV select analog...

Page 43: ...rger file size of the recorded clips Also if you have set up the iDDNS service during the installation of IP camera you can directly enter the web address of your IP camera into a web browser s addres...

Page 44: ...y default on the condition that low environment lighting is detected Switching on the low light behavior allows you to manually set the shutter speed and gain level in the case of low environment ligh...

Page 45: ...Users Setting Modify Remove Click here to Modify or Remove an existing viewer Add Click here to add a new viewer or administrator Allow anonymous login Click here to allow anonymous viewer login witho...

Page 46: ...h This automatic network connection speed test is to help users better define appropriate video bit rate for their applications To perform network bandwidth test 1 Go to Setup Network and click on Net...

Page 47: ...ice if you are using floating dynamic IP and want to tie your camera s current IP address to a domain name And instead of remembering a string of IP address you can use the easier to remember domain n...

Page 48: ...n to work as it should all the switches routers in your network environment must also support and enable QoS Event Setup When an event happens like detected motion a snapshot can be instantly sent to...

Page 49: ...ke a certain amount of time to upload snap shots to the FTP server Figure 6 9 FTP server setup example Image server This page allows you define the naming rules of the snapshots taken by the camera an...

Page 50: ...ovider To properly configure SMS server 1 Under Setup Event Setup Event Server Setup click on SMS server to start configuration 2 Provide the required data for the following field Field Description Se...

Page 51: ...er area defined in the Motion Detection setup To cre ate an event based on tampering detection or loitering detection select Camera Tampering Detection or Loitering Detection from the Event Trigger li...

Page 52: ...options low medium high The audio detection function on this IP camera works by measuring the volume level Each different sensitivi ty stands for a particular threshold of triggering Sensitivity Thres...

Page 53: ...ocated on the left menu Important If you want to record video clips of detected motion to SD card you need to set at least a motion detection region before setting up event based recording under Recor...

Page 54: ...me and password field port numbers may be required if they have been set differently After pressing the Save button you will see the status of the cameras on the list To modify an existing camera simp...

Page 55: ...ays the history of past events successfully triggered by motion or schedule the available types of event trigger depend on camera support Click on any type of event trigger to view its history Figure...

Page 56: ...7 2 ComproTN2200 Network Camera...

Page 57: ...ture allows installers and users to set up a group of cameras with similar configu rations at great ease After the current camera is properly configured users can export current camera s con figuratio...

Page 58: ...Browse button and locate the download ed firmware file and press Upgrade button to update camera firmware Once the update process begins it must not be interrupted Figure 8 2 Firmware update If you l...

Page 59: ...P surveillance products installed on your LAN network even if they are not on the same subnet The scanning generally takes around 1 minute to complete and once the scanning completes you will see the...

Page 60: ...rd later again to scan for and re configure the camera Trouble with the ActiveX Client When you launch the Internet Explorer and enter the camera s IP address in the address field you ll be asked for...

Page 61: ...led Ensure that the ActiveX had been correctly registered with your Internet Explorer Please open Internet Explorer and check that you ve got both the ComproClientAc tivex and USActiveX control compon...

Page 62: ...ut are still unable to receive video audio on the browser please close all the browser windows and delete the Compro Embedded folder found under OS Drive Program Files If you re using 64 bit windows l...

Page 63: ...220 20 16 the client user is trying to receive the video audio stream remotely To successfully view the live video streamed from the IP camera you need to 1 Ensure that the camera s image quality set...

Page 64: ...meras installed on a network you will need to change the HTTP and RTSP port on them manually so each one of them will use a different port E g changing the HTTP and RTSP port for the 2nd device to 81...

Page 65: ...igure 9 11 DDNS setup in iWizard The iDDNS is a free DDNS service provided by Compro If you are using dynamic IP you may want to apply for DDNS Dynamic Domain Name Server service to create a hostname...

Page 66: ...r desktop and select Run as admin istrator If you re not sure whether your camera is on the same subnet with your PC reconnect your camera to your PC directly configure the IP address of your PC as 19...

Page 67: ...ry few minutes determined by the value of TTL Time to Live occasionally the DNS information changes e g your cam era acquires a new IP address but the old information is still stored in the cache resu...

Page 68: ...ts your IP camera is using Refer to the Remote Viewing via Internet Explorer section of this manual for more information Problem using DDNS service The user information is incorrect Go to setup page O...

Page 69: ...onfirm the upload download speed limit of your service If the bit rate of the video stream is set at 3Mbps or higher but your Internet service only provides a max of 2Mbps download band width then try...

Page 70: ...ing Setup Micro SD and check if SD Card Status and SD Card Capacity shows correct information If not detected is shown re move and re insert the card again and refresh the WebVUer and verify again The...

Page 71: ...Configurable brightness saturation and sharpness Analog Video Output Yes RCA output for lens adjustment AUDIO Compression Format G 711 PCM 64 Kbit sec AAC Audio Input Output Built in microphone Networ...

Page 72: ...e with a pre installed 4GB memory card Operating Condition Temperature 20 C 50 C 4 F 122 F Humidity 20 80 RH non condensing Weather Resistance IP66 Rated Impact Protection IK09 Rated Power Supply PoE...

Page 73: ...jector MS POE IJAF MITS PoE injector POE F01 1748DG Eten PoE injector PS 101D Eten PoE injector PS 201G D link PoE switch Hub DES 1316 Cerio PoE injector POE S48G Cerio PoE injector POE S48F Examples...

Page 74: ...11 2 Examples of Port Forwarding Setup on Routers ASUS RT N12 Virtual Server Setup D Link DIR 655 Virtual Serve Setup Compro TN2200 User s Manual...

Page 75: ...11 3 Examples of Port Forwarding Setup on Routers TP LINK wr1043n Virtual Server Setup Chapter 11 Appendix...

Page 76: ...mpro TN2200 User s Manual ComproTechnology Headquarters 4F No 12 Alley 6 Lane 45 Pao Shin Road Hsintien District NewTaipei City 231 Taiwan Tel 886 2 29180169 Fax 886 2 29152389 w w w c o m p r o u s a...

Reviews: