M0203A5A_uc
CommScope ERA
®
CAP MX Medium Power Carrier Access Point Installation Guide
© November 2020 CommScope, Inc.
Page 61
Installing CAP MXs
Connect the Mains Power to the CAP MX
1
Locate the Mains power cable that was delivered with the CAP MX.
2
Locate or install a suitable power junction box or receptacle near the unit and route the power cable from
the power source to the CAP MX.
3
Dependent on the type of power supply used by the unit, wire the power cable to the junction box or
receptacle. Refer to the color code and pin numbers shown in:
•
•
4
With the cable's Mains plug disconnected from the CAP MX, turn the circuit breaker on, unscrew the
plug's protective cover, and carefully test the plug with a voltmeter to ensure that the voltage and polarity
are correct.
5
Once the testing has been completed, turn off the circuit breaker.
6
Unscrew the protective cover from the Mains connector of the unit.
7
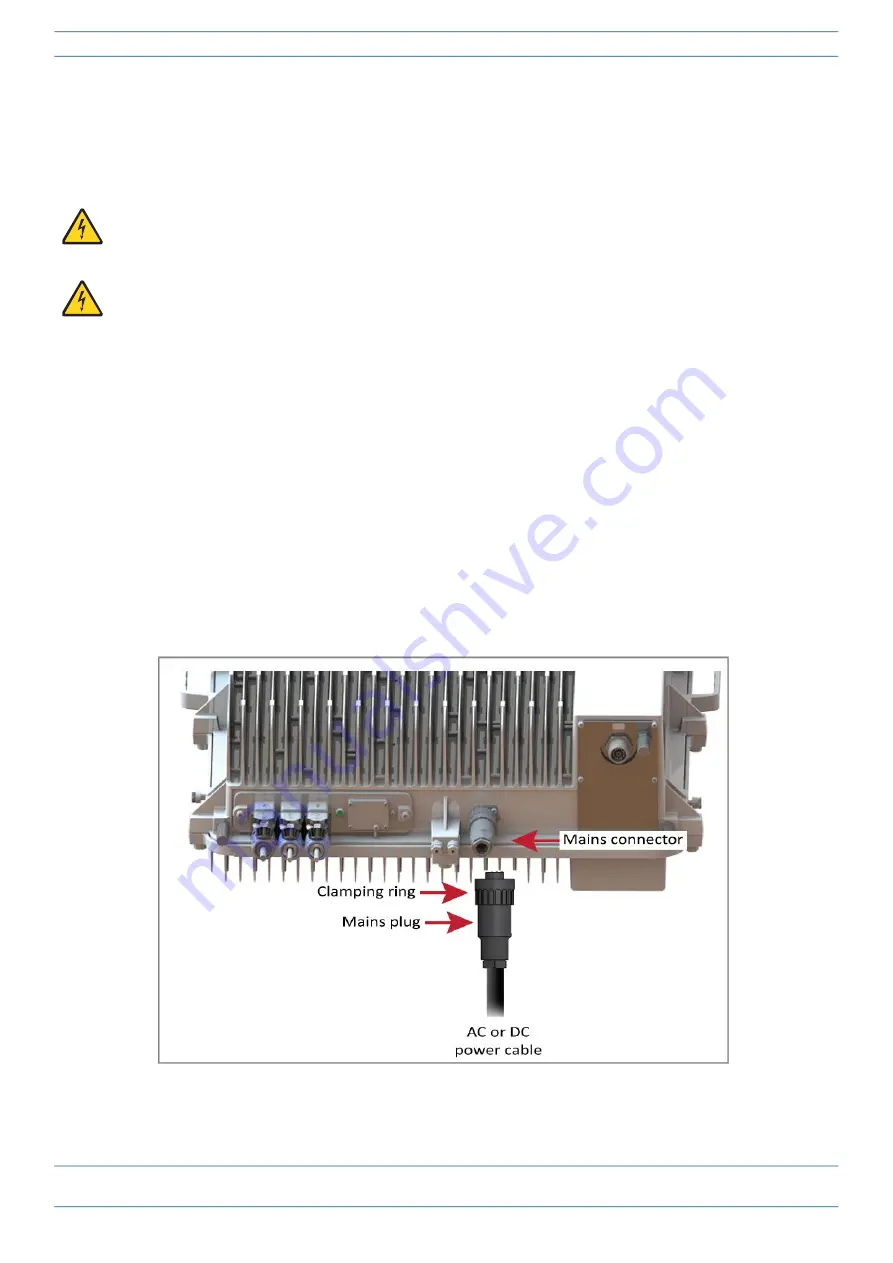
Insert the AC or DC power cable into the Mains connector as shown below; tighten the clamping ring until
it is hand tight. Do not over-tighten the clamping ring.
Do not connect the cable to the unit's Mains connector at this time. The power source must be
interruptible.
The Mains cable must be properly secured observing local regulations and electrical codes. Be sure to
allow enough slack in the cable at the CAP MX to plug or unplug the cable into the Mains connector.


