860463082
Instruction Sheet
www.commscope.com
Page 4 of 13
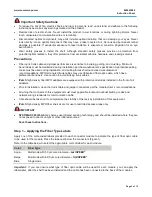
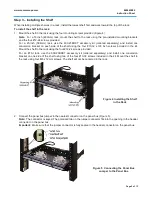
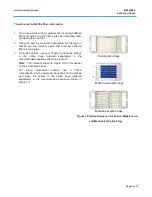
Figure 1 Applying the Fiber Type Labels
Step 2 – Routing the Panel Bus Jumper
Follow the appropriate set of steps below to route the panel bus jumper in preparation for installing the shelf.
For a sliding shelf:
1. Slide the plastic cover off the shelf.
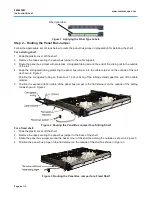
2. Remove the tape securing the panel bus jumper to the cable support.
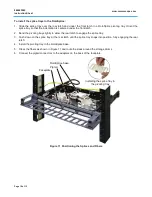
3. Route the panel bus jumper with protective corrugated tubing around the end of the sliding rail to the outside
of the rail.
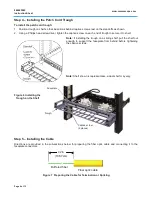
4. Snap the corrugated tubing protecting the panel bus jumper into the cable retainer on the outside of the rail
as shown in Figure 2.
Position the corrugated tubing so that about 1 inch (2.5cm) of the tubing extends past the end of the cable
retainer.
5. Position the exposed ribbon cable of the panel bus jumper in the flat retainers on the outside of the sliding
rail as shown in Figure 2.
Figure 2 Routing the Panel Bus Jumper for a Sliding Shelf
For a fixed shelf:
1. Slide the plastic cover off the shelf.
2. Remove the tape securing the panel bus jumper to the back of the shelf.
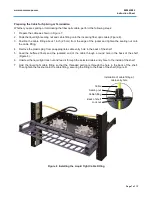
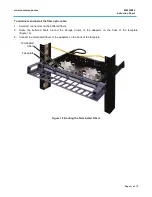
3. Route the panel bus jumper around the back corner of the shelf and along the outside as shown in Figure 3.
4. Position the panel bus jumper in the flat retainer on the outside of the shelf as shown in Figure 3.
Figure 3 Routing the Panel Bus Jumper for a Fixed Shelf
Fiber type label

