COMAC CS 60 II User Manual Download Page 6


7

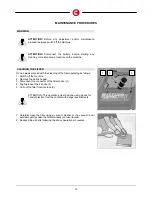
PREPARATION OF THE MACHINE 


4.   BATTERIES ASSEMBLY AND CONNECTION (battery machine 

only) 

For the best mix of economy and usage we suggest fitting 2 x 12V 140Ah 
batteries. Before assembly, ensure the batteries are charged. 
Assembly instructions: 

1.  Remove the “on-off” key from the lock. 
2.  Open the bonnet of the machine. 
3.  Using a suitable lifting method, position the batteries correctly in the 

compartment observing the polarity as in the attached picture.  

4.  Connect the bridge cables and the positive and the negative 

connections as in the attached picture.  


5.  TRACTION MOTOR CONNECTION (battery machine only) 

1.  Take the key out of the instrument board. 
2.  Connect the traction motor cable, identified by the carton tag. 
3.  Insert the key again. 


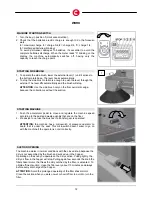
6.  BATTERY CHARGER CONNECTION 

Open the front bonnet. Inside there is a female connector (see the 
picture) into which the male connector, (fixed to the battery charger 
cables) must be inserted. The male coupling connector is delivered in 
the bag containing this instrument catalogue and must be assembled on 
the charger cable. Pay attention to the polarities.  
 

ATTENTION! 

This operation must be done by qualified staff. 

A wrong or imperfect cables connection to the connector could 
cause heavy damages to people or things.  


7. BATTERIES 

RECHARGING 

In order to avoid damage to the batteries, it is necessary to avoid their 
complete discharge.  
After having connected the batteries to the machine with the battery 
charger, proceed with the charge until it is completed. Usually the battery 
charger gives the necessary charge until its automatically stopping. We 
advise to use a 24V – 15A battery charger.  

ATTENTION: 

with reference to the batteries space features, 

please see what there’s in the last page.  

ATTENTION

: never leave the batteries completely 

discharged, even if the machine is not used. During the 
recharge check the level of the electrolyte and top up with 
distilled water. 


Summary of Contents for CS 60 II

Page 1: ...CS 60 II I GB F D E Ed 09 2006 Codice 410856...

Page 2: ...D SIDE BRUSH CONTROL LEVER POSITION 10 SUCTION KNOB AND FILTER SHAKER POSITION 10 WORK 11 WARNING 11 OPERATION CENTRAL BRUSH SWITCH 11 MACHINE DIRECTION SWITCH 11 MACHINE STARTING SWITCH 12 STARTING S...

Page 3: ...serial number These can be found on the serial plate TECHNICAL DATA CS60 is a ride on sweeping machine The B model is an electrically operated machine powered by traction batteries used for cleaning...

Page 4: ...oom Open book symbol Points out to read manual before using the machine 0 1 ON OFF battery machine Warning symbol Read with care all instructions with this symbol to ensure operator and machine safety...

Page 5: ...oceed as follows 1 Remove the fixing tapes 2 Remove the metal staples at package base 3 Take off the carton Package size in cm 135x93x130 Weight of packed machine without batteries 170 kg 3 SLIDING TH...

Page 6: ...the male connector fixed to the battery charger cables must be inserted The male coupling connector is delivered in the bag containing this instrument catalogue and must be assembled on the charger ca...

Page 7: ...inking ATTENTION a few seconds after the meter reads 0 it will start blinking the brush motor will then automatically switch off having only the capacity to reach the charge point ATTENTION For the da...

Page 8: ...her Do not use water Do not strike shelving or scaffoldings where there is danger of falling objects Adapt the speed of operation to the floor conditions Do not exceed the declared hill climbing capac...

Page 9: ...3 Battery control indicator 4 Key start 5 Hour meter 6 Gear way switch 7 Thermal protection brush motor breaker 8 Thermal protection traction motor breaker LEVER BRAKE AND FLAP POSITION 1 Parking and...

Page 10: ...he accelerator pedal is pressed The stopping is automatically when the machine is stopped In the position MAN instead the brush starts to turn when the key is turned in position I ON with the danger t...

Page 11: ...the suction STARTING MACHINE 1 Push the accelerator pedal to move and regulate the machine speed according to the dust and waste quantity that are on the floor 2 We advise to not use the brushes if a...

Page 12: ...material In case of heavy material such as sand piece of soil gravel etc we suggest you do not fill up the hopper more than about 70 otherwise emptying could prove difficult To dump the hopper from th...

Page 13: ...ing as follows 1 Switch off the machine 2 Remove the debris hopper 3 Disconnect the connector of the filter shaker 1 4 Slightly loosen the 4 knobs 2 5 Pull out the filter from its place 3 ATTENTION Th...

Page 14: ...and the knob ADJUSTMENT OF CENTRAL BROOM To ad just loosen the knob 1 and position the lever 2 in the following eyelets 3 Make the same adjustment on the opposite side During adjustment follow the br...

Page 15: ...FROM THE CENTRAL BROOM If along the broom threads and other waste wrap themselves up remove them THE BRUSH MOTOR DOES NOT WORK The brush motor can stop in case of excessive work load To avoid that it...

Page 16: ...ale floor that are resistant to abrasion or with large groove BRISTLES THICKNESS The bristles with bigger thickness are the most rigid to use on smooth and with small interstices floor On an irregular...

Reviews: