Page | 22
VERVE LED
Step 2:
Select the file by navigating the file location.
Step 3:
After selecting the file, click on the
Open
button (Refer to Fig 24). The
Properties
dialog box
appears with printing options of the selected image file.
If the image file is opened using the Operation menu, user gets the following benefits:
a)
Create printing job queue
b)
Prepare image file for ready to print.
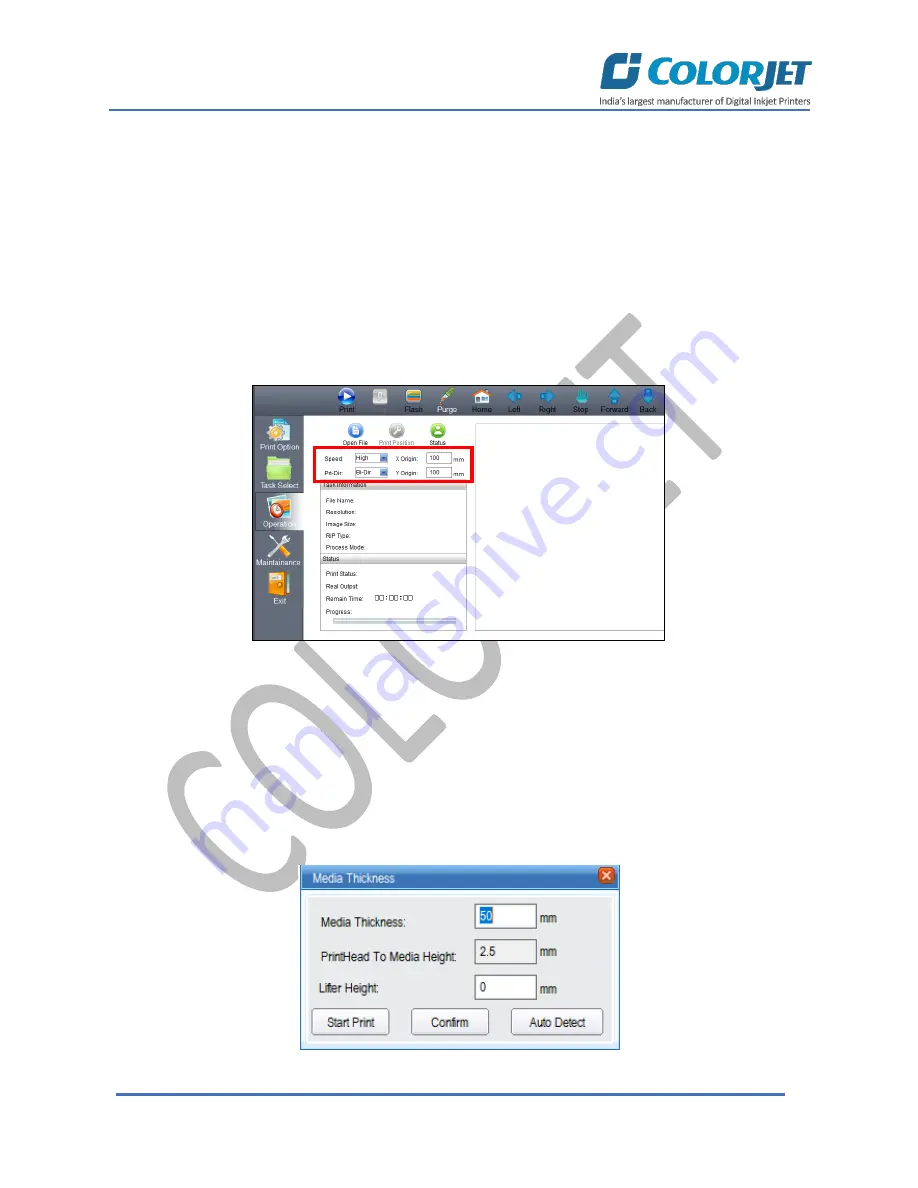
Print Position
Print position option enables users to set the printing speed, print direction, X origin and Y origin, as shown
below:
Fig 25: Setting the Print Position
Note:
This option enables user to define printing direction like right, left, and bi-direction.
Checking Printing Status
Before giving the nozzle test, user needs to provide the printing parameters like print origin (X and Y),
printing direction, and speed. To check the status of print head nozzles, click on the
Status
option under
the
Operation
tab (Refer to Fig 25). The
Media Thickness
dialog box appears on the screen where user
needs to set the media thickness, print head to media height, and lifter height. After making the desirable
changes, click on the
Start Print
button to give the test print, as shown below:
Fig 26: Displaying the Media Thickness Dialog Box
Summary of Contents for VERVE
Page 1: ......
Page 40: ...Page 39 VERVE LED...


