Page
28
of
39
SubliXpress Plus
Editing Job
Follow these steps to edit the selected job:
Step 1
:
Select
the job for which details you want to edit from the
Job List
area and right click.
Step 2
:
Select
on the
Edit
option from the context menu.
Step 3
:
Select
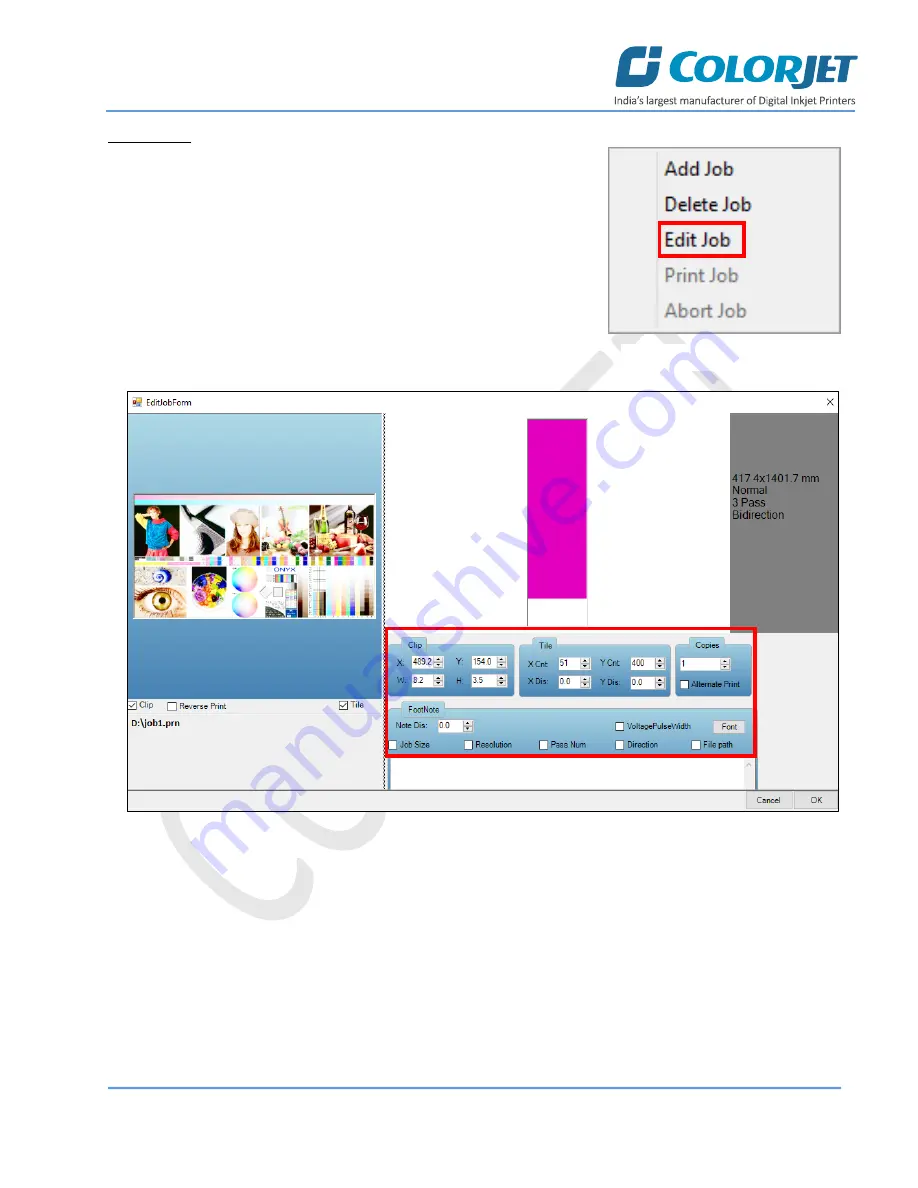
the desired checkbox in front of the Clip, Reverse Print, and
Tile options. Clicking on any option will enable its related parameters on
the right pane and you can edit them as per the requirements. In our case,
we have selected the
Clip
checkbox. The job editing options are shown in
the image below:
Fig 37: Displaying the Edit Job Options
Clip
: By enabling this, a portion of the image can be selected by dragging the image preview. And its height and
width can be adjusted. Also, the crop margins can be adjusted in x and y direction.
Tile:
By enabling this, desired number of counts in x and y directions can be printed. Also, the distance between
each count can be adjusted.
Copies:
Feeding any number of copies will repeat the prints in Y direction. Careful, the Print will stop and restart
after each copy.
Foot note:
You can add footnote printing with each printed image. Parameters required can be selected.
Step 5
: After making the desired changes,
click
on the
OK
button to apply the settings (Refer to Fig 37).
Fig 36: Selecting the Edit Job Option


