background image

5-5    Pre Operation Checks 

Your engine has been designed to use regular 
unleaded gasoline with a pump octane number 
([R+M] /2) of 91 or higher, or research octane 
number of 91 or higher. If knocking or pinging 
occurs, use a different brand of gasoline or 
premium unleaded fuel. Unleaded fuel will give 
you longer spark plug life and reduced 
maintenance cost. 

Gasohol 

There are two types of gasohol: gasohol 
containing ethanol and that containing methanol. 
Gasohol containing ethanol can be used if 
ethanol content does not exceed 10%. Gasohol 
containing methanol is not recommended 
because it may cause fuel system damage or 
vehicle performance problems. 

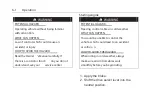
WARNING  

POTENTIAL HAZARD 
Improper ca re when refueling.  
WHAT CAN HAPPEN 


Fuel can spill, which can cause a fire and 
severe injury.   
Fuel expands when it heats up. If the fuel 
tank is overfilled, fuel could spill out due to 
heat from the engine or the sun.


HOW TO AVOID THE HAZARD 


Do not overf ill the fuel tank. Be careful not 
to spill fuel,  especially  on the engine or 
exhaust pipe. Wipe up any spilled fuel 
immediately.  Be sure the fuel tank cap is 
closed securely.


Summary of Contents for HS400UTV-5

Page 1: ...COLEMAN UT400 HS400UTV 5 No one under the age of 16 should operate this UTV OWNER S MANUAL POWERSPORTS ...

Page 2: ... Owner s Manual ...

Page 3: ...ns on your purchase of the Coleman HS400UTV 2 HS400UTV 3 This Owner s Operator s manual will provide you informationregardingsafe operation operational instruction s maintenance and care Fully understanding this manual and following all of the instructions herein will provide the knowledge needed to have safe and enjoyable UTV operation IMPORTANT SAFETY MESSAGES READ THIS MANUAL CAREFULLY AND COMP...

Page 4: ...y the following notations The SafetyAlert Symbol means ATTENTION YOUR SAFETYISINVOLVED Failure to follow WARNING instructions could result in severe injury or death to the machine operator bystander or a person inspecting or repairing the machine ACAUTION indicates special precautions that must be taken to avoid damage to the machine ANOTE provides key information to make procedures easier or clea...

Page 5: ... is below 4 F 20 C park the UTV in a place where the temperature is higher than 4 F 20 C Start the UTV after the UTV has warmed up Please see page 6 3 on the warming up process Follow the proper parking procedures when the temperature is higher than 100 F 38 C turn off the engine make sure the radiator fan is on for 3 minutes before turning off the power switch Starting the UTV for the first time ...

Page 6: ...em 4 4 Speedometer Unit 4 5 Odometer and Trip Meter Modes 4 6 Fault code indicator 4 8 Switches 4 10 On Command Four Wheel Drive and Differential Gear Lock Switches 4 11 Throttle Pedal 4 15 Brake Pedal 4 16 Parking brake pedal 4 16 Drive Select Lever 4 17 Fuel Tank Cap 4 18 Starter 4 18 Seats 4 19 Seat Belts 4 20 Glove Compartment 4 23 Cargo Bed 4 24 Opening and Closing the Tailgate 4 24 Lifting a...

Page 7: ...ering Wheel Inspection 5 10 Seat Belts 5 10 Fittings and Fasteners 5 10 Lights 5 10 Switches 5 10 Tires 5 11 Measuring Tire Pressure 5 13 Tire Wear Limit 5 14 Operation 6 1 Starting a Cold Engine 6 1 Starting a Warm Engine 6 3 Jump Starting 6 3 Warming Up 6 5 Drive Select Lever Operation and Reverse 6 5 Parking 6 9 Parking on a Slope 6 10 Accessories and Loading 6 11 YourVehicle 7 1 Getting To Kno...

Page 8: ... Chart 8 4 Hood 8 6 To Open 8 6 To Close 8 7 EFI System 8 8 ECU and EFI System inspection 8 11 Engine Oil and Oil Filter Cartridge 8 11 To Check Engine Oil Level 8 11 To Change the Engine Oil With or Without Oil Fliter Cartridge Replacement 8 12 Checking the Final Gear Oil Level 8 15 Changing the Final Gear Oil 8 16 Differential Gear Oil 8 18 Checking the Differential Gear Oil 8 18 Changing the Di...

Page 9: ...ication 8 38 Brake Pedal and Accelerator Pedal Lubrication 8 38 Rear Knuckle Upper and Lower Pivot Lubrication 8 39 Steering Shaft Lubrication 8 40 Wheel Installation 8 41 Battery 8 43 Battery Maintenance 8 45 Fuse Replacement 8 46 Replacing Headlight Bulb 8 48 Tail Brake Light Bulb Replacement 8 51 Troubleshooting 8 52 Common Problems in Vehicle 8 53 Cleaning and Storage 9 1 Cleaning 9 1 Storage ...

Page 10: ... from manufacturing defects in material and workmanship for a period of 1 year from the date of purchase shown on the sales receipt During this period of time Coleman Powersports will at its option either repair or replace any original Coleman Powersports part which is covered by this warranty and is proven to be defective in workmanship or material To qualify for this warranty the part 1 Must hav...

Page 11: ...Coleman Powersports A COPY OF YOUR SALES RECEIPT IS REQUIRED FOR WARRANTY SERVICE What this Warranty Does Not Cover This warranty does not cover the following 1 Damage due to lack or improper maintenance as described in this manual 2 Damage which is caused by normal use and not caused by a defect in materials or workmanship 3 Use of the product which is not consistent with the intended use as desc...

Page 12: ...rsonal items Length of Implied Warranties Any implied warranties are limited to the duration set forth in this warranty Coleman Powersports does not make any claim as to the merchantability or fitness for a particular purpose which would extend longer than the duration of this written warranty Check your State Laws as some State Laws do not allow limitations as to the duration of an implied warran...

Page 13: ...Location of the Warning and Safety Labels 1 1 ...

Page 14: ...all of the labels on your vehicle They contain important information for safe and proper operation of your vehicle Never remove any labels from your vehicle If a label becomes difficult to read or comes off a replacement label is available by contacting the dealer 1 2 3 ...

Page 15: ...Location of the Warning and Safety Labels 1 3 5 6 8 9 10 ...

Page 16: ...1 4 Location of the Warning and Safety Labels 11 12 13 14 15 ...

Page 17: ...Location of the Warning and Safety Labels 1 5 16 18 17 19 ...

Page 18: ...andgrip fixed before the seat Always avoid operating the vehicle on any paved surfaces including sidewalks driveways parking lots and streets Never operate this vehicle on any public street road or highway even dirt or gravel streets Never operate this vehicle without wearing an approved motorcycle helmet that fits properly You should also wear eye protection goggles or a face shield gloves over t...

Page 19: ...e right and left as they respond to the terrain and this movement will be felt in the steering wheel A sudden jolt could wrench the steering wheel around and your thumbs or fingers could be injured if they are in the way of the steering wheel spokes Always go slowly and be extra careful when operating on unfamiliar terrain Always be alert to changing terrain conditions when driving the vehicle Nev...

Page 20: ...per than the floorboards on this model Remember that wet brakes may have reduced stopping ability Test your brakes after leaving water If necessary apply the brake several times to let friction dry out the linings Always be sure there are no obstacles or people behind you when you operate in reverse When it is safe to proceed in reverse go slowly Do not brake abruptly when carrying loads in the ca...

Page 21: ...while in thevicinityo f sparks open flames orother sourcesofignition suchasthepilotlightofwaterheatersand clothesdryers Whentransporting thevehicle in anothervehicle besure it iskept in an upright position Otherwise fuel mayleak out of the engine orfuel tank WHAT CAN HAPPEN Gasoline ispoisonousand can cause injuries HOW TOAVOID THEHAZARD If you should swallow some gasolineorinhale a lot of gasolin...

Page 22: ...ZARD Starting orrunning the enginein a closed area WHAT CAN HAPPEN Exhaust fumes are poisonous and may cause loss of consciousness and death within a short time HOW TOAVOID THEHAZARD Always operate yourvehicle in an areawith adequateventilation ...

Page 23: ...attery 6 Fuses 7 Left body protection plate 8 Driver seat belt 9 Air filter element 10 Cargo bed 11 Tail brake lights 12 Spark arrester 13 Rear shock absorber assembly 14 CVT belt case 15 Fuel tank cap 16 Passenger seat belt 17 Right body protection plate 18 Spark plug 19 Oil filter cartridge 20 Radiator cap 21 Coolant reservoir ...

Page 24: ...t switch On Command four wheel drive and differential lock switches Multi function display gauge Auxiliary DC jack Drive select lever Accelerator pedal Brake pedal Release parking handle 33 Horn NOTE The vehicle you have purchased may differ slightly from those in the figures of this manual 25 24 3 ...

Page 25: ... for assistance when ordering spare parts from a service center or for reference in case the vehicle is stolen 1 VEHICLE IDENTIFICATION NUMBER 2 MODEL LABEL INFORMATION Vehicle Identification Number The Vehicle Identification Number is stamped into the frame 1 Vehicle identification number NOTE The vehicle identification number is used to identify your vehicle ...

Page 26: ...l electrical circuits are supplied with power Headlights and taillights come on when the light switch is turned to the on position OFF All electrical circuits are switched off The key can be removed in this position START The electric starter is engaged by turning and holding the key in this position Release the key when the engine starts ...

Page 27: ...ld result See starting instructions prior to starting the engine See pages 6 1 6 3 for details Indicator and Warning Lights 1 Four wheel locked showing light 2 Fault indicator light of EPS system 3 Differential gear lock indicator 4 Coolant temperature warning light 5 Emergency indicator 6 Mechanical parking brake indicator light 7 Forward indicator light F 8 Neutral indicator light N 9 Reverse in...

Page 28: ...lever is in the R reverse position Coolant Temperature Warning L ight When the coolant temperature reaches a specified level this light comes on to warn that the coolant temperature is too hot If the light comes on during operation stop the engine as soon as it is safe to do so and allow the engine to cool down for about 15 minutes CAUTION The engine may overheat if the vehicle is overloaded If th...

Page 29: ...system Fault is displayed by the fault indicator light and the fault code indicator of the EPS system so the driver can acknowledge fault of the EPS in time to take some measures to keep himself herself safe When fault occurs in the EPS system the indicator light will be lit up on consol At the same time the fault code will display on the consol When turning on the main switch Ignition key of the ...

Page 30: ...f the engine is overheating stop the UTV immediately Do not start the engine again until the UTV has been inspected and repaired by a service center Low Battery charge indicator Indicates a low charge on the battery If light is illuminated re charge battery If recharging the battery does not fix the issue have a service center inspect the battery and UTV Speedometer Unit 1 Left turn indicator ligh...

Page 31: ...des On the display panel there are two large buttons one located on the left side and one on the right side Quickly pressing the button on the left side toggles the display from the odometer to the trip meter and the to the hours meter then it starts the cycle over The odometer displays the total distance traveled by the UTV The trip meter records distances for a specific trip and can record dista...

Page 32: ...the left button again and the clock will exit the set mode Four wheel drive indicator There are two 4WD indicators on the display panel The left 4WD indicator has a blinking circle on the front axle when the grey and yellow 4WD selector buttons are pressed in indicating the 4WD function has been activated This position also indicates that the 4WD is NOT locked This allows the wheels on the left an...

Page 33: ...ty of the UTV during operation CAUTION When the selector is set to 4WD the right 4WD symbol front axle will have an X in the middle When riding on good surfaces you should unlock the differential and press in the yellow and the gray buttons to the 2WD unlocked position There should be no symbols showing in either the left or right 4WD indicators CAUTION If the display indicators flash or the speed...

Page 34: ... fault code returns again Only after the fault is fixed will the time show automatically The description for the fault codes are shown in Chapter 11 of this manual Fuel Level Indicator The fuel level display will indicate the fuel volume When fuel tank is full the display will show five white bars 1 As the fuel level decreases the white bars will disappear 2 When fuel is almost empty the display w...

Page 35: ...et the switch to to turn on the high beam and the taillights Set the switch to OFF to turn off all lights CAUTION Do not use the headlights with the engine turned off for an extended period The battery may discharge to the point that the starter motor will not operate properly If this should happen remove the battery and recharge it ...

Page 36: ...ifferential gear lock switch 4WD LOCK Select the appropriate drive according to terrain and the conditions Two wheel drive 2WD Power is sup plied to the rear wheels only Four wheel drive 4WD Power is supplied to the rear and front wheels Four wheel drive with the differential gear locked 4WD LOCK Power is supplied to the rear and front wheels when the differential gear is locked Unlike the 4WD mod...

Page 37: ...stances Ch anging from 2WD to 4WD or from 2WD to 2WD Differential UNLOCK or vice versa while moving may cause the vehicle to unexpectedly handle diff erently This could distract the operator and increase the risk of losing control and an accident HOW TO AVOID THE HAZARD Always stop the vehicle before chang ing from 2WD to 4WD or from 2WD to 2WD Differential UNLOCK On Command F our Wheel Drive Swit...

Page 38: ...o 2WD Stop the vehicle and then set the switch to 2WD The 4WD indicator will go out in the multi function display On Command Differential Gear Lock S witch 2WD LOCK To lock the differential gear in 4WD stop the vehicle make sure the On Command four wheel drive switch is set to 4WD move the select lever to position and then set the switch to LOCK 1 On Command differential lock switch 4WD LOCK 2 Sel...

Page 39: ...l and have an accident if you cannot make a sharp enough turn for the speed you are traveling HOW TO AVOID THE HAZARD Always operate at a slow speed when the vehicle is in 4WD LOCK and allow extra time and distance for maneuvers NOTE When the switch is set to LOCK the differential gear lock indicator and indicator lights will flash until the differential gear is locked When the differential gear l...

Page 40: ...the pedal to the rest position when released Always check that the throttle pedal returns normally before staring the engine 1 Throttle pedal Before starting the engine check the throttle pedal to be sure it is operating smoothly Make sure the throttle pedal fully returns to the idle position as soon as it is released ...

Page 41: ...ZARD Check the operation of the accelerator pedal before you start the engin e If the accelerator pedal does not work smoothly check for the cause Correct the problem before operating the vehicle Consult a service center if you cannot find or solve the problem yourself Brake Pedal Press the brake pedal to slow or stop the vehicle 1 Brake pedal Parking brake pedal The parking brake pedal is located...

Page 42: ... the parking brake gradually Spring pressure helps return the pedal to the released position Be sure to fully release the parking brake before starting out Failure to do so may result in poor performance and premature wearing of the rear brake and V belt 1 Parking brake pedal 2 Parking brake pedal release lever Drive Select Lever The drive select lever is used to shift the vehicle into forward neu...

Page 43: ...Control Functions 4 18 1 Drive select lever Fuel Tank Cap Remove the fuel tank cap by turning it counter clockwise 1 Fuel tank cap ...

Page 44: ...the seat bench pull front of seat upward then slide seat forward 1 Driver Passenger seat To install seat bench insert tabs on rear of seat into the seat holders located on the UTV frame Push down the front of the seat until it snaps in place ...

Page 45: ...or and or passenger could fall if the seat is loose during operation HOW TO AVOID THE HAZARD Make sure the seat is securely latched Seat belts This vehicle is equipped with three point seat belts for both the operator and passenger Always wear seat belts while riding in the vehicle 1 Seat belt 2 2 Latch plate 2 3 Buckle 2 ...

Page 46: ...Push the latch plate into the buckle until it clicks Pull up on the latch plate to make sure it is secure 3 Place the lap portion of the belt low on your hips Push down on the buckle end of the belt as you pull up on the shoulder part so the belt is snug across your hips 1 Buckle 2 Latch plate 4 Position the shoulder belt over your shoulder and across your chest The shoulder belt should fit agains...

Page 47: ...RD Not wearing the seat belt or w earing the seat belt improperly WHAT CAN HAPPEN There is an increased risk of being killed or seriously injured in an accident HOW TO AVOID THE HAZARD Always wear your seat belt when riding in the vehicle Be sure the seat belt is close fittin g across your hips and chest and is latched securely ...

Page 48: ...Compartment CAUTION To prevent damage to the glove compartment do not place metal products like tools or sharp edged products directly in the glove compartment If they must be stored wrap them in appropriate cushion material a Open ...

Page 49: ...nctions 4 24 Cargo B ed 1 Cargo bed 2 Tailgate Opening and Closing the Tailgate 1 Tailgate 2 Latch 2 To open Unhook latches and lower the tailgate To close Place tailgate in original up position then hook latches ...

Page 50: ... bed slowly to its original position and be sure it locks into place Maximum load limit 350lb 158kg WARNING POTENTIAL HAZARD Pinch points WHAT CAN HAPPEN You or someone else could be pinched between the cargo bed and the frame when the bed is being lowered HOW TO AVOID THE HAZARD Before closing the bed be sure others are standing away from the vehicle Keep hands and fingers away from pinch points ...

Page 51: ... limit for this cargo bed Cargo should be properly distributed and securely attached Reduce speed when carrying cargo Al low greater distance for braking WARNING POTENTIAL HAZARD Carrying a passenger in the cargo bed WHAT CAN HAPPEN The passenger could fall be thrown out or be struck by objects in the cargo bed HOW TO AVOID THE HAZARD Never carry a passenger in the cargo bed This cargo bed is desi...

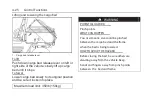
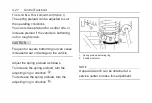
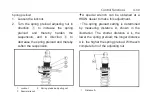
Page 52: ...g out on rough terrain CAUTION Frequent or severe bottoming out can cause increased wear or damage to the vehicle Adjust the spring preload as follows To increase the spring preload turn the adjusting ring in direction To decrease the spring preload turn the adjusting ring in direction 1 Spring preload adjusting ring 2 Position indicator NOTE A special wrench can be obtained at a service center to...

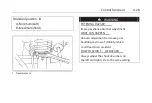
Page 53: ...wrench WARNING POTENTIAL HAZARD Improper shock absorber adjustment WHAT CAN HAPPEN Uneven adjustment can cause poor handling and loss of stability which could lead to an accident HOW TO AVOID T HE HAZARD Always adjust the shock absorbers on the left and right side to the same setting ...

Page 54: ...r high heat source This may cause the unit to explode due to excessive gas pressure Do not deform or damage the cylinders in any way Cylinder damage will result in poor damping performance Do not dispose of a damaged or worn out shock absorber assembly yourself Take the shock absorber assembly to a HSUN dea ler for any service The spring preload rebound damping and compression damping forces of th...

Page 55: ...ad and thereby soften the suspension A special wrench can be obtained at a HSUN dealer to make this adjustment The spring preload setting is determined by measuring distance A shown in the illustration The shorter distance A is the lower the spring preload the longer distance A is the higher the spring preload With each complete turn of the adjusting nut 1 Locknut 2 Spring preload adjusting nut 3 ...

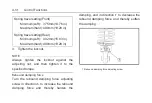
Page 56: ...ten the locknut NOTE Always tighten the locknut against the adjusting nut and then tighten it to the specified torque Rebound damping force Turn the rebound damping force adjusting screw in direction S to increase the rebound damping force and thereby harden the damping and in direction F to decrease the rebound damping force and thereby soften the damping 1 Rebound damping force adjusting screw ...

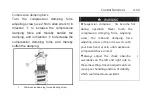
Page 57: ... the damping 1 Compression damping force adjusting screw WARNING Suspension compone nts become hot during operation Never touch the compression damping force adjusting screw the rebound damping force adjusting screw or the oil reservoir with your bare hand or skin until suspension components have cooled Always adjust the shock absorbe r assemblies on the left and right side to the same setting Une...

Page 58: ...t can be obtained at a service center See pages 6 11 6 13 for precaution information 1 Trailer hitch bracket Auxiliary DC Jack The auxiliary DC jack is located at the right side of the front panel The auxiliary DC jack can be used for suitable work lights radios etc The auxiliary DC jack should only be used when the engine is running 1 Auxiliary DC jack cap ...

Page 59: ...ated capacity for the auxiliary DC jack DC 12V 120W 10 A CAUTION Do not use accessories requiring more than the above maximum capacity This may overload the circuit and cause the fuse to blow If accessories are used without the engine running or with the headlights turned on the battery will lose its charge and engine starting may become difficult Do not use an automotive cigarette lighter or othe...

Page 60: ... reservoir Check coolant level Fill with coolant if necessary 5 6 8 20 8 21 Final gear oil Differential gear oil Check for leakage 5 7 Accelerator pedal Check for proper accelerator pedal operation 5 8 5 10 Seat belts Check for proper operation and belt wear 5 10 Steering Check for proper operation 5 10 Fittings and fasteners Check all fittings and fasteners 5 10 Lights and switches Check for prop...

Page 61: ...ribed in theOwner s Manual Brakes Always check the brake pedal travel and the brake fluid reservoir level before each use of the vehicle When applied the brake pedal should feel firm Any sponginess will indicate a possible fluid leak or low brake fluid level which must be corrected before riding If you discover any irregularities in brake system operation including excessive pedal travel contact y...

Page 62: ...ee pages 8 33 8 34 Recommended brake fluid DOT 4 BrakeFluidLeakage Check to make sure there is no brake fluid leaking out of brake hoses joints or the brake fluid reservoir Apply the brakes firmly for one minute If there is any leakage have the vehicle inspected by a service center Brake Operation Test the brakes at a slow speed when starting out to make sure they are working properly If brakes do...

Page 63: ...find anyproblem s with thebrakes If a problem cannot be corrected by the adjustment proceduresprovided inthis manual havethevehicleinspected by a servicecenter Fuel Make sure there is sufficient gasoline in the tank Recommended fuel Unleaded gasoline only Fuel tank capacity 6 86 gal 26 L CAUTION Use only unleaded gasoline The use of leaded gasoline will cause severe damage to internal engine parts...

Page 64: ...methanol Gasohol containing ethanol can be used if ethanol content does not exceed 10 Gasohol containing methanol is not recommended because it may cause fuel system damage or vehicle performance problems WARNING POTENTIALHAZARD Improperca rewhen refueling WHAT CAN HAPPEN Fuel can spill which can causeafireand severeinjury Fuel expandswhen it heatsup If thefuel tankisoverfilled fuel could spill ou...

Page 65: ...ankcase Recommended engine oil type and quantity See page 10 2 Coolant Check the coolant level in the coolant reservoir when the engine is cold The coolant level will vary with engine temperature The coolant level is satisfactory if it is between the minimum and maximum level marks on the coolant reservoir If the coolant level is at or below the minimum level mark add additional coolant to bring t...

Page 66: ... radiator cap Always use athick rag over the cap Allow anyremaining pressureto escapebeforecompletely removing thecap FinalGearO il Make sure the final gear oil is at the specified level Add oil as necessary See pages 8 18 8 19 for details Recommended oil SAE 80 API GL 4 Hypoid gear oil If desired an SAE 80W90 hypoid gear oil may be used for all conditions NOTE GL 5 or GL 6 rated hypoid gear oil m...

Page 67: ...e the vehicle inspected by a service center WARNING Failure to check or maintain proper operation of the throttle system can result in an accident leading to serious injuries or death Never start or operate this vehicle if it has a sticking or improperly operating throttle pedal Immediately contact your service center for service if throttle problems arise Always check the throttle pedal for free ...

Page 68: ... throttle pedal freeplay Adjust the freeplay if necessary Throttle FreeplayInspection 1 Set parking brake 2 Start the engine Allow engine to warm up a few minutes 3 Measure the distance the throttle pedal moves before the engine begins to pick up speed Freeplay should 1 16 to 1 8 inches 1 5 3mm Throttle FreeplayAdjustment 1 Remove seat 2 Loosen the throttle cable column nut Adjust the throttle cab...

Page 69: ...ove smoothly when pulled out and retract on its own when released The latch plate should click securely into the buckle and release when the release button is pushed firmly Wash off any dirt or mud which could affect operation Have a service center repair as necessary Fittings andFasteners Always check the tightness of the chassis fittings and fasteners before each ride Take the vehicle to a servi...

Page 70: ...ur risk of accident HOW TOAVOID THEHAZARD 1 Thetireslisted b elow havebeen approved by the Manufacturer forthismodel Othertire combinations arenot recommended 2 Thetiresshould beset to the recommended tire pressure Front 10psi 70kpa 0 7 kgf cm 2 Rear 10psi 70kpa 0 7 kgf cm 2 Check and adjusttire pressure whentires arecold Fronttireson both sidesshould bethe sametirepressure Reartires on both sides...

Page 71: ...itions Thefollowing are minimums Front 9psi 63kpa 0 64kgf cm 2 Rear 9psi 63kpa 0 64kgf cm 2 4 Useno morethan the following Pressureswhen seating the tirebeads Front 36psi 250kpa 2 5kgf cm 2 Rear 36psi 250kpa 2 5kgf cm 2 Higherpressuresmay causethe tire to burst Inflatetires slowlyand carefully Fast inflation could causethetireto burst ...

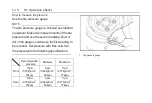
Page 72: ... use the second reading Dust or dirt in the gauge could cause the first reading to be incorrect Set pressure with tires cold Set tire pressures to the following specifications Recommended pressure Minimum Maximum Front 10psi 0 70kgf cm 2 70kpa 9psi 0 64kgf cm 2 63kpa 11psi 0 77kgf cm 2 77kpa Rear 10psi 0 70kgf cm 2 70kpa 9psi 0 64kgf cm 2 63kpa 11psi 0 77kgf cm 2 77kpa 1 Tire pressure gauge ...

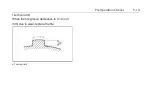
Page 73: ...Pre Operation Checks 5 14 Tire WearLimit When the tire groove decreases to 0 12 in 3 mm due to wear replace the tire a Tire wear limit ...

Page 74: ...ol or functi on you do not understand ask your service center Starting engine WARNING POTENTIAL HAZARD Freezing control cables in cold weather WHAT CAN HAPPEN You could be unable to control the vehicle which could lead to an accident or collisio n HOW TO AVOID THE HAZARD When riding in cold weather always make sure all control cables work smoothly before you begin riding 1 Apply the brake 2 Shift ...

Page 75: ...e neutral indicator light should come on If the neutral indicator light does not come on ask a service center to inspect the electric circuit The engine can be started in any gear if the brake is applied However it is recommended to shift into neutral before starting the engine ...

Page 76: ...or the first time Jump starting Jump starting the vehicle should be avoided The battery should be removed and charged instead However if the vehicle must be jumpstarted proceed as follows 1 Turn the key to OFF 2 Open the hood See pages 8 6 8 7for hood opening and closing procedures 3 Remove the battery compartment cover 4 Using a charged 12V battery connect the positive lead of the jumper cable to...

Page 77: ... Be especially careful not to touch the positive lead of the jumper cable to the negative lead reverse the polarity of the jumper cables when connecting to the batteries battery explosion and or serious damage to the electrical system may occur Start the engine Refer to Starting engine on pages 6 1 6 3 After the engine starts disconnect the negative lead of the jumper cable from the vehicle and ch...

Page 78: ...ect lever operation and reverse driving CAUT ION Before shifting you must stop the vehicle and take your foot off the accelerator pedal Otherwise the transmission may be damaged Shifting Neutral to Forward 1 Stop the vehicle Keep your foot off the accelerator pedal 2 Apply the brakes and then shift by moving the drive select lever along the shift guide NOTE Make sure that the drive select lever is...

Page 79: ...hifting to reverse position 5 The brake pedal is attached to a cable that is connected to a position pin in the gearshift assembly Only when the brake pedal is depressed will the gearshift lever be able to move from neutral to reverse 1 Drive select lever NOTE When in reverse the reverse indicator light should be on If the light does not come on ask a service center to inspect the reverse indicato...

Page 80: ...ceed go slowly Vehicle Break in Period The break in period for your new UTV vehicle is the first 25 hours of operation or the time it takes to use the first three tanks full of gasoline No single action on your part is as important as a proper break in period Careful treatment of a new engine and drive components will result in more efficient performance and longer life for these components Perfor...

Page 81: ...ion or any condition that might result in excessive engine heating must be avoided However momentary 2 3 seconds maximum full throttle operation under load does not harm the engine Each full throttle acceleration sequence should be followed with a substantial rest period for the engine by cruising at lower rpm s so the engine can rid itself of the temporary build up of heat If any abnormality is n...

Page 82: ...break in of the clutch and drive belt will ensure a longer life and better performance Break in the clutch and belt by operating at slower speeds during the break in period as recommended Pull only light loads Avoid aggressive acceleration and high speed operation during the break in period Parking When parking stop the engine and shift the drive select lever into the neutral position Apply the pa...

Page 83: ...e apply the parking brake and block the front and rear wheels with rocks or other objects Do not park the vehicle at all on hills that are so steep you could not walk up them easily 1 Bring the vehicle to a stop by applying the brakes 2 Stop the engine 3 With the brakes applied set the parking brake NOTE Like many other vehicles the parking brake acts on the rear wheels For the parking brake to ha...

Page 84: ... accessory or one that is equivalent in design and quality Accessories should be rigidly and securely mounted An accessory that can shift position or come off while you are operating could affect your ability to control the vehicle Do not mount an accessory where it could interfere with your ability to control the vehicle Examples include but are not limited to an object that limits your ability t...

Page 85: ... with a 1 in receiver See page 4 29 for more information Do not exceed the maximum tongue weight You can measure tongue weight with a bathroom scale Put the tongue of the loaded trailer on the scale with the tongue at hitch height Adjust the load in the trailer if necessary to reduce the weight on hitch If you are carrying cargo and towing a trailer include the tongue weight in the maximum vehicle...

Page 86: ...id making sharp turns unless at very slow speeds Avoid hills and rough terrain Choose terrain carefully Added weight affects the stability and handling of the vehicle WARNING POTENTIAL HAZARD Overloading this vehicle or carrying or towing cargo improperly WHAT CAN HAPPEN Could cause changes in vehicle handling which could lead to an ac cident HOW TO AVOID THE HAZARD Never exceed the stated load ca...

Page 87: ... 2 1 2 5 Please also read all caution and warning labels on your vehicle This vehicle is designed for the operator and one passenger The driver and passenger must always wear a seat belt Never carry passenger in the cargo bed WARNING POTENTIAL HAZARD Not wearing the seat belt Wearing the seat belt improperly WHAT CAN HAPPEN There is increased risk of being killed or seriously injured i n an accide...

Page 88: ...assenger could fall or be struck by objects in the cargo bed HOW TO AVOID THE HAZARD Never carry a passenger in the cargo bed The cargo bed is designed to carry cargo only The total weight of operator passenger accessories cargo trailer tongue weight and the vehicle itself must not exceed 1880lbs 853Kg ...

Page 89: ...be properly distributed and securely attached Reduce speed when carrying cargo or pulling a trailer Allow greater distan ce for braking Always follow the instructions in your Owner s Manual for carrying cargo or pulling a trailer The driver and passenger must always wear a seat belt an approved motorcycle helmet eye protection and protective clothing including over the ankle boots gloves a long sl...

Page 90: ...ncreases your chances of a severe head injury or death in the event of an accident Operating without eye protection can result in an accident and increases your chances of a severe injury in the event of an accident HOW TO AVOID THE HAZARD Always wear an approved motorcycle helmet that fits properly You should also wear E ye Protection Goggles or Face S hield Gloves B oots Long S leeved S hirt or ...

Page 91: ...ore attempting maneuvers that are more difficult Perform the Pre Operation Checks on pages 5 1 5 14 Set the parking brake shift to neutral and follow the instructions on page 6 1 to start the engine Once it has warmed up and you have turned the choke off you are ready to begin driving your vehicle With the engine idling shift the drive select lever into low or high Then release the parking brake P...

Page 92: ...er or go out of control if you attempt sharp high speed turns You should also be careful making sharp turns on rough terrain Do not attempt to turn around or make abrupt maneuvers on slope Position your hands on the steering wheel so that your thumbs and fingers do not wrap around the wheel This is particularly important when driving in rough terrain The front wheels will move right and left as th...

Page 93: ...low these precautions when operating in reverse 1 Always check for obstacles or people behind the vehicle 2 Apply the throttle lightly Never open the throttle suddenly 3 Back up slowly 4 Apply the brakes lightly for stopping 5 Avoid making sharp turns Before shifting into reverse gear always check for obstacles or people behind the vehicle When it is safe to proceed back up slowly ...

Page 94: ...h loose or slippery surfaces GOING UPHILL Do not attempt to climb hills until you have mastered basic maneuvers on flat ground Use proper driving techniques to avoid overturns on hills and slopes Drive straight up hills and avoid crossing the side of a hill which increases your chance of rollover Practice first on gentle slopes before attempting steeper hills Always check the terrain carefully bef...

Page 95: ...9 some hills are too steep for you to climb Maximum slope angle 15 Choose carefully which hills you attempt to climb Avoid hills with slippery surfaces or ones where you will not be able to see far enough ahead of you ...

Page 96: ...efore climbing the hill first be sure you are operating in low range 4WD or if necessary with 4WD Diff Lock To climb a hill you need traction momentum and steady throttle Travel fast enough to keep your momentum going but not so fast that you cannot react to changes in the terrain as you climb Slow down when you reach the crest of the hill if you cannot clearly see what is on the other side There ...

Page 97: ...ive your vehicle straight downhill Avoid sharp angles that could allow the vehicle to pitch or roll over Carefully choose your path and drive no faster than you will be able to react to obstacles that may appear WARNING POTENTIAL HAZARD Going down a hill improperly WHAT CAN HAPPEN Could cause loss of control or cause the vehicle to overturn HOW TO AVOID THE HAZARD Always check the terrain carefull...

Page 98: ...o slowly and carefully If the vehicle starts to tip gradually steer in the downhill direction if there are no obstacles in your path As you regain proper balance gradually steer again in the direction you want to go CROSSING THROUGH SHALLOW WATER If you must cross shallow slow moving water up to the depth of the vehicle s floorboards choose your path carefully to avoid sharp drop offs large rocks ...

Page 99: ...n 13 in 33cm R emember that wet brakes may have reduced stopping ability Test your brakes after leaving water If necessary apply brakes several times to let friction dry out the linings CAUTION After riding your vehicle in water be sure to drain the trapped water by removing the check hose at the bottom of the air filter case the CVT belt cooling duct check hose the drive select lever box check ho...

Page 100: ...r box and replace the filter with a new filter 3 Remove the spark plugs 4 Turn the engine over several times 5 Dry the spark plugs and reinstall them or install new plugs 6 Attempt to start the engine If necessary repeat the drying procedure 7 Take the vehicle to your service center for service as soon as possible whether you succeed in starting it or not 8 If water has been ingested into the CVT ...

Page 101: ...r Box inspection hole Front Axle Differential Lock When driving on rugged or muddy roads locking the differential case in the front axle gearbox will give you the best traction In this case the two front wheels will be driven at the same rate It may not be useful to lock the differential case after you have lost traction because the skid process has ...

Page 102: ...er accident Avoid jumping the vehicle as injury loss of control and damage to the vehicle could occur WARNING POTENTIAL HAZARD Failure to use extra care when operating this vehicle on unfamiliar terrain WHAT CAN HAPPEN You can come upon hidden rocks bumps or holes without enough time to react Could result in the vehicle overturning or going out of control HOW TO AVOID THE HAZARD Go slowly and be e...

Page 103: ...both sides and above the vehicle for obstacles such as branches that the vehicle might hit causing an accident or for brush that might enter the vehicle as you pass and strike the driver or passenger Never hold onto the enclosure so your hand is outside the vehicle Hold only onto the handgrip inside the enclosure ...

Page 104: ...cle tipping Go only fast enough to maintain your momentum but still give yourself plenty of time to react to changes in conditions If there is any question about your ability to maneuver safely over the obstacle you should turn around if the ground is flat and you have the room or back up until you find a less difficult path WARNING POTENTIAL HAZARD Improperly operating over obstacles WHAT CAN HAP...

Page 105: ...e service information included in this manual is intended to provide you the owner with the necessary information for completing your own preventive maintenance and minor repairs The tools provided in the Owner s tool ki t are sufficient for this purpose except that a torque wrench is also necessary to properly tighten nuts and bolts NOTE If you do not have a torque wrench available during a servi...

Page 106: ...h vehicle service WARNING POTENTIAL HAZARD Operating this vehicle with improper modifications WHAT CAN HAPPEN Improper installation of accessories or modification of this vehicle may cause changes in ha ndling which in some situations could lead to an accident HOW TO AVOID THE HAZARD Never modify this vehicle through improper installation or use of accessories All parts and accessories added to th...

Page 107: ...ey require special tools data and technical skills ITEM ROUTINE Whichever Comes first INITIAL EVERY Month 1 3 6 6 12 Km miles 320 200 1 200 750 2 400 1 500 2 400 1 500 4 800 3 000 hours 20 75 150 150 300 Spark Plug Check condition Adjust gap and clean Replace if necessary Crankcase Breather System Check breather hose for cracks or damage Replace if necessary Valves Check valve clearance Adjust if ...

Page 108: ...Intake Duct Clean Replace if necessary Every 20 40 hours More often in wet or dusty areas Engine Oil Replace Warm engine before draining Engine Oil Filter Cartridge Replace Final Differential Gear Oil Check oil level Check oil leakage Replace Front Brake Check operation brake pad wear fluid leakage see NOTE page 5 2 5 3 Correct if necessary Replace pads if worn to the limit Front and Rear Suspensi...

Page 109: ...d Drive Shaft Universal Joint Lubricate with lithium based grease Rear Upper and Lower Knuckle Pivots Lubricate with lithium based grease Fittings and Fasteners Check all chassis fittings and fasteners Check if necessary Anti Roll Bar Bushings Check for cracks or damage NOTE R ecommended brake fluid DOT4 Brake fluid replacement When disassembling the master cylinder or caliper replace the brake fl...

Page 110: ...8 6 Periodic Maintenance and Adjustment Hood To Open Unhook the hood latches and then slowly tilt the hood up until it stops 1 Latch 2 1 Hood ...

Page 111: ...ecure projections on the underside of the hood into slots on the back of the instrument panel Secure slots on the side of the hood around projections on the frame 1 Projection 2 2 Slot 2 CAUTION Make sure that all cables and wires are in place when closing the hood Do not drive the vehicle with the hood open unlatched or removed ...

Page 112: ...tem EFI engine was completely different from the engine which uses carburetor it consist of ECU EFI cables sensors actuators and other advanced components As the following pictures 1 Oxygen sensor 2 Oxygen sensor threaded sleeve 3 Exhaust Pipe 1 ECU ...

Page 113: ...oltage wire 2 Ignition signal plug 3 Ignition coil 1 Fuel injector 2 Bent pipe inlet pipe 3 Intake air temperature sensor pressure sensor 4 Ducting dampers 2 Water temperature sensor 1 Air damper degree sensor 2 Idle speed stepper motor 3 Air damper ...

Page 114: ...condition ECU will adjust the fuel injection volume according to different negative pressure and opening of air damper Adjust the engine fuel injection volume can adjust the output power and output torque Water temperature sensor For testing cooling water temperature according to the temperature difference ECU will automatically revise fuel injection volume to ensure the smooth operation of the en...

Page 115: ...eration In addition the oil must be changed and the oil filter cartridge replaced at the intervals specified in the periodic maintenance and lubrication chart To Check Engine O il Level 1 Place the vehicle on a level surface 2 Remove the console 3 Check the engine oil level on a cold engine NOTE If the engine was started before checking the oil level be sure to warm up the engine sufficiently and ...

Page 116: ...mmended type to raise it to the correct level 7 Insert the dipstick into the oil filler hole and then tighten the oil filler cap 8 Install the console To Change the Engine O il With or Without O il Filter Cartridge Replacement 1 Remove the console See page 8 9 for console removal and installation procedures 2 Place an oil pan under the engine to collect the used oil and then remove the engine oil ...

Page 117: ...is not being replaced 4 Remove the oil filter cartridge with an oil filter wrench 1 Oil filter cartridge 2 Oil filter bolt NOTE An oil filter wrench is available at a nearby service center 5 Apply a light coat of engine oil to the O ring of the new oil filter cartridge NOTE Make sure the O ring is seated properly ...

Page 118: ...torque wrench Tightening torque Oil filter cartridge 12 ft lbs 17Nm 1 7m kgf 1 Oil filler cartridge 2 Torque bolt 7 Install the engine oil drain bolt and then tighten it to the specified torque Tightening torque Engine oil drain bolt 17 ft lbs 24Nm 2 4m kgf 8 Add the specified amount of recommended engine oil and then install the engine oil filler cap and tighten it ...

Page 119: ...han specified In addition do not use oils labeled ENERGY CONSERVING II or higher Make sure that no foreign material enters the crankcase 9 Start the engine and then let it idle for several minutes while checking it for oil leakage If oil is leaking immediately turn the engine off and check for the cause 10 Turn the engine off wait at least ten minutes and then check the oil level and correct it if...

Page 120: ...ype to raise it to the correct level CAUTION Be sure no foreign material enters the final gear case 4 Install the oil filler bolt and then tighten it to the specified torque Tightening torque Final gear oil filler bolt 16 3 ft lbs 23 Nm 2 3 m kgf Changing the Final Gear O il 1 Place the vehicle on a level surface 2 Place a container under the final gear case to collect the used oil 3 Remove the oi...

Page 121: ...ning torque Final gear oil drain bolt 14 ft lbs 20 Nm 2 0 m kgf 5 Add the recommended final gear oil up to the brim of the filler hole Recommended oil SAE 80 API GL 4Hypoid gear oil Oil quantity 0 42 qt 0 4 L CAUTION Be sure no foreign material enters the final gear case 6 Install the oil filler bolt and then tighten it to the specified torque ...

Page 122: ...l Level 1 Place the vehicle on a level surface 2 Remove the differential gear oil filler bolt and check the oil level It should be up to the brim of the filler hole If the level is low add sufficient oil of the recommended type to raise it to the specified level 1 Speed sensor 2 Correct oil level 3 Differential gear oil CAUTION 1 Be sure no foreign material enters the differential gear case 2 Plea...

Page 123: ... lbs 23Nm 2 3 m kgf Changing the Differential Gear O il 1 Place the vehicle on a level surface 2 Place a container under the differential gear case to collect the used oil 3 Remove the differential gear oil filler bolt and differential gear oil drain bolt to drain the oil 1 Differential gear oil drain bolt 4 Install the differential gear oil drain bolt and tighten it to the specified torque ...

Page 124: ... 5 Hypoid gear oil Oil quantity 0 3 qt 0 28L CAUTION Be sure no foreign material enters the differential gear case 6 Install the differential gear oil filler bolt and then tighten it to the specified torque Tightening torque Differential gear oil filler bolt 16 3 ft lbs 23Nm 2 3m kgf 7 Check for oil leakage If oil leakage is found check for the cause Oil cooler 1 Oil Cooler 2 Protection net protec...

Page 125: ...tone can easily break the oil cooler and cause oil leak CAUTION If the oil cooler is blocked it will make the oil temperature overheated and damage the engine Coolant The coolant level should be checked before each ride Checking the Coolant Level 1 Place the vehicle on a level surface 2 Open the hood See pages 8 6 8 7 for hood opening and closing procedures 3 Check the coolant level in the coolant...

Page 126: ...voir capacity up to the maximum level mark 0 663 qt 0 627L CAUTION Mix anti freeze with distilled water only However if distilled water is not available soft water can be used for refilling Changing the Coolant The coolant must be changed by a service center at the intervals specified in the periodic maintenance and lubrication chart Recommended antifreeze High quality ethylene glycol antifreeze c...

Page 127: ... content of the coolant If water is used instead of coolant have a service center check the antifreeze content of the coolant as soon as possible The radiator fan is automatically switched on or off according to the coolant temperature in the radiator Axle Boots Check the protective boots for holes or tears If any damage is found have them replaced by a service center 1 Front axle boot 2 each side...

Page 128: ...stment 1 Rear axle boot 2 each side Spark Plug Inspection Removal 1 Remove hood See pages 8 6 2 Remove the spark plug cap 3 Use the spark plug wrench in the tool kit to remove the spark plug as shown 1 Spark plug cap 1 Spark plug wrench ...

Page 129: ...not attempt to diagnose such problems yourself Instead take the vehicle to a service center You should periodically remove and inspect the spark plug because heat and deposits will cause the spark plug to slowly break down and erode If electrode erosion becomes excessive or if carbon and other deposits are excessive you should replace the spark plug with the specified plug Specified spark plug DR8...

Page 130: ...s 17 5 Nm 1 75 m kgf NOTE If a torque wrench is not available when you are installing the spark plug a good estimate of the correct torque is 1 4 to 1 2 turn past finger tight Have the spark plug tightened to the specified torque as soon as possible 4 Install the spark plug cap 5 Lower the cargo bed Cleaning the Engine Air Filter Element NOTE There is a check hose at the bottom of the air filter c...

Page 131: ... Remove the Engine cover See page 8 16 8 17 for Engine cover removal and installation procedure 3 Remove the connecting rubber tube between air cleaner and throttle valve and the screws fixing the air cleaner and then remove the air cleaner 1 Holder 3 2 Air filter case cover 4 Remove the air filter element 5 Remove the sponge material from its frame ...

Page 132: ...tly but thoroughly in solvent WARNING POTENTIAL HAZARD Using low flash point solvents or gasoline to clean the sponge material WHAT CAN HAPPEN Low flash point solvents or gasoline can catch fire or explode HOW TO AVOID THE HAZARD Use parts cleaning solvent to clean the sponge material 7 Squeeze the excess solvent out of the sponge material and let it dry ...

Page 133: ...ial NOTE The sponge material should be wet but not dripping 10 Pull the sponge material over its frame 11 Install the air filter element 12 Install the air filter case cover and be sure the crankcase breather hose is connected 1 Crankcase breather hose 13 Install the engine cover 14 Install the seats NOTE The air filter element should be cleaned every 20 40 hours It should be cleaned and lubricate...

Page 134: ...emoved This will allow unfiltered air to enter causing rapid engine wear and possible engine damage Additionally operation without the air filter element will affect throttle valve jetting with subsequent poor performance and possible engine overheating Cleaning the Spark Arrester Be sure the exhaust pipe and muffler are cool before cleaning the spark arrester 1 Remove the bolts 1 Bolt 3 2 Remove ...

Page 135: ...he bolts to the specified torque Tightening torque Tailpipe bolt 8 5 ft lbs 12 Nm 1 2 m kgf WARNING POTENTIAL HAZARD Improper cleaning of the spark arrester Hot exhaust system WHAT CAN HAPPEN Could injure the eyes Could cause burns Could cause carbon monoxide pois oning possibly leading to death Could start a fire HOW TO AVOID THE HAZARD When cleaning the spark arrester Always let the exhaust syst...

Page 136: ...echnician Front Brake Pad Check Each brake pad is provided with wear indicator grooves which allow you to check the brake pad wear without having to disassemble the brake system To check the brake pad wear check the wear indicator grooves If a brake pad has worn to the point that the wear indicator grooves have almost disappeared have a service center replace the brake pads as a set 1 Brake pad we...

Page 137: ...llow you to check the brake pad wear without having to disassemble the brake system To check the brake pad wear check the wear indicator grooves If a brake pad has worn to the point that the wear indicator grooves have almost disappeared have a service center replace the brake pads as a set 1 Brake pad wear indicator groove ...

Page 138: ...rn brake pads and or brake system leakage If the brake fluid level is low be sure to check the brake pads for wear and the brake system for leakage The brake fluid reservoir is located under the hood See pages 8 6 8 7 for hood opening and closing procedure 1 Minimum level mark Observe these precautions When checking the fluid level make sure the top of the brake fluid reservoir is level Use only t...

Page 139: ...f the brake fluid level goes down Brake Fluid Replacement Complete fluid replacement should be done only by trained service personnel Have a service center replace the following components during periodic maintenance or when they are damaged or leaking Replace the oil seals every two years Replace the brake hoses every four years Checking the Brake Pedal Have a service center check the brakes at t...

Page 140: ...braking ability which could lead to an accident HOW TO AVOID THE HAZARD After servicing Make sure the brakes operate smoothly and that the brake pedal position is correct Make sure the brakes do not drag All air must be bled from the brake system Replacement of brake components requires professional knowledge These procedures should be performed by a service center ...

Page 141: ...ing takes effect If necessary adjust the brake light switch as follows 1 Open the hood See pages 8 6 8 7 for hood opening and closing procedure 2 Turn the adjusting nut while holding the brake light switch in place To make the brake light come on earlier turn the adjusting nut in direction To make the brake light come on later turn the adjusting nut in direction 1 Brake light switch 2 Adjusting nu...

Page 142: ...Operation of controls could be restricted which could cause an accident or injury HOW TO AVOID THE HAZARD Inspect cables frequently Replace damaged cables Lubricate the inner cables and the cable ends If the cables do not operate smoothly ask a service center to replace them Recommended lubricant Engine oil see page 10 2 Brake Pedal and Accelerator Pedal Lubrication Lubricate the pivoting parts Re...

Page 143: ...Periodic Maintenance and Adjustment 8 39 Rear Knuckle Upper and Lower Pivot Lubrication Lubricate the knuckle upper and lower pivots with a grease gun Recommended lubricant Lithium based grease ...

Page 144: ...nd Adjustment Steering Shaft Lubrication Lubricate the pivot points Recommended lubricant Lithium based grease all purpose grease Upper universal joint steering transmission shaft Lower universal joint steering transmission shaft ...

Page 145: ...lance rod 1 Nut 4 Wheel Installation 1 Install the wheel and the nuts NOTE The arrow mark on the tire must point toward the rotating direction of the wheel Tapered nuts are used for both the front and rear wheels Install the nut with its tapered side towards the wheel ...

Page 146: ...and Adjustment 1 Arrow mark 1 Tapered nut 2 Lower the vehicle so that the wheel is on the ground 3 Tighten the wheel nuts to the specified torque Wheel nut torque Front 49 7 ft lbs 70Nm 7 0 m kgf Rear 49 7 ft lbs 70Nm 7 0 m kgf ...

Page 147: ...ith a sealed type battery Therefore it is not necessary to check the electrolyte or add distilled water in the battery If the battery seems to have discharged consult a service center CAUTION Do not try to remove the sealing caps of the battery cells You may damage the battery ...

Page 148: ...ARD Avoid contact with skin eyes or clothing Always shield eyes when working near batteries Keep out of reach of children Antidote EXTERNAL Flush with water INTERNAL Dri nk large quantities of water or milk Follow with milk of magnesia beaten egg or vegetable oil Get prompt medical attention EYES Flush with water for 15 minutes and get prompt medical attention Keep batteries away from sparks flame...

Page 149: ...letely recharge the battery before reinstallation 2 Always make sure the connections are correct when putting the battery back in the vehicle 1 Negative battery lead 2 Positive battery lead CAUTION A special battery charger constant voltage ampere or constant voltage is required for recharging a sealed type battery Using a conventional battery charger may shorten the battery life ...

Page 150: ...he ignition switch and install a new fuse of the specified amperage If a fuse is blown replace it as follows 1 Remove the battery compartment cover by lifting it up and pulling it out 1 Battery compartment cover 2 Screw M6 8 2 Turn the key to OFF and turn off the electrical circuit in question CAUTION To prevent accidental short circuiting turn off the ignition switch when checking or replacing a ...

Page 151: ...d to a fire HOW TO AVOID THE HAZARD Always use a fuse of the specified rating Never use a material in place of the proper fuse 3 Remove the blown fuse and then install a new fuse of the specified amperage 1 Main fuse 2 Spare main fuse 3 Headlight fuse 4 Ignition fuse 5 Auxiliary DC jack fuse 6 2WD 4WD Fuse 7 Signaling system fuse 8 Meter Fuse 9 Backup fuse for odometer and clock ...

Page 152: ... the electrical circuit in question to check if the device operates 5 If the fuse immediately blows again have a service center check the electrical system 6 Install the battery compartment cover 7 Close the hood Replacing Headlight Bulb If a headlight bulb burns out replace it as follows 1 Lift the hood up See pages 8 6 8 7 for hood opening and closing procedures 2 Remove the cover at the rear of...

Page 153: ... cover by pulling it off 1 Headlight bulb holder cover 4 Remove the headlight bulb holder by pushing it in and turning it counter clockwise 5 Remove the defective bulb by pulling it out 6 Insert a new headlight bulb into the bulb holder by pushing it in 1 Headlight bulb holder ...

Page 154: ...ight bulb to keep it free from oil otherwise the transparency of the glass the luminosity of the bulb and the bulb life will be adversely affected Thoroughly clean off any dirt and fingerprints on the headlight bulb using a cloth moistened with alcohol or thinner 1 Install the bulb holder by pushing it in and turning it clockwise 2 Install the bulb holder cover and the cover at the rear of the hea...

Page 155: ... 1 Rear tail light 2 Remove the bulb holder together with the bulb by turning it counter clockwise 3 Push the defective bulb in and turn it counter clockwise to remove it from the bulb holder 4 Push a new bulb in and turn it clockwise to install in the bulb holder 5 Install the bulb holder together with the bulb by turning it clockwise 1 Tail brake light bulb holder 6 Install the panel by installi...

Page 156: ...s If your vehicle requires any repair take it to a service center The skilled technicians at a service center have the tools experience and know how to properly service your vehicle Imitation parts may look like original parts but they are often inferior Consequently they have a shorter service life and can lead to expensive WARNING POTENTIAL HAZARD Checking the fuel system while smoking or near a...

Page 157: ...Table1 Solution of Common Problems in Appearance Parts and Impact Fittings S N Problems Solutions 1 Covers are cracked Repair cover at authorized service center Change for new plastic covers Attach the stickers and re rivet the warning labels 2 Vehicle s bottom protection plate is damaged by ground Check if the reduction gear box and differential in front and rear bridge are damaged or if there is...

Page 158: ...s of calipers are deformed 2 Brake performance is diminished Check if the brake discs are over worn Check if the brake blocks in calipers are over worn or contaminated by debris Check if there is any leakage in the brake system s brake fluid lines or junctions Check if the post rod in the brake master cylinder is deformed Check if there is any air in the brake fluid lines Bleed the lines if necess...

Page 159: ...d 4 Vehicle pulls left or right when braking at high speed Check both left and right front brakes make sure there is no deviation when applying the brake Check to make sure the rear brakes do not lock up before the front brakes begin to stop the unit Check spring force on shocks make sure they are both within the specified limits Check rubber dampeners on shocks Make sure dampeners are in place an...

Page 160: ... Vehicle will not go into 4wd Mode Check if the control switch on consol is working Check if the differential lock control magneto plug in rear bridge reduction gear box is broken Check if wire is loose or broken 3 Rear differential will not work Check if the control switch on consol is working 4 Rear differential will not work Check if the differential lock control magneto plug in rear bridge red...

Page 161: ...not working Check if the switch is broken Check if wire is loose or broken Check if the CDI is broken Table 4 Solution of Common Problems in Running System 1 Too much play in the steering wheel Check the fix screws connecting steering rod to steering stem and knuckle to find out if they are loose or broken Check the bolts on the ends of steering rod to find out if they are loose or broken Check th...

Page 162: ... wheel axles to find out if they are worn or broken Check rubber bushings between the front suspension shocks and frame to find out if they are worn or missing 3 Rear wheels shake during use Check the inner splines of rear wheel hubs and outer splines of rear wheel axles to find out if they are worn or broken Check the lug nuts and lock nuts of rear wheels and axles to find out if they are loose o...

Page 163: ... if shock absorbers have lost damping force 6 Front and or rear differential is making noise Check if the spline of intermediate driving shaft is broken Check if the splines in left right drive shafts of front rear differentials are broken Check if the gears in rear bridge reduction gear box and differential are over worn Check dust covers of constant velocity universal joints in right left drive ...

Page 164: ...h voltage wire is in poor contact Check if CDI s faulty 3 Loss of power performance Check if the carburetor or fuel filter is clogged by debris Check and clean core of air cleaner Check muffler and spark arrestor for blockage clean spark arrestor if necessary 4 Popping noise in engine Check air cleaner and admission line for leaks Check muffler to engine connection make sure it is not loose Check ...

Page 165: ...k temperature sensor of radiator for damage and Check fan for failure Check antifreeze make sure vehicle has the correct type and quantity Check to make sure the coolant system does not have air pockets 7 Engine will not start Check battery make sure it is charged and can hold a charge Check starter motor for damage Check carburetor and fuel filter for blockage Check ignition loop make sure it is ...

Page 166: ...be temporarily used provided that it is changed to the recommended coolant as soon as possible WARNING POTENTIAL HAZARD Removing the radiator cap when the engine and radiator are still hot WHAT CAN HAPPEN You could be burned by hot fluid and steam blown out under pressure HOW TO AVOID THE HAZARD Wait for the engine to cool before removing the radiator cap Always use a thick rag over the cap Allow ...

Page 167: ...intbrush Do not apply degreaser to the wheel axles 3 Rinse the dirt and degreaser off with a garden hose Use only enough pressure to do the job CAUTION Excessive water pressure may cause water seepage and deterioration of wheel bearings brakes transmission seals and electrical devices Many expensive repair bills have resulted from improper high pressure detergent applications such as those availab...

Page 168: ...leaner waxes as many contain abrasives that may scratch the paint or protective finish When finished start the engine and let it idle for several minutes WARNING POTENTIAL HAZARD Operatio n with wet brakes after washing WHAT CAN HAPPEN Wet brakes may have reduced stopping ability increasing the chance of a n accident HOW TO AVOID THE HAZARD Test the brakes after washing Apply the brakes several ti...

Page 169: ...e fuel from the fuel system as much as possible and pour the drained fuel into the fuel tank Specified amount 1 oz of stabilizer to each gallon of fuel or 7 5 ml of stabilizer to each liter of fuel NOTE Use of fuel stabilizer and conditioner eliminates the need to drain the fuel system Consult a service center if the fuel system needs to be drained instead 3 Remove the spark plug pour about one ta...

Page 170: ...t all exposed metal surfaces with a light film of oil Do not apply oil to any rubber parts or the seat covers 8 Remove the battery and charge Store it in a dry place and recharge it once a month Do not store the battery in an excessively warm or cold place less than 32 F 0 C or more than 86 F 30 C NOTE Make any necessary repairs before storing the vehicle ...

Page 171: ... for HS400UTV 2 1550mm 61 0 in for HS400UTV 3 1870mm 73 6 in 840mm 33 1 in 1830mm 72 0 in 300mm 11 8 in 3500mm 137 8 in Basic weight with oil and full fuel tank 543kg 1197 lb Engine Engine type Cylinder arrangement Displacement Bore stroke Compression ratio Starting system Lubrication system Liquid cooled 4 stroke Water cool Forward inclined single cylinder 393 cm 3 84 5 70mm 9 3 1 Electric starte...

Page 172: ...dge replacement API service SG type or higher JASO standard MA CAUTION In order to prevent clutch slippage since the engine oil also lubricates the clutch do not mix any chemical additives Do not use oils with a diesel specification of CD or oils of a higher quality than specified In addition do not use oils labeled ENERGY CONSERVING II or higher 2 1 L 2 22qt 2 2 L 2 32 qt ...

Page 173: ...ifferential gear case oil Type Quantity SAE80 API GL 5 Hypoid gear oil 0 28L 0 3 qt Radiator capacity including all routes 1 5 L 1 59 qt Air filter Wet element Fuel Type Fuel tank capacity Unleaded gasoline only 26L 6 86 gal Throttle valve Type quantity DELPHI MT05 Spark plug Type Spark plug gap DR8EA 0 6 0 7 mm 0 023 0 027 in ...

Page 174: ...ion Primary reduction system Secondary reduction system CVT reduction ratio Transmission type Operation V belt Shaft drive 1 75 35 20 V belt automatic Right hand operation Chassis Frame type Caster angle Trail Steel tube frame 5 0 26 0mm 1 02 in Tire Type Size Front Rear Tubeless 25 8 12 25 10 12 ...

Page 175: ...c brake Right hand operation Dual disc brake Left hand and right foot operation Suspension Front suspension Rear suspension Double wishbone Double wishbone Shock absorber Front shock absorber Rear shock absorber Coil spring oil damper for HS400UTV 2 Coil spring oil or airbag damping for HS400UTV 3 Coil spring oil damper for HS400UTV 2 Coil spring oil or airbag damping for HS400UTV 3 Wheel travel F...

Page 176: ...tage quantity Headlight Tail brake light Front Rear turning light License light 12V35 0W 35 0W 2 12V5 0W 21 0W 2 12V10 0W 10 0W 2 12V3 0W Indicator lights Neutral indicator light Reverse indicator light Coolant temperature warning light Parking brake indicator light Diff lock indicator On Command differential gear lock indicator light Forward range indicator light LED LED LED LED LED LED LED ...

Page 177: ...Specifications 10 7 Model HS400UTV 2 HS400UTV 3 Main Fuse Headlight Fuse Ignition Fuse Auxiliary DC Jack Fuse Signaling System Fuse 2WD 4WD Fuse 30 0A 15 0A 10 0A 10 0A 10 0A 3 0A ...

Page 178: ...cuit Low Voltage KsDGDM_IAT_ShortLow 112 274 P0113 IAT Circuit High Voltage or Open KsDGDM_IAT_ShortHigh 113 275 P0117 Coolant Oil Temperature Sensor Circuit Low Voltage KsDGDM_CoolantShortLow 117 279 P0118 Coolant Oil Temperature Sensor Circuit High Voltage or Open KsDGDM_CoolantShortHigh 118 280 P0122 TPS Circuit Low Voltage or Open KsDGDM_TPS_ShortLow 122 290 P0123 TPS Circuit High Voltage KsDG...

Page 179: ...on KsDGDM_INJ_CYL_B_Fault 202 514 P0230 FPR Coil Circuit Low Voltage or Open KsDGDM_FPP_CircuitShortLow 230 560 P0232 FPR Coil Circuit High Voltage KsDGDM_FPP_CircuitShortHigh 232 562 P0336 CKP Sensor Noisy Signal KsDGDM_CrankNoisySignal 336 822 P0337 CKP Sensor No Signal KsDGDM_CrankNoSignal 337 823 P0351 Cylinder 1 Ignition Coil Malfunction KsDGDM_EST_A_Fault 351 849 P0352 Cylinder 2 Ignition Co...

Page 180: ...GDM_O2_2_ShortHigh 138 312 P0038 O2S Heater 2 Circuit High Voltage KsDGDM_O2_HeaterShortHigh 38 56 P0037 O2S Heater 2 Circuit Low Voltage KsDGDM_O2_HeaterShortLow 37 55 P0500 VSS No Signal KsDGDM_VSS_NoSignal 500 1280 P0850 Park Neutral Switch Error KsDGDM_ParkNeutralSwitch 850 2128 P0445 CCP short to high KsDGDM_CCP_CircuitShortHigh 445 1093 P0444 CCP short to low open KsDGDM_CCP_CircuitShortLow ...

Page 181: ...anty on your Off Road vehicle New off road motor vehicles must be designed built and equipped to meet U S EPA Federal and California an smog standards HISUN must warrant the emission control system on your vehicle for 5 000 kn or at least 30 months whichever comes first provided that there has been no abuse neglect or improper maintenance of your vehicle This off road vehicle was designed to meet the ...

Page 182: ...ty rights and responsibili es you should contact Hisun Motors Corp U S A 310 E University Drive McKinney TX 75069 Phone 972 446 0760 or Toll Free 877 838 6188 or the U S Environmental Protec on Agency at 2000 Traverwood Drive Ann Arbor MI 48105 YOUR WARRANTY RIGHTS AND OBLIGATIONS Hisun Motors Corp U S A warrants that each new off road vehicle A is designed built and equipped so as to conform at th...

Page 183: ...imited Liability A The liability of HISUN under this Emission Control System Warranty is limited solely to the remedying of defects in material or workmanship by an authorized HISUN dealer at its place of business during customary business hours This warranty does not cover inconvenience or loss of use of the vehicle or transporta on of the vehicle to or from the HISUN dealer HISUN shall not be li...

Page 184: ...l The arr ty period be he the ehi le i pla ed to e i e If you ha e a y ue io re ardi your arra ty ri ht d re p ibilitie you hould ta Hi u Moto orp U or the U iro m tal Prote io e y at Tra er ood Dri e bor MI M Toll ee rr ty i ued by HISUN Thi rr additio to the limited ehi rr Hisun Motors Corp U S A Emission Control System Warranty Statement VI ADDITIONAL INFORMATION Any replacement part that is eq...

Page 185: ...POWERSPORTS 888 405 8725 1775 E University Dr Tempe AZ 85281 www colemanpowersportsusa com www facebook com colemanpowersportusa www instagram com colemanpowersports_usa ...

Reviews: