16
External Motor Testing
ELECTRIC VEHICLE - MOTOR
TEST PROCEDURE 1 – Motor Continuity Test
1.
Disable the vehicle.
2.
Disconnect the batteries and discharge the controller.
3.
Disconnect the wires from the motor.
4.
Set a multimeter to check for continuity.
5.
Check the continuity readings between the motor terminals below:
_
MOTOR TERMINALS
CONTINUITY TEST
RESULT
A1 to A2
F1 to F2
Continuity
A1 to F1
A1 to F2
No Continuity
A2 to F1
A2 to F2
No Continuity
A1 to Ground
A2 to Ground
No Continuity
F1 to Ground
F2 to Ground
No Continuity
6.
If readings are correct, reconnect the motor wires.
See Motor Installation on page 16-15.
7.
Connect the batteries.
See Connect the Batteries – Electric Vehicles, Section 1, Page 1-5.
TEST PROCEDURE 2 – Internal Short Circuits
See General Warnings on page 1-1.
1.
Place vehicle on a level surface.
2.
Disconnect the batteries and discharge the controller.
See Disconnect the Batteries – Electric Vehicles,
3.
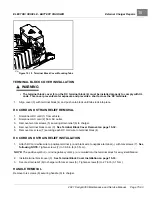
Disconnect wires from terminals on motor using two wrenches to prevent posts from turning.
4.
With a multimeter set to 200 ohms, place black (–) probe on motor housing. Scratch through paint to ensure a
good connection. Place red (+) probe on A1, A2, F1, and F2 terminals respectively while rolling the vehicle slowly
to rotate the armature. Multimeter should indicate no continuity between the motor housing and all individual
terminals. If readings indicate continuity, motor will need to be removed from the vehicle and repaired by a
qualified technician.
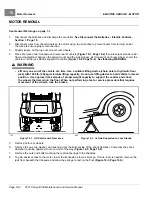
See Motor Removal on page 16-4.
4.1.
An incorrect reading from the A1 or A2 terminal indicates three possible problems: a grounded A1 or A2
terminal, a grounded wire in the brush area, or a grounded armature/commutator. An incorrect reading for
the F1 or F2 terminal indicates a possible grounded F1 or F2 terminal or field coil.
5.
If readings are correct, reconnect the motor wires.
See Motor Installation on page 16-15.
6.
Connect the batteries.
See Connect the Batteries – Electric Vehicles, Section 1, Page 1-5.
Page 16-2
2021 Carryall 300 Maintenance and Service Manual
Summary of Contents for Carryall 300 2021
Page 2: ......
Page 16: ......
Page 551: ...80 2018 by Kohler Co All rights reserved KohlerEngines com 17 690 15 Rev...
Page 565: ...GASOLINE ENGINE HARNESS Wiring Diagrams Gasoline Engine Harness 26...
Page 566: ...Page intentionally left blank...
Page 567: ...GASOLINE KEY START MAIN HARNESS Wiring Diagrams Gasoline Key Start Main Harness 26...
Page 568: ...Page intentionally left blank...
Page 569: ...GASOLINE PEDAL START MAIN HARNESS Wiring Diagrams Gasoline Pedal Start Main Harness 26...
Page 570: ...Page intentionally left blank...
Page 571: ...GASOLINE INSTRUMENT PANEL HARNESS Wiring Diagrams Gasoline Instrument Panel Harness 26...
Page 572: ...Page intentionally left blank...
Page 573: ...GASOLINE FNR HARNESS Wiring Diagrams Gasoline FNR Harness 26...
Page 574: ...Page intentionally left blank...
Page 575: ...ELECTRIC MAIN HARNESS Wiring Diagrams Electric Main Harness 26...
Page 576: ...Page intentionally left blank...
Page 577: ...ELECTRIC INSTRUMENT PANEL HARNESS Wiring Diagrams Electric Instrument Panel Harness 26...
Page 578: ...Page intentionally left blank...
Page 579: ...ELECTRIC ACCESSORIES HARNESS Wiring Diagrams Electric Accessories Harness 26...
Page 580: ...Page intentionally left blank...
Page 588: ...NOTES...
Page 589: ...NOTES...
Page 590: ...NOTES...
Page 591: ...NOTES...
Page 592: ...NOTES...
Page 593: ...NOTES...
Page 594: ...NOTES...
Page 595: ......
Page 596: ......


