4K Video Conference Camera User Manual
10
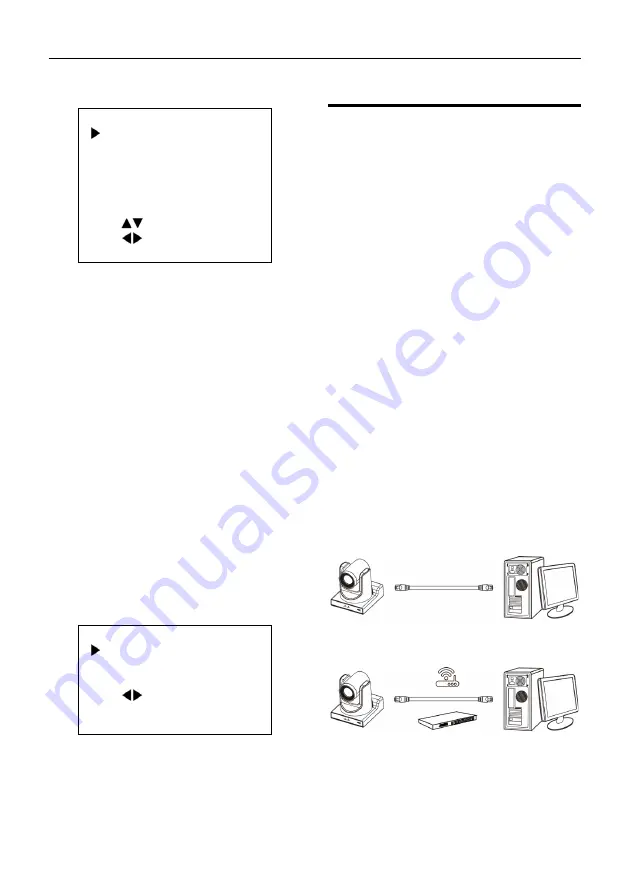
[HOME] key enter the communication setup
page, as shown in the following figure.
COMMUNICATION SETUP
Protocol
VISCA
V_Address
1
V_AddrFix
Off
Net Mode
Serial
Baudrate
9600
Select Item
Change Value
[Menu] Back
Protocol: Control protocol type, optional items:
Auto, VISCA, PELCO-D, PELCO-P.
V_Address: Optional items: 1 ~ 7.
(Effective only in Auto, VISCA protocol).
V_AddrFix: Optional items: On, Off (When set
to On, useless in 88 30 01 FF Command).
P_D_Address: Optional items: 0 ~ 254.
(Effective only in Auto, PELCO-D protocol).
P_P_Address: Optional items: 0 ~ 31.
(Effective only in Auto, PELCO-P protocol).
Net Mode: Set the serial port network control,
optional items: Serial, Paral.
Baudrate: Serial port baud rate, optional items:
2400, 4800, 9600, 38400.
5.9 RESTORE DEFAULT
Move the main menu cursor to [RESTORE
DEFAULT], and press [HOME] key enter the
restore default page, as shown in the following
figure.
RESTORE DEFAULT
Restore?
No
Change Value
[Home] OK
[Menu] Back
Restore: Confirm restore factory settings,
optional items: Yes, No.
Note: Press [HOME] button to confirm, all
parameter restore default, include IR Remote
address and VISICA address.
6
Network Function
6.1 Operating Environment
Operating System: Windows 7/8/10, Mac OS X,
Linux, Android
Network Protocol: TCP/IP
Client PC: P4/128M RAM/40G HDD/ support
scaled graphics card, support DirectX 8.0 or
more advanced version.
6.2 Equipment Installation
1) Connect video conference camera to your
internet or to your PC via network cable.
2) Turn on DC 12V power.
3) If the network connection is normal, the
connection light (green) at the network
interface will light up within 5 seconds, and
the data indicator (orange) will flash,
indicating that the physical connection of
the camera has been completed.
6.3 Internet Connection
There are two main ways to connect video
conference camera.
Connect by Network Cable
Connect by Switch/Router
6.4 Camera Controlled by LAN
6.4.1 Setup IP Address


