background image

1

CLEARSPAN

 MAJESTIC GREENHOUSES

Revision date: 06.21.16

STK#  

DIMENSIONS

105432PCA  56' W x 96' L

©2016 ClearSpan™

All Rights Reserved. Reproduction 

is prohibited without permission.

ClearSpan


Majestic Greenhouse

56' Wide

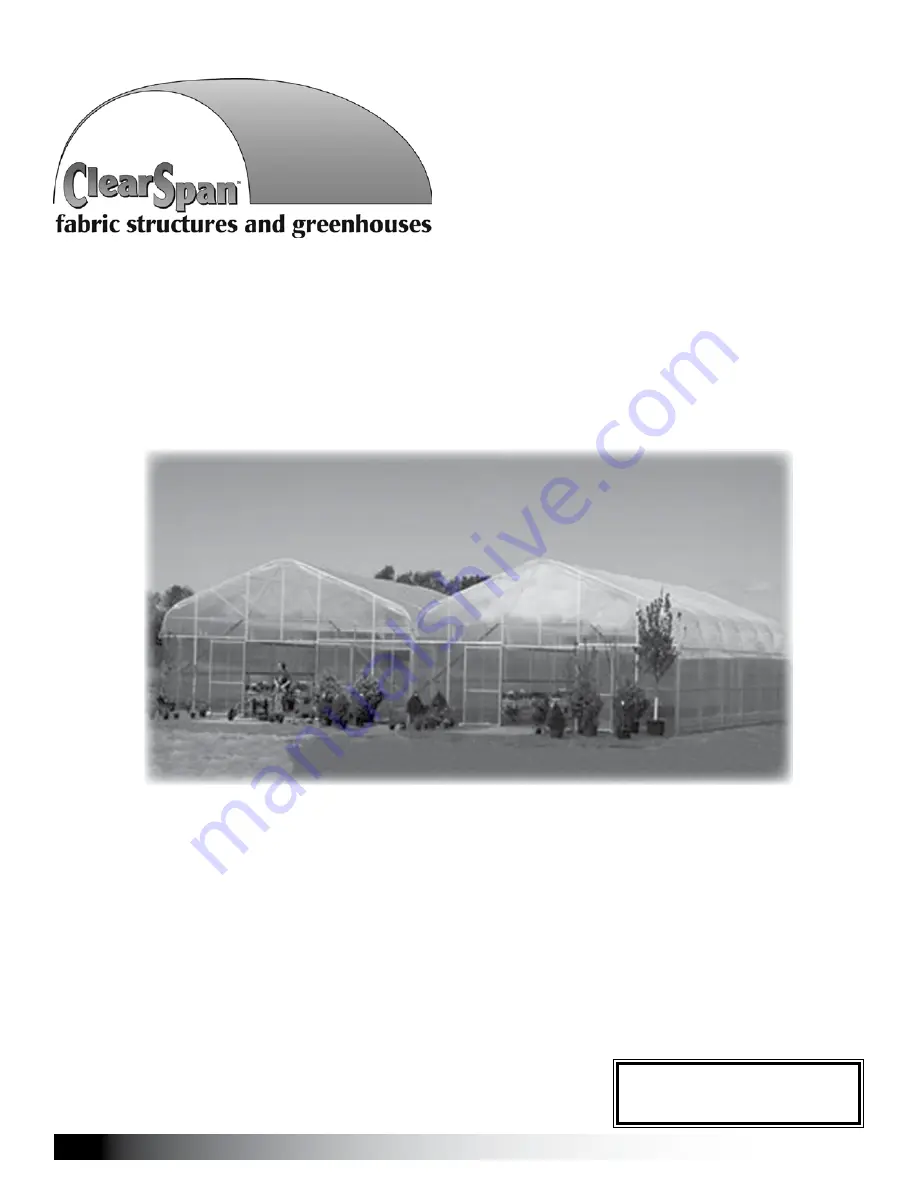
Photo may show a different but similar model.

Summary of Contents for Majestic Greenhouse

Page 1: ...OUSES Revision date 06 21 16 STK DIMENSIONS 105432PCA 56 W x 96 L 2016 ClearSpan All Rights Reserved Reproduction is prohibited without permission ClearSpan Majestic Greenhouse 56 Wide Photo may show a different but similar model ...

Page 2: ...ure Failing to anchor the shelter properly will void the manufacturer s warranty and may cause serious injury and damage LOCATION Choosing the proper location is an important step before you begin to assemble the structure The following suggestions and precautions will help you determine whether your selected location is the best location Never erect the structure under power lines Identify whethe...

Page 3: ... that spans from one rafter leg to the other on the same rafter assembly For strength brackets are used to attach struts between the chord and the rafter Conduit An assembly of pipes used to secure the main cover and end panels if equipped Purlins and some strut assemblies also consist of connected pipes to form a conduit Each pipe joint of a conduit assembly is secured with a self tapping Tek scr...

Page 4: ...uestions consult the Pictorial Parts Guide and all shelter diagrams throughout these instructions for clarification or contact Customer Service NOTE At this time you do not need to open the plastic bags containing the fasteners if used QUICK START GUIDE For a quick overview of this shelter and its components consult the Quick Start Guide near the back of these instructions The pages of the Quick S...

Page 5: ...and diagrams Some parts are not shown FA4482B FA4484B Tek Screw 100441 Nut Setter Swaged Plain Swaged and Plain Rafter Sections AS1003 3 16 Cable Clamp AS1094 1 4 Cable Thimble 104189 Turnbuckle 104302 Pipe Fitting with Base 102546 2 375 Cross Connector 102548 1 66 Cross Connector 103856 2 375 Band Clamp QH1402 1 66 Band Clamp QH1070 Pipe Strap 102921 Neo bonded Washer 105124 Butterfly Clamp H Cha...

Page 6: ...on Use the diagrams on this page to install H channel with flat side facing out ATTENTION Use only 1 1 2 Tek screws to attach H channel to building frame Do not use shorter screws They will not hold Do not use washers on Tek screws when installing H channel ATTENTION Install all twin wall poly carbonate panels with UV protected side toward the sun Poly Carb Girt H Channel with flat side toward the...

Page 7: ... how to assemble your building For details of each assembly procedure consult the Quick Start Guide and the individual sections of these instructions See illustration below to identify main parts of shelter 1 Mark the location of the building and identify the required parts for each assembly procedure 2 Assemble all rafters 3 Assemble and anchor the frame 4 Prepare and install all cable assemblies...

Page 8: ...after feet 5 After marking the on center positions of all rafters on the boards or site remove the strings and continue with the attaching rafter feet to the baseboards ATTACH RAFTER FEET TO BASEBOARDS The following is an example of one way to position the rafter feet after the site has been prepared This is an example only The site anchoring system and other factors affect preparing for the rafte...

Page 9: ... the top center pipe Interior Rafter Assembly Procedure 1 Select the five 5 pipes needed to assemble a rafter and arrange these on a flat surface as shown below for assembly NOTE DO NOT join sections at this time 28SM23S1 20SM23P2 2375S100D 52 21 1 2 2 Using a tape measure measure the following clamp locations on the pipe and mark locations with a marker Mark these locations shown below on the rem...

Page 10: ... mounting holes at the bottom of the rafter leg and clamp the rope in place with the clamp on the outside as shown below 9 Insert the remaining end of the cable through the other rafter bolt holes measure the 28 on center width dimension and clamp the legs in place to prevent the rafter from spreading as the struts are attached 10 Position three 3 sections of the 166S099 pipe 99 each and one 1 166...

Page 11: ...lower it can be slid down slightly at this time 14 Select two 2 of the 5 struts QH1304 and two 2 of the 7 struts QH1308 and position them on the ground between the upper part of the assembled rafter and the assembled chord Strut pattern shown may vary slightly from actual rafter 1 1 2 5 5 7 7 15 Connect one end of a 5 strut to the clamp on the rafter Do not tighten at this time Consult the connect...

Page 12: ...end rafters only 1 Assemble the two end rafters on a flat surface using the same procedure as an interior rafter 2 Attach one pipe strap QH1070 to each end rafter in the locations shown below These pipe straps are located on the inside of the rafter legs underside of the rafter pipe peak and on top of the chord Do not tighten at this time These will be tightened after the purlin is installed NOTE ...

Page 13: ...g to assemble the second Gather the parts Assembled Rafters 1 315 x 75 swaged 131S075 and 1 315 x 73 5 plain 131P0735 pipe Marker tape measure and FA4482 Tek screws NOTE The purlins are part of the assembled frame and run perpendicular to the rafter assemblies Each purlin consists of 1 315 x 75 131S075 swaged pipes see Side Profile diagram in the Quick Start section for quantity and one 1 1 315 x ...

Page 14: ... end rafter IMPORTANT NOTE The purlin should extend through the pipe strap at the peak of the end rafter by one half inch Do not allow the purlin to extend beyond the edge of the end rafter 7 With the purlin in position tighten the pipe strap at the peak and secure the purlin in the pipe strap using a Tek screw 8 Measure the on center rafter width to achieve the proper rafter spacing and tighten t...

Page 15: ...3 Tighten the cross connector and install a Tek screw as shown to secure the purlin pipe joint and to secure the purlin to the cross connector 14 Move to the other upper pipe joint on the inside rafter place a cross connector over the joint and repeat the steps to install the first two sections of the last overhead purlin NOTE Position the cross connector and purlin on the rafter pipe joint Do not...

Page 16: ... to place in position will be the remaining end rafter This end rafter includes the pipe straps attached during the rafter assembly procedures and is identical to the first end rafter set in place 22 Set the end rafter in place and align the purlins with the pipe straps previously attached to the rafter Insert the rafter feet mounting bolts bolt head to the outside and tighten as previously instru...

Page 17: ... remaining leg on the same rafter assembly and mark as instructed in the previous steps 4 Repeat Steps 1 3 for the remaining end rafter assembly 5 On the first inside rafter assembly measure the same distance 13 1 2 up the rafter leg from the foot base and mark the location on the outside of the leg 13 1 2 6 After marking the location of the center of the bottom purlins on the legs place a cross c...

Page 18: ...e FA4484 Tek screw is used throughout this assembly ATTACH THE CENTER PURLIN The center purlin is attached to the chord and runs on top of the chord the length of the shelter As before regarding all end rafter purlin connections the center purlin is attached using a pipe strap A cross connector 102548 is used to secure the center purlin to the chord of the inside rafters only Complete these steps ...

Page 19: ... rafter repeat the steps to secure the center purlin to the chord of the end rafter 11 After the final purlin is attached to the end rafter continue with squaring the assembled frame Center Purlin Chord Tek Screw SQUARING THE ASSEMBLED FRAME SPECIAL NOTE Additional bays are attached to the first bay To ensure that subsequent bays are square the first bay must be square The gutter system and connec...

Page 20: ... for additional information about anchoring the shelter ATTACH BAND CLAMPS FOR CABLING Cables attached to both ends of the shelter provide the diagonal bracing for the shelter Band clamps secure the cable bracing to the shelter SPECIAL NOTE Complete the following steps but DO NOT tighten the cable assemblies at this time All cable assemblies for all bays will be tightened after the frames for each...

Page 21: ...wn in the figure to the right 3 Grasp both sections of the cable near the thimble and position one cable clamp one inch away from the thimble as shown above NOTE Position the clamp on the cable with its U bolt portion over the short dead section of the cable 4 With the saddle portion of the cable clamp in position thread the nuts onto the U bolt section of the clamp and tighten slightly to maintai...

Page 22: ...ies to the building using 103856 band clamps ATTENTION The cable positions are identical for both sides of the frame All cable assemblies are positioned at the ends of the frame regardless of the frame length Frame length of your building may differ from what is shown Consult the Quick Start diagram for your shelter for additional details All inserts show the circled locations as seen standing ins...

Page 23: ...of the lower butterfly clamp between the rafter legs of two separate bays The upper butterfly clamp is placed between the two legs below the band clamps for the cables side cable assemblies and at a similar location on the legs that are without band clamps for the cables ATTENTION When setting the frame for the adjacent bay use the butterfly clamps to set the position of the frame You must be able...

Page 24: ...he end rafter at the front of the greenhouse and anchor it in place This base rail will be directly below and parallel with the chord of the end rafter END FRAME ANCHORING SUGGESTIONS If the greenhouse is setting on crushed rock or bare ground the base rail can be bolted to ground anchors not included set into the ground If the greenhouse includes a concrete floor or a perimeter concrete foundatio...

Page 25: ...square to round tube bracket and attach the bracket to one end of the vertical frame member Use a 5 16 drill bit to drill a hole through the tube and attach the bracket to the tube using a nut and carriage bolt FAH320 15 With the door jambs attached at the bottom and loose at the top measure each frame member to locate the height of the rough door opening and mark the location on the inside of the...

Page 26: ...length One 1 square tube connector to connect the two pipes 104628 One 1 104624 square tube fitting to attach the support to the bottom frame member of the end wall assembly One 1 104074 square to round tube connector to attach the tubing to the band clamp on the bottom chord END WALL INSTALLATION continued 22 Use the End Wall Diagram to determine the number of remaining vertical end wall supports...

Page 27: ...bottom of the frame member Bottom Chord of End Rafter 104074 Position all screw heads so they do not touch the end wall panels when these are installed on the end wall framing 29 Align the center of the assembled frame member with the first center mark on the base rail and attach the top of the frame member to the band clamp on the chord Do not tighten 30 Verify that the vertical end wall frame me...

Page 28: ...as seen from the inside of the greenhouse Hat channel is attached to the rafter leg and the chord of the end rafter 2 After securing the hat channel to the rafter leg and the chord using Tek screws attach the diagonal brace to each end wall vertical frame member 3 Select and attach hat channel to the inside of the opposite side as shown in the greenhouse below 4 Choose one of the 8 chord to chord ...

Page 29: ...hem using the connector as shown in the following drawing NOTE A small hammer and wood block can be used to seat the connector in one gutter and to seat the remaining gutter section onto the connector Drawing above shows a connector and two gutter sections Install gutter here 3 After the two sections are connected and seated in place locate the gutter mounting bolts and slide these into the top ch...

Page 30: ...ay and in which direction you want the water to drain NOTE The gutter must be installed with a gradual slope so water will drain properly from the gutter 7 With the direction of the water drainage determined place the clamps around the rafter legs over the mounting bolts in the gutter channel and tighten 8 After securing the first section of gutter in place install a connector on another 10 gutter...

Page 31: ...l after installation Space the ends of adjacent lower panels a few inches apart to allow water to drain into the gutter Use the gutter as a guide and set the lower panel in the desired position The H Channel installed between roof panels is shipped in 8 lengths Two 2 8 sections of H Channel are used between the roof panels Complete these steps to install the hat channel 1 Locate the center of both...

Page 32: ... the lower edge of the next run of hat channel 11 Move to the other end rafter on the same side of the frame and measure and mark the same location on the top of that end rafter 12 Stretch and snap a chalk line to mark the lower edge of the next run of hat channel and install this run as previously described 13 Continue this pattern of marking and installing the separate runs of hat channel on bot...

Page 33: ... by installing the gutter film between bays End Rafter Hat Channel Center Line Ridge Cap Frame length of your building may differ from what is shown INSTALL GUTTER FILM D1002554M Gather the parts Gutter film Tek screws and neo bonded washers Assembly Procedure Unpack the gutter film and attach the film to the frame and gutter between each bay Secure the gutter film to the gutter using the gutter r...

Page 34: ...f Panel Installation Method To create a better seal between the roof panels install the upper roof panel so that it overlaps the top edge of the lower roof panel This procedure is presented in the steps that follow Edge of Film Gutter Film 5 With a few inches of film extending below the gutter channel that the gutter rail clips into begin to secure the film into the gutter INSTALL GUTTER FILM cont...

Page 35: ...e end rafter and mark the location at each hat channel 6 Verify that the lower edge of the panel is aligned with the hat channel attached to the roof frame 7 Secure the first panel to each run of hat channel using Tek screws and washers installed through the panel and into the hat channel at the first set of 24 marks See the black dots for Tek screw locations above NOTE Do not install any screws a...

Page 36: ...er polycarbonate panel as shown below 104548 End Cap ATTENTION Install the end cap as shown below Once the end cap is installed verify that the UV protected side of the panel will be to the outside toward the sun when the panel is placed on the frame At this time the panel should have one long edge finished with H channel one long edge unfinished upper edge taped and lower edge finished with the 1...

Page 37: ...the hat channel 20 Repeat the steps to install the remaining roof panels for the first side of the greenhouse NOTE Install end cap 104548 on the bottom edge of the upper polycarbonate roof panels only Tape both edges of the lower roof panel with vent tape 21 Continue installing panels until the first side of the roof is covered NOTE If the final roof panels are too wide and extend beyond the end r...

Page 38: ...THE SIDE PANELS Side panels are attached to the frame in the same manner as roof panels Complete these steps to attach the hat channel runs to the outer side of the assembled bays SPECIAL NOTE Install the hat channel to the two 2 outside walls only The interior walls of the individual bays the walls that are adjacent to one another when the bays are connected do not include hat channel 1 Beginning...

Page 39: ...ade in the previous step and repeat the steps to mark the third run of side INSTALL SIDE RUNS OF HAT CHANNEL continued when it is placed in position Set a panel in place to verify this dimension and adjust the hat channel position as needed to achieve the 6 clearance 6 Position the location of the final upper side run of hat End Rafter Frame length of your building may differ from what is shown Da...

Page 40: ... panel edges may not be adequate if additional seams are created Begin at the door end of the building Install all accessories fans vents heaters etc after installing all polycarbonate sheets INSTALL SIDE RUNS OF HAT CHANNEL continued 7 Move to the other end rafter mark the same location as the previous step verify that the line is level and snap a line between the two marks 8 Select the hat chann...

Page 41: ...or top edge of the lower end panels These edges are sealed with the white vent tape only The upper edge of all lower panels is overlapped by the end cap profile attached to the lower edge of the upper panels when these are installed Cut upper end panels flush with the edge of the installed roof panels For best results end panels should lap under the edge of the installed roof panels Tape or seal w...

Page 42: ...me shown above may differ from actual frame 5 Continue with the Double Door Assembly procedures that follow DOUBLE DOOR ASSEMBLY The materials and parts needed to assemble the doors include Door frames and polycarbonate panels Door hinges and latch hardware Aluminum U Channel profile 104213 End cap profile 104548 Tek screws FA4482B FA4484B Neo bonded galvanized washers 102921B Assemble and Attach ...

Page 43: ...ows the assembly from the outside See also diagram on next page b Cross section insert shows the end cap dashed line attached to the inside back of the door frame 11 At the top and sides of the end wall door opening on the inside of the frame attach end cap and allow it to extend below and into the door frame opening ATTENTION This profile acts as a stop for the double doors which prevents undo st...

Page 44: ... panels with material such as cardboard to protect the UV protected surface during the ridge cap installation The ridge cap is the final component needed to complete the installation of the greenhouse roof The installation procedure above describes installing all panels before installing the ridge cap In the diagrams that follow end frame has been removed for clarity Basic tools needed Ladder to r...

Page 45: ...he end of the ridge cap The roof flashing will be installed under the ridge cap in a later procedure After the flashing is installed a screw is driven to secure the flashing and the end of the ridge cap Overlap the ridge cap in a direction that is least affected by the prevailing winds Ridge Cap End Rafter End Panel NOTE For easier installation of the Tek screws pre drill a hole through the ridge ...

Page 46: ...A4484 Tek screws and neo bonded washers 102921 Like the upper roof panel end cap 104548 is used to finish the lower edge of the upper side panel H channel is used to join separate panels along the side INSTALL POLYCARBONATE SIDE PANELS Install panel cells vertically to allow condensation to properly drain from the cells Required panels include For each lower side panel use a full 6 x 8 sheet of po...

Page 47: ...d cut it to 71 which is 1 shorter than the length of the upper panel 6 Install the H channel along the inside edge of the side panel and flush with the top of the panel This is the edge where the next side panel will join the first 8 Install the end cap section along the lower edge no tape of the upper polycarbonate panel as shown below with the flat side to the outside of the shelter NOTE Space s...

Page 48: ...ides of the bays are covered as shown NOTE Trim the last panel to the proper width if needed and install as previously described 14 Continue by installing the roof to sidewall flashing 11 Position the top edge of each side panel under each roof panel Space below is reserved for customer notes 12 Align all H channel between the upper and lower side panels for a uniform appearance Upper Side Panel L...

Page 49: ...red length so that it is installed flush to the edge of the panels See the previous diagram 7 Repeat the steps to install the roof to sidewall flashing for the remaining side 8 Continue with the installation of the final end wall panels one 1 at each corner of each end wall INSTALL UPPER CORNER END WALL PANELS Before the end wall flashing is installed install the final four 4 end wall panels per b...

Page 50: ...n the Quick Start section for further information 9 Once all corner panels are installed continue with the installation of the flashing to finish the roof edge INSTALL THE ROOF FLASHING After all end panels are installed finish the roof edge using the 2 x 4 106513 flashing This flashing is bent at a right angle to overlap the upper edge of the end wall panels Flashing is cut as needed to finish th...

Page 51: ...p edge of the end wall panels This 4 surface of the flashing will not sit flush against the end wall panels due to the mounting screws and washers that secure the panels to the end rafter When installed correctly a small gap will remain between the flashing and the end panel Do not install screws though the flashing and into the end rafter Doing so will result in an uneven installation and appeara...

Page 52: ...See the circle and arrow in the photo that follows First Upper Roof Panel First Lower Roof Panel Overlap panels 3 4 Dashed line shows the top edge of the lower panel Seal with silicone 2 Locate any gaps or holes created during the panel installation and seal with silicone 3 Return to any joints where profile sections meet and seal with silicone Greenhouse shown below may differ from actual greenho...

Page 53: ...t damage the cover when removing debris Remove snow to prevent excess accumulation Use tools that will not damage the polycarbonate panels when removing snow Check the contents of the shelter to verify that nothing is touching the polycarbonate panels that could cause damage If the greenhouse is moved inspect all parts and connections before it is reassembled Replace all worn or broken parts immed...

Page 54: ...n date 06 21 16 Frame length of your building may differ from what is shown 16 3 8 GROUND TO PEAK HEIGHT Grid Represents 12 Squares FRONT 28 0 ON CENTER WIDTH Approximately 56 5 1 2 On Center Width QUICK START GUIDE 56 Wide Majestic Greenhouse ...

Page 55: ...sed for cable connections are not installed on every rafter Sidewall cable connections installed on end and 2nd from end rafters only Corner cable connections installed on end rafters only 2375S100D 2375S100D 28SM23S1 28SM23S1 20SM23P2 166S099 166P040 166S099 166S099 104302 104302 QH1304 strut QH1308 strut QH1308 strut QH1304 strut Purlin Connection Purlin Connection Purlin Connection Purlin Conne...

Page 56: ...32PCA PURLIN CONDUIT 131S075 15 131P0735 1 Band Clamp Band Clamp Band Clamp Band Clamp Band Clamp Band Clamp Band Clamp Band Clamp Band Clamp Band Clamp 96 0 Shelter Length center to center 6 0 on center Rafter Spacing Wrap cables with duct tape at this point to protect film ...

Page 57: ...d Rafter Chord Purlin View 5 Mid Rafter Purlin View 6 Cable Band Clamp View 7 Cable Assembly Closed Open View 10 Cable Assembly Closed Closed View 9 Strut Connection View 3 Cable Over Rafter View 8 Rafter Rafter Gutter CONNECTIONS ATTENTION Cable positions and frame length shown may vary from the actual frame Frame length of your building may differ from what is shown ...

Page 58: ...B 3 8 Nut Foot Rafter View 1 Note Similar connection for strut to chords using clamp QH1402 Two struts will connect to clamp End Rafter Purlin View 4 End Rafter Chord Purlin View 5 Mid Rafter Purlin View 6 2 375 Rafter QH1304 5 Strut 103856 2 375 Band Clamp 1 66 Chord 2 375 Rafter 103856 2 375 Band Clamp QH1402 1 66 Band Clamp Chord Rafter View 2 2 375 End Rafter 1 315 Purlin QH1070 Pipe Strap Sec...

Page 59: ...p of straight side AS1003 Cable Clamp Open End Cable Clamps Thimble Turnbuckle Thimble Cable Clamps Cable Clamps Thimble Cable Over Rafter View 8 Mid Length Rafter Some lengths may not have a rafter at exact center length use closest rafter to mid length Open end of Cable Assembly Closed End 103856 2 375 Band Clamp Closed End of Cable Assembly AS1094 Thimble Used for closed ends and turnbuckle con...

Page 60: ...CLEARSPAN MAJESTIC GREENHOUSES 60 Revision date 06 21 16 CONNECTION DETAILS 11 12 Rafter Rafter Gutter View 12 Rafter Rafter Butterfly Clamp View 11 Butterfly Clamp 105124 Gutter Assembly 104125 ...

Page 61: ...61 CLEARSPAN MAJESTIC GREENHOUSES Revision date 06 21 16 CONNECTIONS RAFTER 2 1 1 2 4 3 QH1304 Bottom Chord 103856 QH1402 103856 3 QH1402 4 QH1308 103856 ...

Page 62: ...e building using 103856 band clamps ALL SIDE CABLE ASSEMBLIES ARE THE SAME LENGTH Upper Cable ATTENTION The side cable positions are identical for both sides of the frame All cable assemblies are positioned at the ends of the frame regardless of the frame length All inserts show the circled locations as seen standing inside the frame 4 2 3 1 Side Cable ATTENTION Wrap this upper cable connection us...

Page 63: ... Fit 104779 Cut to Fit 104779 104779 Cut to Fit 104779 104779 Cut to Fit 104779 104779 Cut to Fit 104779 104779 Cut to Fit 104779 104779 Cut to Fit 104779 102897 104779 Cut to Fit 104779 Cut to Fit 104779 Cut to Fit 104779 Cut to Fit 104779 Cut to Fit 104779 Ground Level on center Inside to inside door dimensions are shown NOTE Diagram shows only one bay repeat outline for other bay ...

Page 64: ...Fit 104779 104779 Cut to Fit 104779 Cut to Fit 104779 104779 Cut to Fit 104779 104779 Cut to Fit 104779 104779 Cut to Fit 104779 104779 Cut to Fit 104779 104779 Cut to Fit 104779 104779 104779 Cut to Fit 104779 Cut to Fit 104779 Cut to Fit 104779 Cut to Fit 104779 Cut to Fit 104779 Ground Level on center NOTE Diagram shows only one bay repeat outline for other bay ...

Page 65: ...RONT Ground Level Front View Back View 92 1 2 96 3 4 NOTE All door dimensions are inside to inside ATTENTION Connection views shown are the same for both front and back end walls 104624 Base connection with baseboard NOTE Diagram shows only one bay repeat outline for other bay ...

Page 66: ...tor Ground Level 1 50 x 1 50 Pipe QH1330 Insert the square tubes into the 104628 connector and secure using Tek screws 104628 1 50 x 1 50 Pipe Tek screws Tek screws 104075 1 50 x 1 50 Pipe 1 50 x 1 50 Pipe Insert the square tubes into the 104628 connector and secure using Tek screws NOTE Diagram shows only one bay repeat outline for other bay ...

Page 67: ...ion Use the diagrams on this page to install H channel with flat side facing out ATTENTION Use only 1 1 2 Tek screws to attach H channel to building frame Do not use shorter screws They will not hold Do not use washers on Tek screws when installing H channel ATTENTION Install all twin wall poly carbonate panels with UV protected side toward the sun Poly Carb Girt H Channel with flat side toward th...

Page 68: ...een end panels edges of panels X around door frame and along the outer edge of all the upper and outer panels attach to the bottom of all upper panels will overlap the tops of lower panels Cut all upper end wall panels to fit the opening Install all profile and H channel as instructed After cutting each upper panel seal the open cells using vent tape or silicone H Channel G u t t e r Optional End ...

Page 69: ...to be installed with UV protectant to the outside of the shelter Symboy Key U Channel H Channel End Cap Cut all upper end wall panels to fit the opening Install all profile and H channel as instructed After cutting each upper panel seal the open cells using vent tape or silicone vertical seams between end panels attach to the bottom of all upper panels will overlap the tops of lower panels along t...

Page 70: ...AILS 6 x 8 Poly 6 x 8 Poly 6 x 8 Poly 6 x 12 Poly Cut to fit 1 8 2 1 4 154 3 4 8 mil polycarbonate sheets provided for sides and top 102531 6 x 12 Side Polycarbonate Panels 102530 6 x 8 Roof Polycarbonate Panels 105352 Hat Channel CG96174 Ridge Cap 104548 End Cap H Channel ...

Page 71: ...LS H a t C h a n n e l B R a f t e r H a t C h a n n e l H C h a n n e l H C h a n n e l P o l y c a r b P o l y c a r b 1 0 4 5 4 8 C Rafter Hat Channel H Channel Polycarb Polycarb 104548 Detail C Detail B Detail A Frame length of your building may differ from what is shown ...

Reviews: