background image

User manual

Page 


© clearaudio electronic GmbH, 2022-01

3. Front and rear view of the

TT1

 tonearm

Front view

Pic. 4: Front and rear view

Rear view

Precision VTA adjustment

Cueing lever

Tonearm tower 

(right)

Magnet to lock in 

operating position

Precision tube holder for 

glass tube

Magnet to lock in 

operating position

Tonearm tower 

(left)

Bulletproof wood 

antiresonance bridge 

core

Precision VTA adjustment

Precision level

 gauge

Tonearm cable ground screw

Cueing lift mechanism

Tonearm cable 

holder

Cueing lever

Tonearm cable 

holder

Summary of Contents for Statement TT1

Page 1: ...User manual clearaudio electronic GmbH 2022 01 Made in Germany Statement TT1 Pic similar Pic similar...

Page 2: ...tonearm from Clearaudio Please take a moment to read this owner s manual to ensure correct setup to avoid any potential damage and to discover how to care for your Statement TT1 so that it gives you...

Page 3: ...mage could occur During any transportation of the tonearm always protect the carriage with a piece of foam so that the carriage cannot move during transportation When repackaging the tonearm please fo...

Page 4: ...ation of the Statement turntable 9 10 5 Mounting the TT1 tonearm on the Statement turntable 11 6 Mounting the armwand 12 7 Mounting the cartridge 13 8 Pre setting the tracking force 14 9 Fine adjustme...

Page 5: ...ure its safe transport Please keep this packaging in case of any further transport Important note Please check the contents as shown in the picture below Please take special care of the tonearm cable...

Page 6: ...nch 1 5 2 2 5 3 8 10 Mini Level Gauge 4 2x large hex socket headed bolts M10 x 80 to mount round base on turntable 11 Alignment gauge to aligning the round bases 5 White gloves 12 4x mounting screws M...

Page 7: ...mes almost completely assembled Additional parts accessories and tools are also packed separately Pic 2 Delivery condition tonearm body Pic 3 Armwand Please note For the transport the tonearm carriage...

Page 8: ...ment Cueing lever Tonearm tower right Magnet to lock in operating position Precision tube holder for glass tube Magnet to lock in operating position Tonearm tower left Bulletproof wood antiresonance b...

Page 9: ...id introducing scratches and or fingerprints during assembly First position the two round bases see page 4 package content No 9 onto the turntable Please note you may need to remove the previous discs...

Page 10: ...nt gauge fit into the threads machined into the bases Pic 6 Placing the alignment gauge Pic 7 Tightening the mounting bolts While holding the alignment gauge in this position tighten the two bolts wit...

Page 11: ...While holding it in place insert the four socket head mounting screws provided into the threaded holes in the tonearm mounting bases and tighten them Please note Always hold the tonearm in place while...

Page 12: ...position and press the cable into the holders provided on the back of the tonearm Make sure that the cable has enough latitude when the tonearm is moved back and forth Guide the tonearm tube between...

Page 13: ...ector on your cartridge to avoid any damages Please note This tonearm is suitable for all cartridges with a weight of 5 5g and above If your cartridge is lighter please use an additional weight headsh...

Page 14: ...rweight onto the back of the headshell tube Pic 15 The choice of counterweight depends on the weight of the cartridge Please only pre adjust the tracking force of the cartridge The correct setting wil...

Page 15: ...en position it at the right hand end of the gauge Pic 16b Never move the cartidge in the alignment gauge while it is lowered If the needle is not parallel to the reference line correct the position of...

Page 16: ...o the tonearm Move the tonearm forward to the playback position and check the tonearm height by placing the Mini Level Gauge on the headshell of the pickup Place it carefully in the center on the top...

Page 17: ...essary to loosen the locking screw for the headshell tube on the cart Fix the screw after completing the setting and remove the Mini Level Gauge from the headshell Set the correct tracking force of yo...

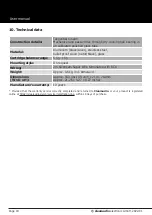
Page 18: ...black glass Cartridge balance range 5 5g 15g Mounting style On request Wiring 2m Sixstream Super Wire terminated with RCA Weight Approx 8 6kg incl Armwand Dimensions W x D x H Approx 540 incl lift un...

Page 19: ...o CONSERVER L ATTESTATION D ACHAT L attestation d achat est la preuve permanente d un achat de valeur La conserver en lieu sur pour s y reporter aux fins d obtention d une couverture d assurance ou da...

Page 20: ...li apparecchi verranno riparati presso i nostri Centri di Assistenza Autorizzati Le spese ed i rischi di trasporto sono a carico del cliente La casa costruttrice declina ogni responsabilit per danni d...

Page 21: ...User manual Made in Germany Page 21...

Page 22: ...User manual Page 22 clearaudio electronic GmbH 2022 01...

Page 23: ...User manual Made in Germany Page 23...

Page 24: ...ade in Germany Clearaudio Electronic accepts no liability for any misprints Technical specifications are subject to change or improvement without prior notice Product availability is as long as stock...

Reviews: