ATTENTION
Si votre bateau est neuf, il est
déconseillé d’utiliser cet article pendant
les quatre premières semaines après
avoir pris possession du bateau.
Certains matériaux utilisés sur les
bateaux neufs risquent de libérer des
vapeurs et peuvent transférer les
colorants de la housse au bateau et
par conséquent tacher le bateau et
ses éléments. Les housses de bateau
peuvent être utilisées sans danger
après cette période initiale.
Instructions & Care
Mode d’emploi et entretien
Stellex
™
T-Top Boat Cover
Housse pour bateau à toit
rigide Stellex
MC
18cB51_21639
20-404-120501-RT, 20-405-130501-RT
CAUTION
If your boat is new, use of this product is not recommended within the first four
weeks of ownership of the boat. Some compounds used in new boats can release
gases that will cause the dyes in boat covers to transfer to the boat, potentially
staining the boat or its components. Boat covers can be used safely after this
introductory period.
Installation
1. Cover sharp points with cloth or a sponge to avoid stressing or tearing your
boat cover.
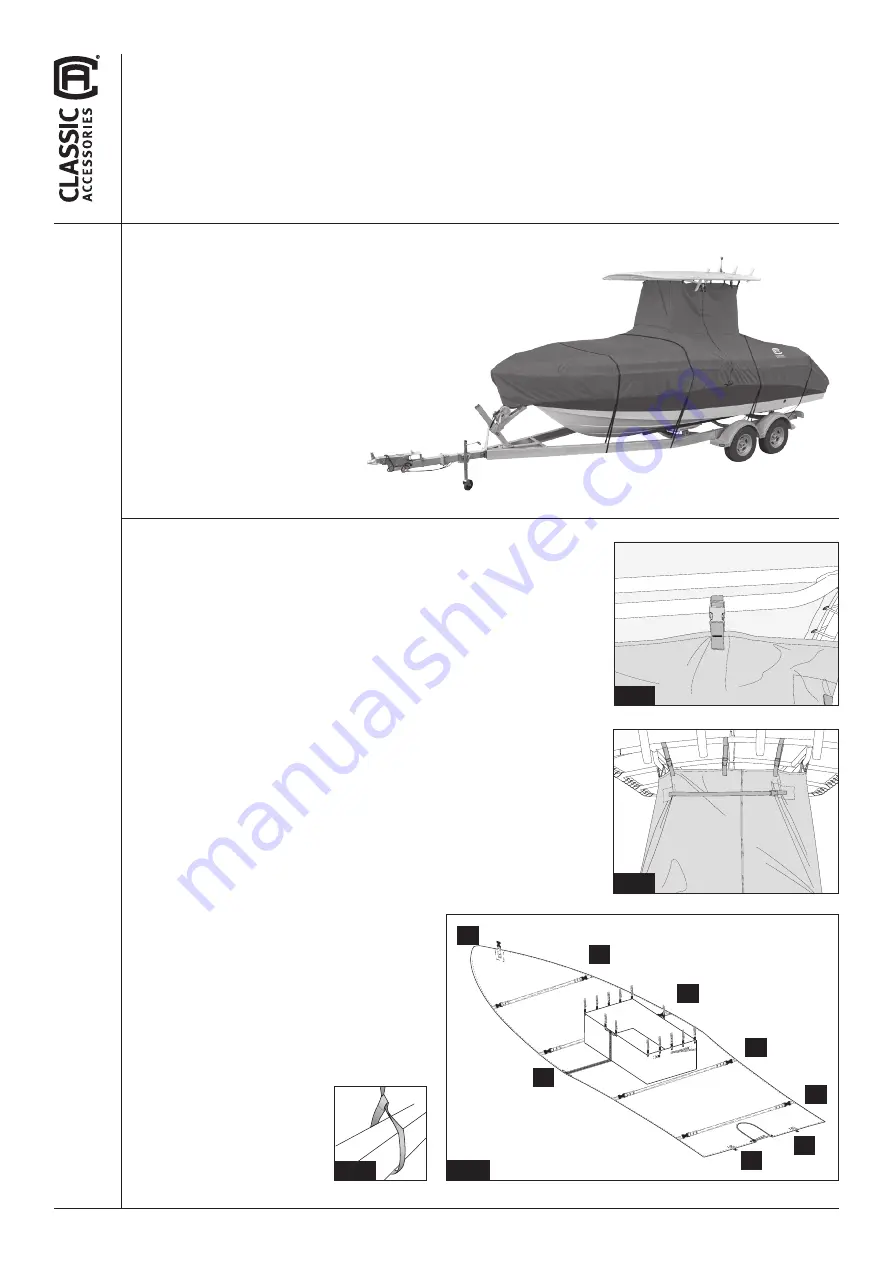
2. Make sure the port side zipper is open (Fig. 3Z). Drape your cover over your
boat with the tapered end that has the label marked “FRONT” at the bow. Start
at the bow and pull the cover towards the back on the starboard side of
the tower.
3. Wrap the cover around the tower and while pulling the zipper halves
together, start closing the zipper approx. 12 inches.
4. Standing inside the tower, line up and attach the webbing straps to the
upper frame (Fig. 1). Pull the top edge of the tower section upwards by
tensioning the straps. Adjust the rear tension strap (Fig. 2) to tighten cover
around tower.
5. Pull the zipper further down to the seam.
6. Pull the cover to align with bow and stern. Adjust placement as needed.
Close the zipper all the way.
7. Pull your cover below the rub rail around the entire boat.
8. Your cover includes quick-release straps that secure your cover to your boat.
The bow straps are sewn to the cover and the stern straps are free and need
to be attached to the cover with the buckles. Also included is a “D” ring near
the motor area of the cover. This “D” ring is available for an additional tie down
point and can be used as necessary. Use a line or cord and tie the “D” ring to
something secure on the boat or trailer.
9. Locate the two stern straps with looped ends
(Fig. 3C). Route the strap around a stationary point
on the stern of your boat and thread the clip end
of the strap through the loop end of the strap
(Fig. 2). Hook the clip end of the strap into the
corresponding buckle socket on the cover. Repeat
with the other stern strap.
10. Locate the side straps (Fig. 3B). Route the
strap around a trailer beam (Fig. 4) and back up
to the corresponding buckle socket on the cover.
Repeat with the other side straps. Repeat the above
process with the bow strap (Fig.
3A). After buckling ALL of the
straps, cinch all straps tight and
adjust their length as necessary
to get a tight fit.
Fig. 2
Fig. 1
Fig. 2
B
B
C
C
Z
A
B
B
Fig. 3
Fig. 4
©2018


