English
GREAT BRITAIN •
customer service
tel:
08545 300 9799
e-mail:
internet:
www.clasohlson.com/uk
V
er
. 20
130604
3.5
″
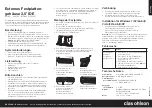
IDE External Enclosure
Art.no 38-3184
Model GD35601
Please read the entire instruction manual before using the product
and save it for future reference. We reserve the right for any
errors in text or images and any necessary changes made to
technical data. If you have any questions regarding technical
problems please contact our Customer Services.
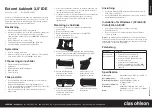
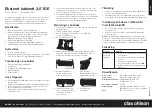
Description
•
External hard disk enclosure with USB 2.0 connection.
•
Install a hard disk (3.5
″
with an IDE connection) into
the enclosure and you have a portable device which
can be connected/moved between computers.
Note:
IDE hard disk sold separately.
•
Supports Plug-and-Play and Hot-Plug.
•
Data transfer rate: Up to 480 Mbps (USB 2.0)
•
Power supply via included mains adaptor.
System requirements
•
PC with vacant USB port.
•
Supported operating systems: Windows 7 (32/64-bit)/
Vista (32/64-bit) and XP. Mac compatible.
Contents
•
External enclosure (hard disk not included)
•
USB cable
•
Mains adaptor with connection cable
•
Instruction manual
•
Foot /desk stand
Things to consider
•
A new hard disk should always be partitioned and formatted
correctly before use.
•
Always save important data on several storage media.
•
Never remove the enclosure when the hard disk is reading
or writing data, you might damage the hard disk.
•
Do not expose the enclosure to heat or direct sunlight.
•
Do not place the enclosure close to strong magnetic fields
such as TVs, loudspeakers, etc. This could erase data or
cause the hard disk to stop working.
•
We take no responsibility for damaged or lost files. It is the sole
responsibility of the user to take measures to prevent and
recover any data loss. Make frequent backups of your files
using a variety of different storage media.
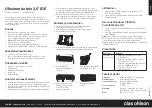
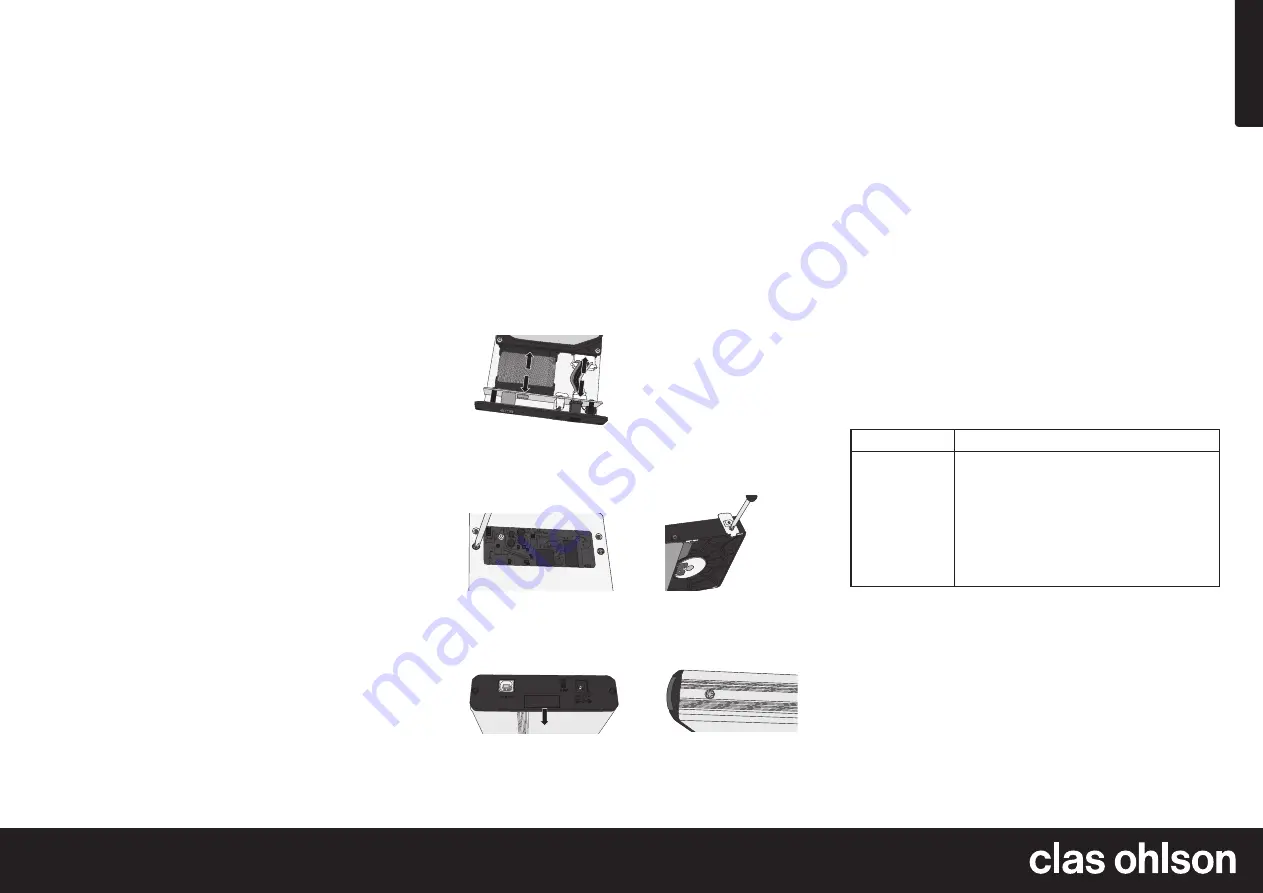
Mounting the hard disk
1. Loosen the two screws on the enclosure’s end that secure
the sled in the housing.
2. Pull out the sled carefully.
3. Use the jumpers to set the hard disk. The jumpers should be
set to MASTER (this info should be on the hard disk itself).
4. Connecting the hard disk (3.5
″
IDE):
Connections
1. Connect the included USB lead between the enclosure and
a USB 2.0 port on your computer.
2. Plug the mains adaptor into a wall socket and its
DC connector into the socket on the enclosure.
Installation for Windows 7 (32/64-bit)/
Vista (32/64-bit) and XP
•
The computer will locate the external enclosure
automatically; no extra drivers are needed.
•
Once connected the new device will appear under
My Computer
.
Note:
A new hard disk should always be partitioned and
formatted correctly before use. The computer’s USB port must
be type 2.0 for it to be able to take advantage of the higher
transfer rate; otherwise it will use the slower USB 1.1 standard
(12 Mbps).
Troubleshooting
Problem
Solution
Enclosure not
detected.
•
Check if the hard disk is partitioned
and formatted.
•
Make sure that the USB cable is
correctly connected to the computer.
•
Make sure the switch (by the DC
connection) is in the
ON
position.
•
Check that your computer’s USB port
is functional.
Specifications
Interface
Compatible with USB 2.0 and USB 1.1
Connecting cable
USB, length 60 cm
Data transfer rate
Up to 480 Mbps (USB 2.0)
12 Mbps (USB 1.1)
Compatible hard disk
3.5
″
IDE
Mains adaptor
Input voltage: 100–240 V AC, 50 Hz
Output voltage: 12 V DC, 2.0 A
(+ centre positive)
Dimensions
186 × 115 × 31 mm
a. Connect the enclosure’s IDE connector (to the wide flat cable)
and the 4-pin power cable to the hard disk. Make sure
the plug is plugged into the socket as far as it can go
without forcing it.
b. Screw the hard disk into
place from the underside
using the included screws.
c. Screw the two brackets
securely into place using
the included screws.
d. Slide in the sled back into
the enclosure. Refit the
two retaining screws.
e. Tighten the screws on
both sides.