GREAT BRITAIN
For consumer contact, please visit www.clasohlson.
co.uk and click on customer service.
Ver
. 200906
Dummy Security Camera
Art.no. 36-3110 Model Security Camera Imitation
Please read the entire instruction manual before using the product and save it for future reference.
We reserve the right for any errors in text or images and any necessary changes made to technical
data. If you have any questions regarding technical problems please contact Customer Services.
The “Dummy” security camera looks just like a
real surveillance camera and can be mounted
on the wall or ceiling. A flashing LED gives it an
impression of authenticity. Battery operated.
Inserting the batteries
The security camera requires 2 x C/LR14
batteries (not included).
Only use batteries of the same type, do not
mix old and new batteries.
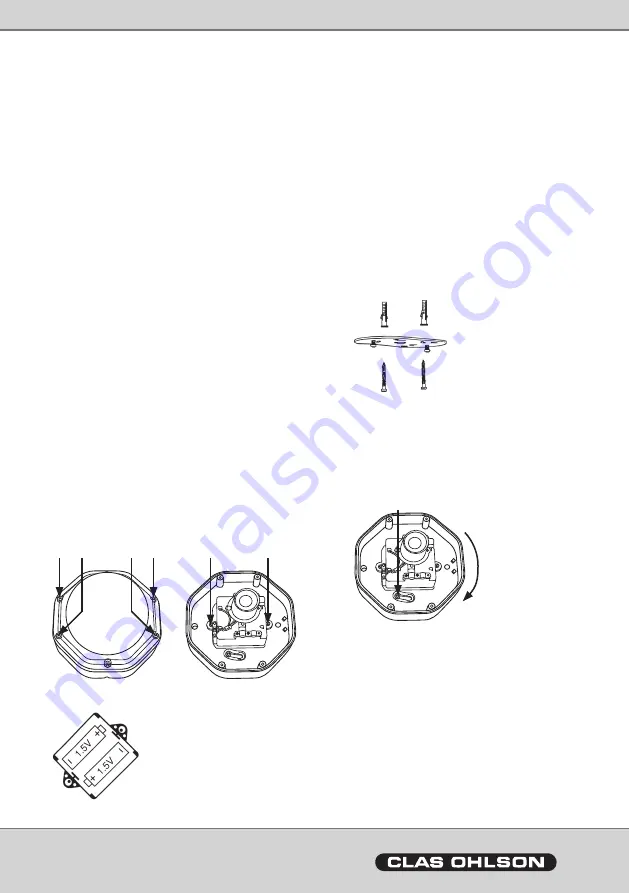
1. Unscrew the dome from the base and
open the camera (fig. 1).
2. Unscrew the battery compartment (fig. 2).
3. Insert the batteries according to the
markings (+ and -) in the battery
compartment. (fig. 3).
4. Turn on the power. The red LED should
begin to flash.
5. Screw the battery compartment back in
and reattach the dome.
The battery should last about 4 months.
Change it once you notice the LED becoming
weak or inoperable. Never let old batteries
remain in the camera since they can begin to
leak and damage the product.
Fig. 1
Fig. 2
Fig. 3
Mounting
1. Decide where to place the security camera.
2. Using the mounting plate as a template,
mark the position of the screw holes.
3. Place the side with the two threaded holes
against the ceiling (or wall) and fasten the
mounting plate securely using the three
screws (using the wall plugs if necessary).
4. Screw the other two M4 screws loosely
into the mounting plate.
5. Open the security camera.
6. Press the base onto the mounting plate so
that the mounting holes are aligned with
the M4 screws in the mounting plate.
Turn the base and tighten the screws.
7. Screw the security camera together.
Specifications
Power supply:
DC 3 V (2 x
C/LR14 batteries)
Battery life:
Up to 4 months
(alkaline batteries)
Diameter:
125 mm
Height:
100 mm
Weight (excluding batteries): 200 g
Wipe off the security camera with a damp
cloth when needed.
ENGLISH


