


24
3.1 Quick Start
After you select the picture source, most of the rest of setup is automatic, although you can override
the automatic settings and adjust anything manually.
Selecting the source means choosing the connector
where the picture is coming in. In the case of the
Analog/Digital connector, it also means choosing
between Analog and Digital.
There are three input connectors:
• an analog/digital computer connector
• an S-Video connector
• a composite video connector
Quick start
Connect power and turn on the power switch, which
should light. The backlight (lamp) will come on auto-
matically. If the power was already on, and the back-
light is off, press the remote
ON
button.
1. Aim remote control at the lower left corner of the
Bay Cat and press
SOURCE
on the remote. The Bay
Cat will now look at each of the three connectors
and stop on the first one that is receiving a valid
picture.
If this is successful (it may take 10 seconds)
stop here
.
If you have several sources connected, press
SOURCE
again to go to the next one with a picture.
If you get no picture or have other trouble, read
the rest of these steps.
If the source is component video, you will have to
manually change the Colorspace to YPbPr. Otherwise
the colors will be wrong.
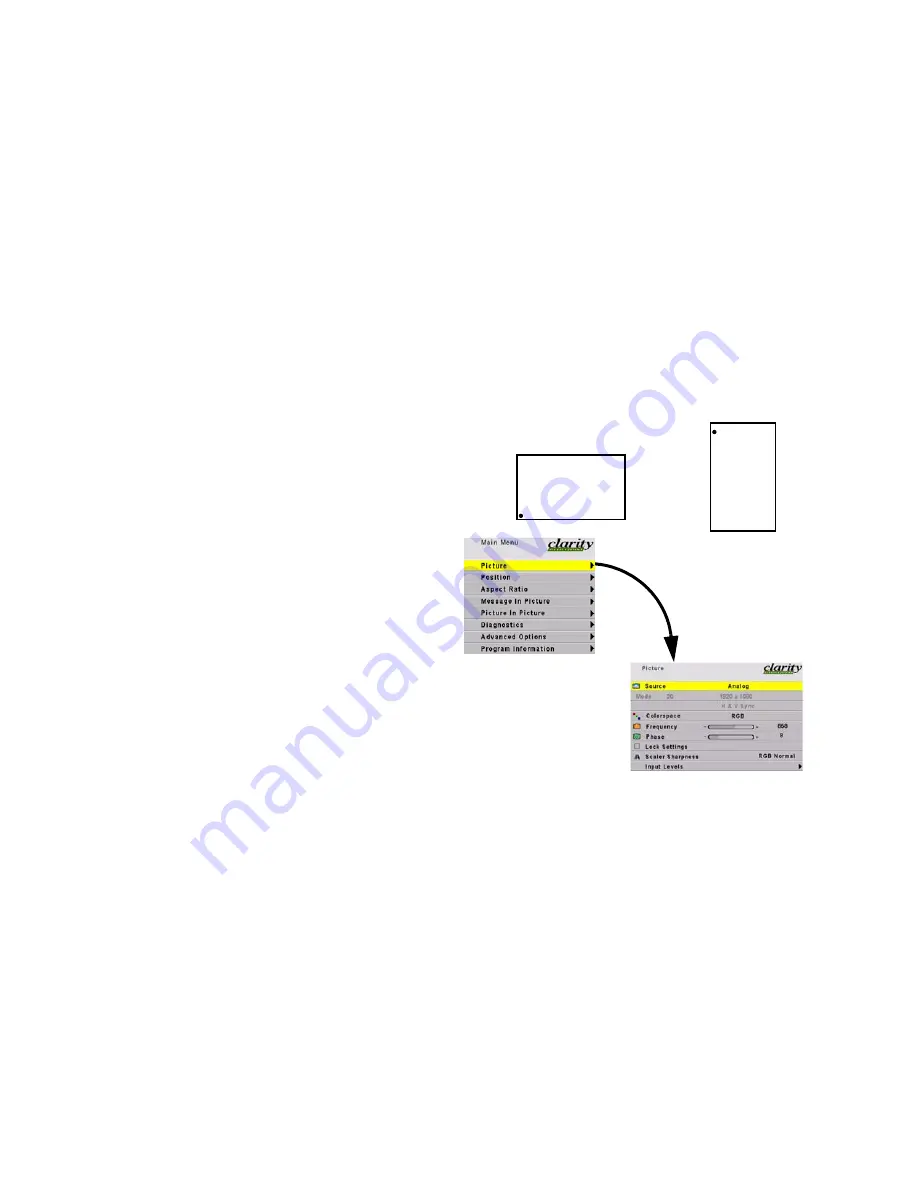
2. Press
MENU
. The
Main Menu
should appear.
3. Select
Picture
with the up-down arrow keys on the
remote and press
ENTER
. This will open the Pic-
ture menu.
4. With the left-right arrow keys, select the input
connector you want:
a)
Analog RGB
(usually computer sources, VGA
thru UXGA)
b)
Digital RGB
(DVI)
c) Comp Video
d) S-Video
If the source picture is component video (YPbPr), select
the Analog RGB
5. Press
ENTER
. The Bay Cat will immediately dis-
play the picture. Within a second or two the Bay
Cat will analyze the picture and adjust to it.
If you see no picture …
• Check the source by connecting it to another type
of display. If the source is a laptop, maybe it has
timed out and the screen is blank. Did you enable
the VGA output on the rear of the laptop?
• Check the power switch near the AC power cord.
It should be lit.
• The IR receiver for the remote is a small hole in
the lower left corner of the display. Be sure the
remote is aimed toward it. (In Portrait orientation
the IR receiver is in the upper left corner.
• Check whether EDID is set to Analog or Digital.
(See “EDID: What It Is and How It Works” on
page 34.)
About the remote
The remote control operates with IR (infra-red)
signals going to the IR receiver. The receiver is in the
lower left corner of the screen bezel behind a small
hole.
(Later, to prevent accidental adjustment of the dis-
play, cover this hole with a small square of black
tape.)
A quick reference for all the remote buttons is
found in “Remote Control Buttons” on page 78.
Landscape
Portrait
Summary of Contents for SN-4035-WX Bobcat
Page 1: ...Bay Cat SN 4610 1080 User Guide ...
Page 2: ......
Page 3: ...i SN 4610 1080 Bay Cat 46 Direct View LCD Display User Guide 070 0146 01 4 October 2004 ...
Page 6: ...iv ...
Page 10: ......
Page 13: ...3 ...
Page 17: ...7 ...
Page 18: ...8 ...
Page 21: ...11 ...
Page 27: ...17 ...
Page 32: ...22 ...
Page 37: ...27 ...
Page 43: ...33 ...
Page 47: ...37 ...
Page 51: ...41 ...
Page 53: ...43 ...
Page 57: ...47 Second press of MISC button First press of MISC button ...
Page 63: ...53 ...
Page 67: ...57 Find the mode and its Mode ID number in the three tables starting on page 94 ...
Page 69: ...59 ...
Page 78: ...68 Diagnostics Test Patterns Move through Test Patterns with the up down arrow keys ...
Page 90: ...80 4 3 Drawings Dimensions in inches ...
Page 91: ...81 Side view of Bay Cat measure to rear of installed bracket ...
Page 92: ...82 ...
Page 93: ...83 ...
Page 99: ...89 ...
Page 103: ...93 ...
Page 114: ...104 ...