


46
Chapter 2
RetCam System Software Configuration
RetCam 3 and RetCam Shuttle User Manual
PN 18-000393 Rev. A
NOTE
Prior to performing this step, establish a physical connection to the network
used to support RCRS by plugging a shielded RJ-45-equipped Cat5 or Cat6
cable into the network connector on the RetCam system (on the rear of the
RetCam 3 cart or on the notebook computer of the RetCam Shuttle).
To configure the RetCam 3 or RetCam Shuttle for use with RCRS, select the “gear” icon
on the bottom right of the screen to display the
Utilities
menu, and then select
User
Preferences
.
Figure 15
Utilities Menu
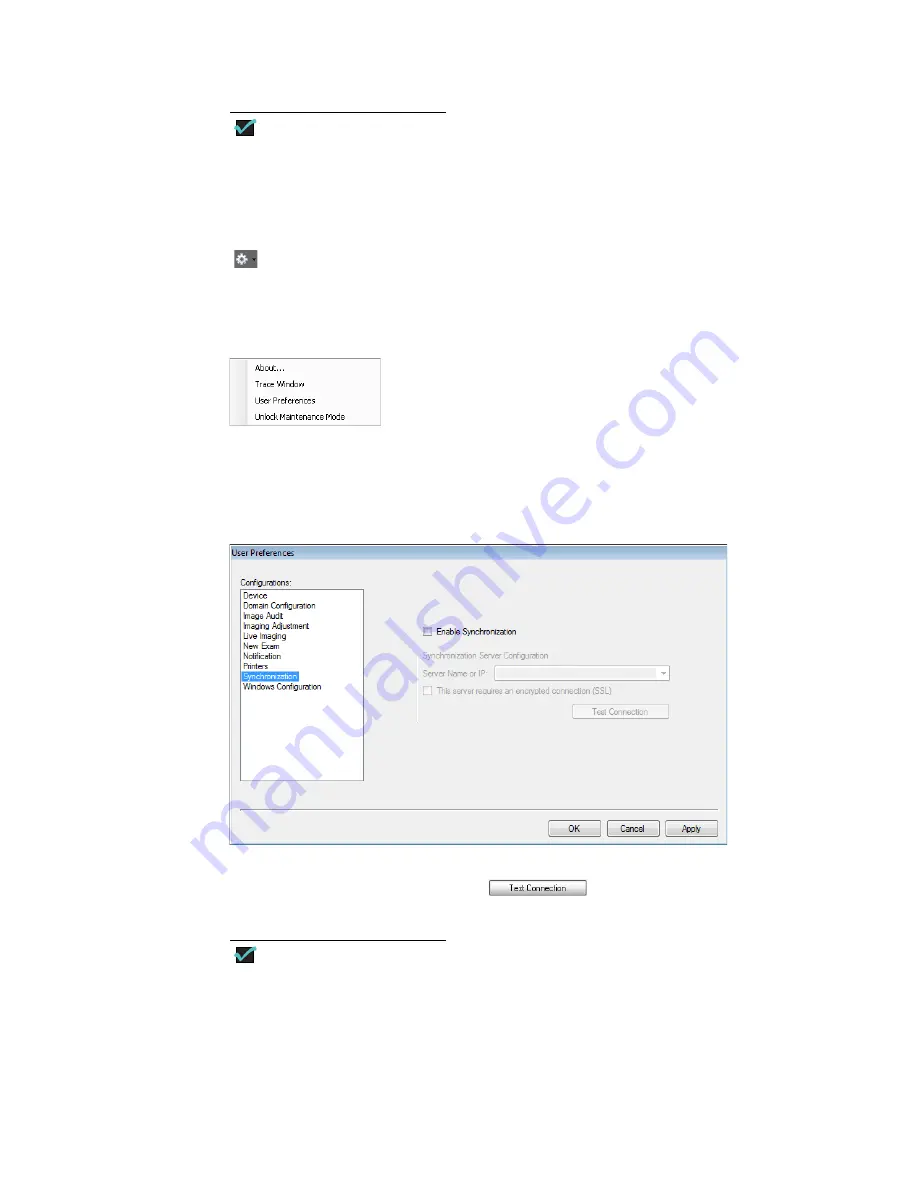
When the
User Preferences
window appears, select
Synchronization
to display the
options for RCRS.
Figure 16
User Preferences Window
Check the
Enable Synchronization
checkbox, and enter the name or IP address of the
server that is running the RCRS. Click
to verify that communication has
been established with the RCRS server.
NOTE
The
Server Name
field does not require that you enter
http://www
or
https://www
.