


6
04
WIFI CONFIGURATION
1.
Plug the device into a power outlet with the provided power adapter. A
Power On
sound
(See Appendix B for details on sounds), indicating that it is powered on.
2.
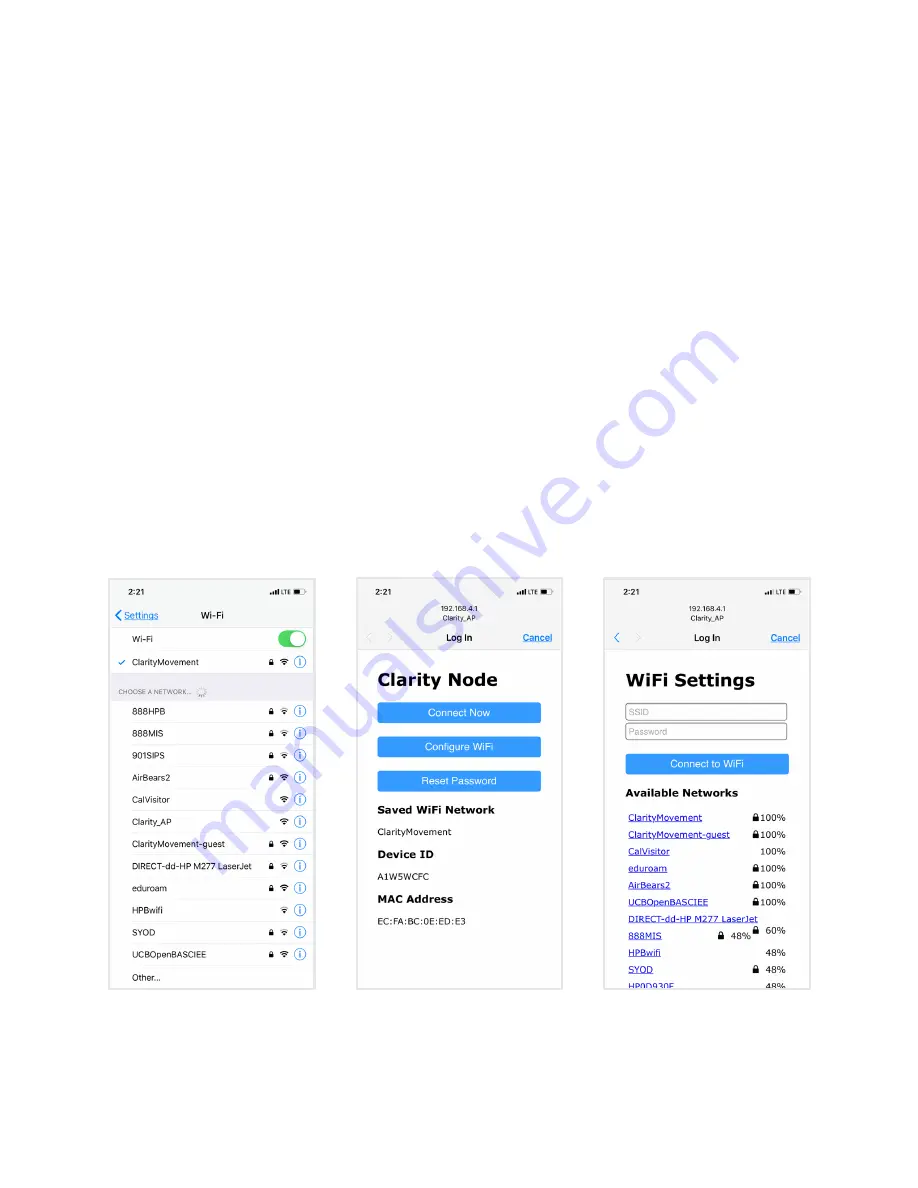
On a phone or computer, select “Clarity_AP” from available WiFi networks (Figure 3).
3.
A menu or browser will pop up (Figure 4). If not, go to 192.168.4.1 in the web browser.
4.
If connecting to a new WiFi network, select “Configure WiFi”. Select “Connect Now” if
the saved WiFi network is the desired network to start connecting.
5.
Please enter the WiFi SSID and password for the desired WiFi network. Click “Connect to
WiFi” and wait for connection status (Figure 5).
6.
If successful, the device will play the
Connection Successful
sound (See Appendix B for
details on sounds), indicating that it is connected. If unsuccessful, the device will play
the
Connection Fail
sounds
(See Appendix B for details on sounds). Please proceed to
Troubleshooting (Appendix A).
Figure 5.
Set up new WiFi
network.
Figure 3.
Select “Clarity_AP” from
the available WiFi networks on
your device.
Figure 3.
W-Fi configuration menu


