


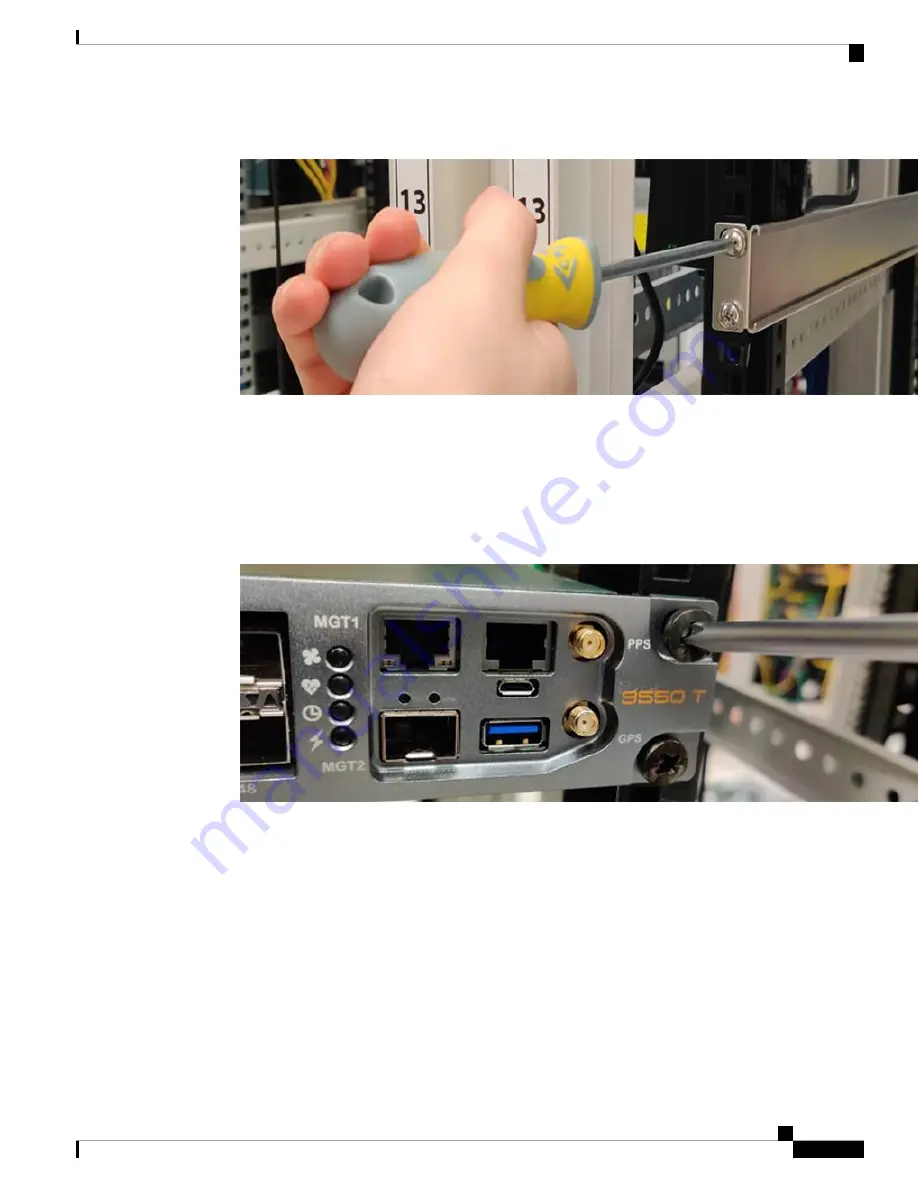
Figure 8: Attaching the left hand side rail.
2.
Lift the Nexus 3550-T to the desired height and align the installed rails with the rail mounting holes on
the rear of the Nexus 3550-T.
3.
Slowly rack the Nexus 3550-T by sliding back onto the rails, until the front is flush with the rack.
4.
Fasten the Nexus 3550-T onto the rack as per the method for installing the front mount bolts. Due to the
Nexus 3550-T's weight, the installation might be easier with the aid of another person.
Figure 9: Fasten the Nexus 3550-T in the normal manner.
Installing a 1 (RU) Chassis in a Two-Post Rack
This section describes the rack installation for the Cisco Nexus 3550-T Triton switch into a two-post rack.
To install a switch, you must attach mounting brackets to the switch and secure the switch to the rack.
Installation in racks other than 19-inch racks requires a bracket kit not included with the switch.
The following figure shows the standard 19-inch mounting brackets.
Cisco Nexus 3550-T Hardware Installation Guide
15
Installing the Chassis
Installing a 1 (RU) Chassis in a Two-Post Rack
Summary of Contents for Nexus 3550-T
Page 2: ... 2021 Cisco Systems Inc All rights reserved ...
Page 10: ...Cisco Nexus 3550 T Hardware Installation Guide 6 Preparing the Site Dust and Contaminants ...
Page 26: ...Cisco Nexus 3550 T Hardware Installation Guide 22 Installing the Chassis Starting the Switch ...
Page 40: ...Cisco Nexus 3550 T Hardware Installation Guide 36 Rebooting Rebooting a Switch ...


