


Step 3
Rotate the ejector lever upwards to seat the PM into the power tray.
Step 4
Tighten the ejector lever screw to a nominal installation torque of 5.5 in-lb (0.62 N-m). Do not exceed a maximum
installation torque of 10 in-lb (1.13 N-m).
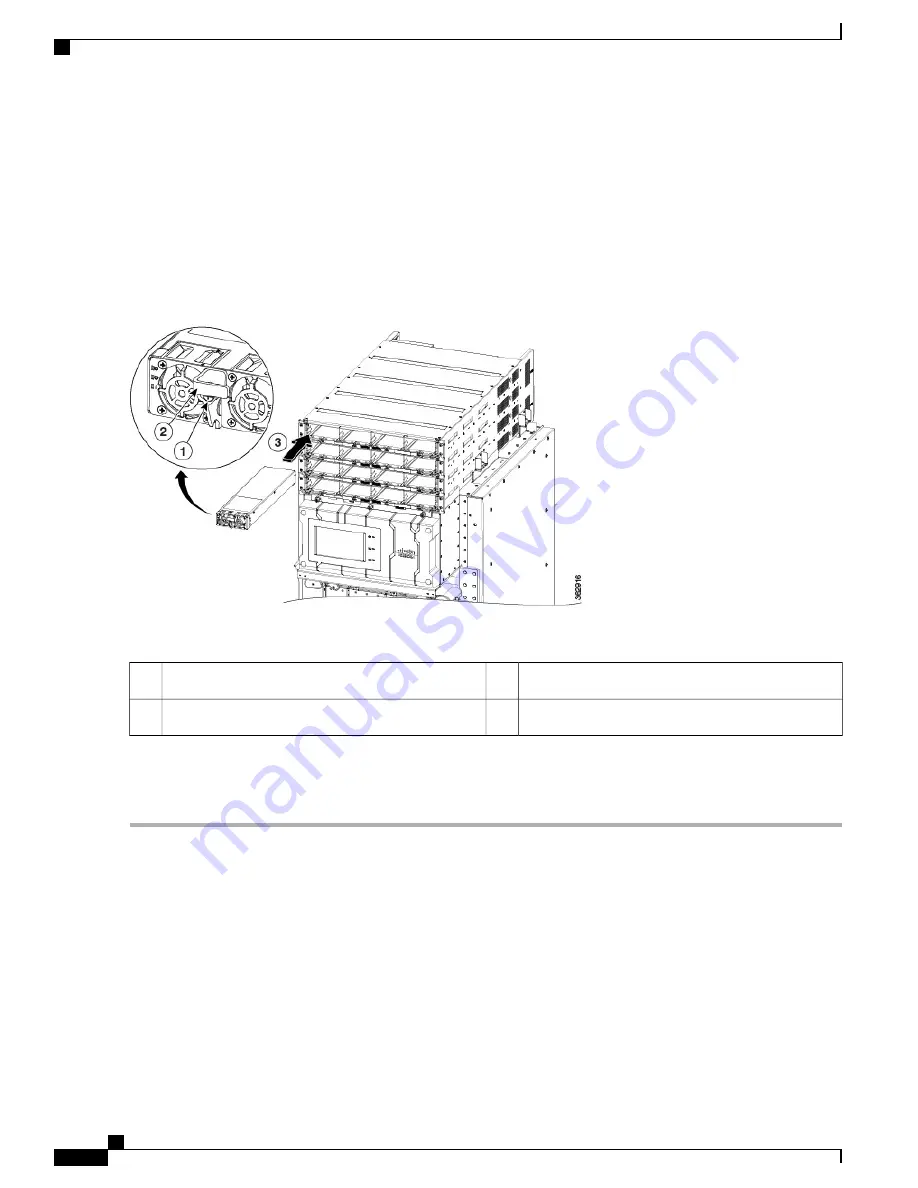
Figure 33: Installing a Power Module into a Power Tray
—
DC Power Tray Shown
Ejector lever screw
3
Power module
1
Ejector lever
2
Step 5
Fill the power tray, in PM ascending order, to the required configuration.
Step 6
If necessary, repeat these steps for the remaining power trays.
About the Power Module Status Indicators
The input-power-present LED on the AC and DC power modules provide a visual indication that voltage is
present across the input terminal connection.
•
For DC power modules, the DC input LED lights up when the input voltage reaches within the acceptable
range.
•
For AC power modules, the AC Input LED lights up when the input voltage reaches within the acceptable
range.
Cisco Network Convergence System 6000 Fabric Card Chassis Hardware Installation Guide
50
Installing the Power Components
About the Power Module Status Indicators


