background image

SGE2010/SGE2010P Administration Guide

54

B

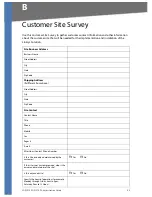
Customer Site Survey

Use this Customer Site Survey to gather customer contact information and other information 
about the customer site that will be needed for the implementation and installation of the 
Linksys Solution.

Site Business Address

Business Name

Street Address

City

State

Zip Code

Shipping Address 


(if different from above)

Street Address

City

State

Zip Code

Site Contact 

Contact Name

Title

Phone

Mobile

Fax

Pager #

E-mail

After Hours Contact Phone Number

Is this Site owned and maintained by the 
customer?

  Yes   

  No

If this site is not customer-owned, who is the 
owner and maintainer of the site?

Is this a manned site?

  Yes   

  No

Specify the hours of operation (for example, 
Monday through Friday, 8am to 5pm, 
Saturday 9 am to 12 Noon).

Summary of Contents for Linksys SGE2010

Page 1: ...ADMIN GUIDE BUSINESS SERIES 48 port 10 100 1000 Ethernet Switch Model SGE2010 SGE2010P ...

Page 2: ...ack Mount Placement 6 Wall Mount Placement 7 Connecting the Cables 7 4 Using the Console 9 Connecting to Your Switch with HyperTerminal 9 Connecting to the Switch with Telnet 12 Logging On to the Console 12 Selecting Menu Options and Actions 12 Using the Switch Main Menu 13 System Configuration 13 System Information 14 Management Settings 16 Username Password Settings 21 Security Settings 22 VLAN ...

Page 3: ...to the Switch with the Web Based Utility 51 Using Menus in the Web Based Utility 51 Viewing On line Help 52 A Contacts 53 US Canada Contacts 53 B Customer Site Survey 54 C Warranty Information 56 Limited Warranty 56 Exclusions and Limitations 56 Obtaining Warranty Service 57 Technical Support 57 D Federal Communication Commission Interference Statement 58 Industry Canada Statement 58 EC Declaratio...

Page 4: ...nfigure it to bridge your different networks These instructions should be all you need to get the most out of the Switch What s in this User Guide This user guide covers the steps for setting up and using the Switch Chapter 2 Getting to Know the SGE2010 SGE2010P This chapter describes the ports LEDs and other features on the front and back panels of the switch Chapter 3 Connecting Devices to the S...

Page 5: ...iodes LEDs to indicate the status of numerous functions These functions are listed below PWR A green PWR LED lights up to indicate that the Switch is powered on FAN A green FAN LED lights up to indicate that the cooling fan is operating properly A blinking red FAN LED indicates that the cooling fan has failed RPS A green RPS LED lights up to indicate that RPS is connected and operating properly A ...

Page 6: ...nformation about stacking refer to the SFE2010 SGE2010 Reference Guide miniGBIC1 4 The switch provides four mini GBIC ports The mini GBIC gigabit interface converter port is a connection point for a mini GBIC expansion module so the Switch can be uplinked via fiber to another switch Each mini GBIC port provides a link to a high speed network segment or individual workstation at speeds of up to 100...

Page 7: ...e Cables on page 7 Sample Network Configuration For an example of a possible network configuration see the application diagrams shown below Maximum Cabling Distances When you connect your network devices make sure you don t exceed the maximum cabling distances which are listed in the following table A hub refers to any type of 100Mbps hub including regular hubs and stackable hubs A 10Mbps hub conn...

Page 8: ... to the switch s power port and plug the other end into an electrical outlet CAUTION Make sure you use the power cord that is supplied with the switch Use of a different power cord could damage the switch Placement Options Before connecting cables to the Ethernet switch first you will physically install the Ethernet switch Either set the Ethernet switch on its four rubber feet for desktop placemen...

Page 9: ...e each Ethernet switch requires 1RU of space in the rack follow these instructions 1 Remove the four front screws on one side of the Ethernet switch Retain the screws for re installation 2 Place one of the supplied spacers on the side of the Ethernet switch so the four holes align to the screw holes 3 Place a rack mount bracket next to the spacer and reinstall the four screws removed in step 1 4 R...

Page 10: ... for the other corners of the Ethernet switch 5 Attach the Ethernet switch to a wall with appropriate screws not supplied CAUTION Ensure that the Ethernet switch is securely attached to the wall Connecting the Cables To connect network devices to the Ethernet switch follow these instructions 1 For 10 100Mbps devices connect a Category 5 Ethernet network cable to one of the numbered ports on the Et...

Page 11: ...ware such as HyperTerminal 6 Connect the supplied power cord to the power port and plug the other end into an electrical outlet CAUTION Make sure you use the power cord that is supplied with the Ethernet switch Use of a different power cord could damage the Ethernet switch 7 Power on the network devices connected to the Ethernet switch Each active port s corresponding Act Link LED will light up on...

Page 12: ... Telnet on page 12 Logging On to the Console see page 12 Selecting Menu Options and Actions see page 12 Using the Switch Main Menu see page 13 System Configuration see page 13 Port Status see page 44 Port Configuration see page 46 System Mode Layer 2 Layer 3 Selection see page 48 Help see page 49 Logout see page 50 Connecting to Your Switch with HyperTerminal You can use the HyperTerminal to conne...

Page 13: ...lick the Start button Choose Programs Accessories Communications HyperTerminal 2 On the Connection Description screen type a name for this connection select an icon and then click OK 3 On the Connect To screen use the Connect using drop down list to select a port to communicate with the switch COMn or TCP IP ...

Page 14: ...ole 4 Set the serial port settings as follows Bits per second 115200 Data bits 8 Parity None Stop bits 1 Flow control None 5 Then click the OK button 6 Optionally on the File menu click Save to save these settings The next time that you need to connect to the console you can open this saved connection ...

Page 15: ... HyperTerminal and open the connection that you configured previously 2 When the blinking cursor appears press the Enter key 3 When prompted to login enter the default login and password admin The Switch Main Menu appears Selecting Menu Options and Actions Within the Console Interface menus list options in numeric order Actions appear at the end of the screen To select menu options and actions use...

Page 16: ...2 Layer 3 Selection see page 48 5 Help see page 49 0 Logout see page 50 System Configuration The System Configuration Menu provides access to screens where you can manage system information view or modify management settings set up user accounts and manage security settings It also provides access to screens where you can manage VLAN IDs IPv4 and IPv6 settings and download upgrade files You also w...

Page 17: ...ee page 44 0 Back Select return to the previous menu To open this screen From the Switch Main Menu select 1 System Configuration Menu System Information The System Information menu provides access to screens where you can view firmware version information and general system information 1 Versions see page 15 2 General Information see page 15 0 Back Select to return to the previous menu To open thi...

Page 18: ...ration 2 From the System Configuration Menu select 1 System Information 3 From the System Information Menu select 1 Versions General Information Use the General System Information screen to view the system description system up time and system MAC address You also can enter a system contact system name and system location To open this screen 1 From the Switch Main Menu select 1 System Configuratio...

Page 19: ...ion complete message appears press the Esc key to move the cursor to the Action list Management Settings The Management Settings screen provides access to screens where you can change the settings for serial port telnet and secure telnet SSH 1 Serial Port Configuration see page 17 2 Telnet Configuration see page 17 3 SSH Configuration see page 18 0 Back Select to return to the previous menu To ope...

Page 20: ... System Configuration Menu select 2 Management Settings 3 From the Management Settings Menu choose 1 Serial Port Configuration To change the baud rate of the serial port 1 Select Edit and then make changes 2 Press the Esc key to move the cursor to the Action list 3 Select Save to save your changes 4 When the Operation complete message appears press the Esc key to move the cursor to the Action list...

Page 21: ...When the Operation complete message appears press the Esc key to move the cursor to the Action list SSH Configuration The SSH Configuration menu provides access to screens where you can configure SSH server settings generate crypto keys and generate keys fingerprints 1 SSH Server Configuration see page 19 2 SSH Status see page 19 3 SSH Crypto Key Generation see page 20 4 SSH Keys Fingerprints see ...

Page 22: ...enu 2 From the System Configuration Menu select 2 Management Settings 3 From the Management Settings Menu choose 3 SSH Configuration 4 From the SSH Configuration Menu select 1 SSH Server Configuration To change SSH Server settings 1 Select Edit and then make your changes 2 Press the Esc key to move the cursor to the Action list 3 Select Save to save your changes 4 When the Operation complete messa...

Page 23: ...SSH RSA or DSA key To open this screen 1 From the Switch Main Menu select 1 System Configuration Menu 2 From the System Configuration Menu select 2 Management Settings 3 From the Management Settings Menu choose 3 SSH Configuration 4 From the SSH Configuration Menu select 3 SSH Crypto Key Generation 5 When you finish using this screen select Quit To change SSH Crypto Key Generation settings NOTE On...

Page 24: ... to view the RSA and DSA fingerprints To open this screen 1 From the Switch Main Menu select 1 System Configuration Menu 2 From the System Configuration Menu select 2 Management Settings 3 From the Management Settings Menu choose 3 SSH Configuration 4 From the SSH Configuration Menu select 4 SSH Keys Fingerprints 5 When you finish using this screen select Quit Username Password Settings You can us...

Page 25: ...in field 2 Press the Esc key to move the cursor to the Action list 3 Select Save to save your changes 4 When the Operation complete message appears press the Esc key to move the cursor to the Action list Security Settings The Security Settings screen provides access to screens where you can generate SSL certificates and view the SSL certificate listings You also can use this module to disable the ...

Page 26: ...d 2 Press the Esc key to move the cursor to the Action list 3 Select Execute to generate the certificate with the new parameters 4 When the Operation complete message appears press the Esc key to move the cursor to the Action list The following fields are specified Public Key Algorithm Specifies the SSL type Public Key Length Specifies the SSL RSA key length Range 512 to 2048 Common Name FQCN IP a...

Page 27: ...uit Disable Active Management Access Profile You can use select option 3 on the Security Settings menu to disable the active management access profile To disable the active management access profile 1 From the Switch Main Menu select 1 System Configuration 2 From the System Configuration menu select 4 Security Settings 3 From the Security Settings Menu select 3 Disable Active Management Access Pro...

Page 28: ...rn to the previous menu To open this screen 1 From the Switch Main Menu select 1 System Configuration 2 From the System Configuration Menu select 5 Vlan Management Default VLAN Setup You can use the Default VLAN Setup screen to view and change the VLAN ID To open this screen 1 From the Switch Main Menu select 1 System Configuration 2 From the System Configuration Menu select 5 Vlan Management 3 Fr...

Page 29: ... IP Configuration menu provides access to screens where you can manage IPv4 and IPv6 address configuration HTTP and HTTPS configuration and network configuration 1 IPv4 Address Configuration see page 27 2 IPv6 Address Configuration see page 28 3 HTTP Configuration see page 34 4 HTTPS Configuration see page 34 5 Network Configuration see page 35 0 Back Select to return to the previous menu To open ...

Page 30: ...pen this screen 1 From the Switch Main Menu select 1 System Configuration 2 From the System Configuration Menu select 6 IP Configuration 3 From the IP Configuration menu select 1 IPv4 Address Configuration IPv4 Address Settings You can use this screen to view or editing the IPv4 address settings To open this screen 1 From the Switch Main Menu select 1 System Configuration 2 From the System Configu...

Page 31: ...ttings 4 When the Operation complete message appears press the Esc key to move the cursor to the Action list DHCP Renew You can select this option to renew DHCP NOTE This option is available only if the interface is configured as a DHCP interface through IPv4 Address Settings To renew DHCP 1 From the Switch Main Menu select 1 System Configuration 2 From the System Configuration Menu select 6 IP Co...

Page 32: ... use the IPv6 Interface Enable screen to enable or disable the IPv6 interface To open this screen 1 On the Switch Main Menu select 6 IP Configuration 2 On the IP Configuration menu select 2 IPv6 Address Configuration 3 On the IPv6 Address Configuration menu select 1 IPv6 Interface Enable To edit the IPv6 interface settings 1 When you finish using this Select Edit and then make the changes Press th...

Page 33: ...the System Configuration Menu select 6 IP Configuration 3 From the IP Configuration menu select 2 IPv6 Address Configuration 4 From the IPv6 Address Configuration menu select 2 IPv6 Address Settings To edit the IPv6 address settings 1 Select Edit and then make the changes Press the Tab key to move the cursor from one field to the next NOTE To enable or disable the DHCP client move the cursor to th...

Page 34: ... From the IP Configuration menu select 2 IPv6 Address Configuration 4 From the IPv6 Address Configuration menu select 3 IPv6 Address Table IPv6 ISATAP Enable You can use the IPv6 ISATAP Enable screen to configure the ISATAP tunnel To open this screen 1 From the Switch Main Menu select 1 System Configuration 2 From the System Configuration Menu select 6 IP Configuration 3 From the IP Configuration ...

Page 35: ...Esc key to move the cursor to the Action list 3 Select Save to save your settings 4 When the Operation complete message appears press the Esc key to move the cursor to the Action list IPv6 ISATAP Interface Show You can use the ISATAP Interface Show screen to view the interface type and address To open this screen 1 From the Switch Main Menu select 1 System Configuration 2 From the System Configura...

Page 36: ...2 IPv6 Address Configuration 4 From the IPv6 Address Configuration menu select 6 IPv6 Default Gateway To edit the IPv6 default gateway settings 1 Select Edit and then make the changes Press the Tab key to move the cursor from one field to the next NOTE To change the state of the gateway move the cursor to the State field and then press the Space Bar to toggle between ENABLE and DISABLE 2 Press the...

Page 37: ...em Configuration Menu select 6 IP Configuration 3 From the IP Configuration menu select 3 HTTP Configuration To change the HTTP settings 1 Select Edit and then make your changes 2 Press the Esc key to move the cursor to the Action list 3 Select Save to save your changes 4 When the Operation complete message appears press the Esc key to move the cursor to the Action list HTTPS Configuration Use the...

Page 38: ...r changes 4 When the Operation complete message appears press the Esc key to move the cursor to the Action list Network Configuration The Network Configuration screen provides access to screens where you can execute ping tests and traceroute tests for IPv4 and IPv6 addresses 1 Ping IPv4 see page 36 2 Ping IPv6 see page 37 3 TraceRoute IPv4 see page 38 4 TraceRoute IPv6 see page 39 0 Back Select to...

Page 39: ... the Network Configuration menu select 1 IPv4 Ping To change the IP address 1 Select Edit and then enter the IP address 2 Press the Esc key to move the cursor to the Action list 3 Select Save to save your changes 4 When the Operation complete message appears press the Esc key to move the cursor to the Action list To begin the ping test 1 Select Execute to begin the ping test 2 After the ping test ...

Page 40: ...the Network Configuration menu select 2 IPv6 Ping To change the IP address 1 Select Edit and then enter the IPv6 address 2 Press the Esc key to move the cursor to the Action list 3 Select Save to save your changes 4 When the Operation complete message appears press the Esc key to move the cursor to the Action list To begin the ping test 1 Select Execute to begin the ping test 2 After the ping test...

Page 41: ...nfiguration 3 From the IP Configuration menu select 5 Network Configuration 4 From the Network Configuration menu select 3 Trace Router IPv4 To change the IP address 1 Select Edit and then enter the IPv4 address 2 Press the Esc key to move the cursor to the Action list To begin the trace route test 1 Select Execute to begin the test 2 After the test is complete the results of the test appear on th...

Page 42: ...nfiguration 3 From the IP Configuration menu select 5 Network Configuration 4 From the Network Configuration menu select 4 Trace Router IPv6 To change the IP address 1 Select Edit and then enter the IPv6 address 2 Press the Esc key to move the cursor to the Action list To begin the trace route test 1 Select Execute to begin the test 2 After the test is complete the results of the test appear on th...

Page 43: ...see page 42 0 Back Select to return to the previous menu To open this screen 1 From the Switch Main Menu select 1 System Configuration 2 From the System Configuration Menu select 7 File Management Upgrade Backup IPv4 You can use the Upgrade Backup IPv4 screen to download files from an IPv4 address To open this screen 1 From the Switch Main Menu select 1 System Configuration 2 From the System Confi...

Page 44: ... appears press the Esc key to move the cursor to the Action list Upgrade Backup IPv6 You can use the Upgrade Backup IPv6 screen to download files from an IPv6 address To open this screen 1 From the Switch Main Menu select 1 System Configuration 2 From the System Configuration Menu select 7 File Management 3 From the File Management Menu select 2 IPv6 Upgrade Backup To enter the IPv6 Upgrade Backup...

Page 45: ...placed You can use the Active Image screen to specify which image is the active image on the switch To open this screen 1 From the Switch Main Menu select 1 System Configuration 2 From the System Configuration Menu select 7 File Management 3 From the File Management Menu select 3 Active Image To enter the active image settings 1 Select Edit The cursor moves to the Active Image after Reset field 2 ...

Page 46: ...to Factory Settings You can restore the switch to the factory default settings To restore factory default settings 1 From the Switch Main Menu select 1 System Configuration 2 From the System Configuration Menu select 9 Restore Factory Settings 3 When the confirmation message appears press y to restore the default settings or press n to cancel NOTE Restoring factory settings from the console or web...

Page 47: ...o open this screen 1 From the Switch Main Menu select 1 System Configuration 2 From the System Configuration Menu select 11 Stack Configuration Port Status The Port Status menu provides access to screens where you can view the port status and the PoE status for each port on the switch 1 Port Status see page 45 2 PoE Status see page 45 0 Back Select to return to the previous screen To open this scr...

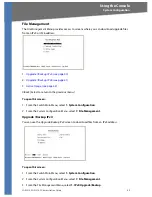
Page 48: ...ts use the Port Configuration screen See Port Settings on page 46 To open this screen 1 From the Switch Main Menu press 2 Port Status 2 From the Port Status Menu press 1 Port Status PoE Status You can use the PoE Status screen to view the PoE status of the ports NOTE To configure PoE use the PoE Configuration screen See PoE Settings on page 47 To open this screen 1 From the Switch Main Menu press ...

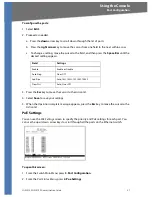
Page 49: ...page 47 0 Back Select to return to the previous screen From the Switch Main Menu press 3 Port Configuration Port Settings You can use the Port Settings screen to specify the auto negotiation status port speed duplex mode and flow control settings You can use the up or down arrow keys to scroll through all the ports on the Ethernet switch To open this screen 1 From the Switch Main Menu press 3 Port...

Page 50: ...key to move the cursor to the Action list 4 Select Save to save your settings 5 When the Operation complete message appears press the Esc key to move the cursor to the Action list PoE Settings You can use the PoE Settings screen to specify the priority and PoE settings for each port You can use the up or down arrow keys to scroll through all the ports on the Ethernet switch To open this screen 1 F...

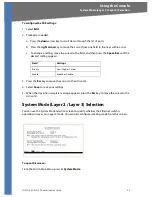
Page 51: ...ace Bar until the desired setting appears 3 Press the Esc key to move the cursor to the Action list 4 Select Save to save your settings 5 When the Operation complete message appears press the Esc key to move the cursor to the Action list System Mode Layer 2 Layer 3 Selection You can use the System Mode Selection screen to specify whether the Ethernet switch is operating in Layer 2 or Layer 3 mode ...

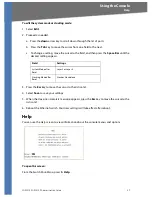
Page 52: ...til the desired setting appears 3 Press the Esc key to move the cursor to the Action list 4 Select Save to save your settings 5 When the Operation complete message appears press the Esc key to move the cursor to the Action list 6 Reboot the Ethernet switch Your new settings will take effect after reboot Help You can use the Help screen to view information about the console menus and options To ope...

Page 53: ... SGE2010P Administration Guide 50 Logout Using the Console Logout The Logout command lets you logout from the Ethernet switch NOTE When you issue this command you are immediately logged off the Ethernet switch ...

Page 54: ...ecting to the Switch with the Web Based Utility on page 51 Using Menus in the Web Based Utility on page 51 Viewing On line Help on page 52 Connecting to the Switch with the Web Based Utility You can connect to the switch using a standard web browser on a computer that is connected to the same network as the switch To access the web based utility enter the IP address of the switch to the address fi...

Page 55: ...wing On line Help Web Utility Configuration Viewing On line Help The Web Utility has on line Help including field definitions for each screen To access the on line help for a particular screen click the Help button on the right side of the screen ...

Page 56: ...ble by phone or online US Canada Contacts 24 Hour Technical Support 800 326 7114 RMA Return Merchandise Authorization http www linksys com warranty Website http www linksys com FTP Site ftp ftp linksys com Support http www linksys com support Sales Information 800 546 5797 800 LINKSYS EU Contacts Website http www linksys com international Product Registration http www linksys com registration ...

Page 57: ... Business Name Street Address City State Zip Code Shipping Address if different from above Street Address City State Zip Code Site Contact Contact Name Title Phone Mobile Fax Pager E mail After Hours Contact Phone Number Is this Site owned and maintained by the customer Yes No If this site is not customer owned who is the owner and maintainer of the site Is this a manned site Yes No Specify the ho...

Page 58: ...security safety procedures such as the need for safety glasses safety shoes and the location s of hardhat areas Site Coordinator Specify the name and phone number of the site coordinator responsible for ensuring that the site is adequately prepared for the installation of the Cisco equipment Name Phone Network Bandwidth What is the downlink and uplink speed of your broadband connection Uplink spee...

Page 59: ...l or electrical stress misuse negligence or accident f the serial number on the Product has been altered defaced or removed or g the product is supplied or licensed for beta evaluation testing or demonstration purposes for which Linksys does not charge a purchase price or license fee ALL SOFTWARE PROVIDED BY LINKSYS WITH THE PRODUCT WHETHER FACTORY LOADED ON THE PRODUCT OR CONTAINED ON MEDIA ACCOM...

Page 60: ...ort in your area can be found in the product User Guide and at www linksys com Have your product serial number and proof of purchase on hand when calling A DATED PROOF OF ORIGINAL PURCHASE IS REQUIRED TO PROCESS WARRANTY CLAIMS If you are requested to return your product you will be given a Return Materials Authorization RMA number You are responsible for properly packaging and shipping your produ...

Page 61: ...sidential area is likely to cause harmful interference in which case the user will be required to correct the interference at his own expense Industry Canada Statement The Class A digital apparatus meets all requirements of the Canadian Interference Causing Equipment Regulation Cet appareil numerique de la class A respecte toutes les exigences du Reglement sur le materiel brouilleur du Canada EC D...

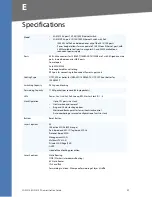
Page 62: ...TP CAT 5 or better for 10BASE T 100BASE TX UTP CAT 5e or better for 1000BASE T Switching Capacity 96 Gig non blocking Forwarding Capacity 71 4M packets per second 64 byte packets LEDs Power Fan Link Act PoE Speed RPS Master Stack ID 1 8 Stack Operation Up to 192 ports in a stack Hot Insertion and removal Ring and Chain stacking options Master and Backup master for resilient stack control Auto numb...

Page 63: ... RFC2819 RMON MIB groups 1 2 3 9 only RFC2737 Entity MIB RFC 2618 RADIUS Client MIB RFC 1215 Traps RMON Embedded Remote Monitoring RMON software agent supports four RMON groups history statistics alarms and events for enhanced traffic management monitoring and analysis Firmware Upgrade Web Browser upgrade HTTP and TFTP Dual images for resilient firmware upgrades Port Mirroring Traffic on a port ca...

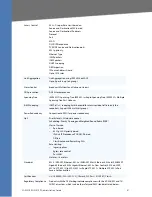
Page 64: ...raffic to only the requestors Support 256 multicast groups Power Redundancy Connection to RPSU for power redundancy QoS Priority levels 4 Hardware queues Scheduling Priority Queuing and Weighted Round Robin WRR Class of Service Port based 802 1p VLAN priority based IPv4 v6 IP Precedence TOS DSCP based Diffserv Classification and Remarking ACLs Rate Limiting Ingress policer Egress rate control Per ...

Page 65: ... 6 1 Dimensions Metric 440 mm W x 375 mm H x 44 mm D English 17 32 in W x 14 70 in H x 1 73 in D Unit Weight SGE2010 4 94kg or 10 89 lbs 174 25 oz SGE2010P 4 94kg or 10 89 lbs 174 25 oz Power SGE2010 100 240V 47 73Hz Internal Universal Also equipped with external redundant power supply connector for external power supply 48VDC SGE2010P 100 240V 47 63Hz Internal Universal Also equipped with externa...

Page 66: ...080312A LB ...

Reviews: