


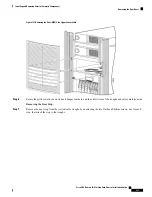


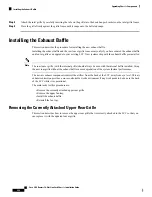


Figure 127: Removing the Inlet Grille Frame Assembly
Step 2
Rotate the assembly forward, lift it away from the chassis, and set it aside.
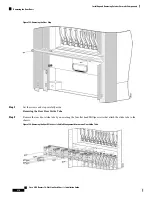
Installing the Inlet Grille Frame Assembly and Inlet Screen
This section describes how to install the new inlet grille frame assembly and the inlet grille screen.
In this task, you must first remove the lower grille screen from the frame, because the screws that attach the
frame assembly to the chassis are inboard of the screen—that is, the new screen is shipped already installed
into the new frame assembly, but you cannot attach the new frame to the chassis until you remove the screen
first. When the new frame assembly is installed, you can reinstall the lower grille screen into the new frame.
Prerequisites
Before performing this task, ensure that the lower grille and lower grille frame assembly have been removed.
See
Removing the Currently Installed Front Inlet Grille
and
Removing the Currently Installed Inlet Grille
for more information.
Steps
To install the new inlet grille frame and screen, perform the following steps:
Cisco CRS Routers 16-Slot Line Card Chassis Installation Guide
220
Upgrading Chassis Components
Installing the Inlet Grille Frame Assembly and Inlet Screen


