


You can have a mix of CRS-16-LCC-FAN-CT= and CRS-16-LCC-F-CT-B= in
an LCC.
Note
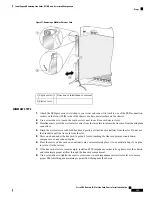
Steps
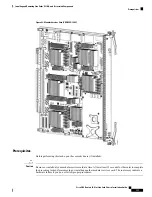
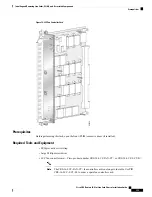
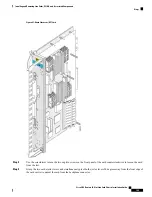
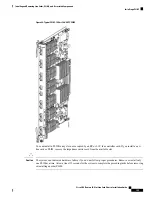
To install an LCC fan controller card, see the figure below and follow these steps:
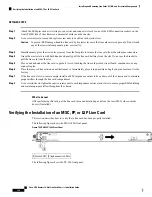
Figure 76: Installing an LCC Fan Controller Card
Direction of installation
or removal
3
Captive screw
1
Ejector lever
2
Step 1
Attach the ESD-preventive wrist strap to your wrist and connect its leash to one of the ESD connection sockets on the
front (PLIM) side of the chassis or a bare metal surface on the chassis.
Step 2
Remove the LCC fan controller card from its antistatic packaging.
Step 3
Grasp the card carrier handle with one hand and place your other hand under the carrier to support and guide it into the
correct slot.
Cisco CRS Routers 16-Slot Line Card Chassis Installation Guide
140
Installing and Removing Line Cards, PLIMs, and Associated Components
Steps


