


6-26
Cisco Wireless LAN Controller Configuration Guide
OL-17037-01
Chapter 6 Configuring WLANsWireless Device Access
Configuring WLANs
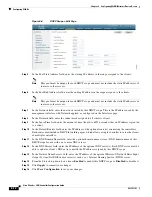
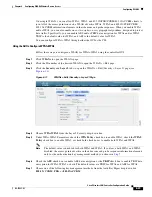
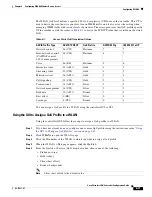
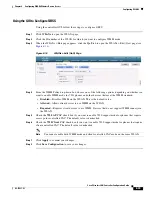
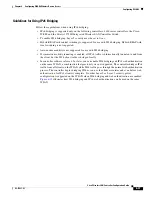
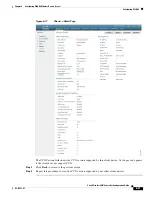
Figure 6-12
WLANs > Edit (Security > Layer 2) Page
Step 8
Choose
CKIP
from the Layer 2 Security drop-down box.
Step 9
Under CKIP Parameters, choose the length of the CKIP encryption key from the Key Size drop-down
box.
Range:
Not Set, 40 bits, or 104 bits
Default:
Not Set
Step 10
Choose the number to be assigned to this key from the Key Index drop-down box. You can configure up
to four keys.
Step 11
Choose
ASCII
or
HEX
from the Key Format drop-down box and then enter an encryption key in the
Encryption Key field. 40-bit keys must contain 5 ASCII text characters or 10 hexadecimal characters.
104-bit keys must contain 13 ASCII text characters or 26 hexadecimal characters.
Step 12
Check the
MMH Mode
check box to enable MMH MIC data protection for this WLAN. The default
value is disabled (or unchecked).
Step 13
Check the
Key Permutation
check box to enable this form of CKIP data protection. The default value
is disabled (or unchecked).
Step 14
Click
Apply
to commit your changes.
Step 15
Click the
General
tab.
Step 16
Check the
Status
check box to enable this WLAN.
Step 17
Click
Apply
to commit your changes.
Step 18
Click
Save Configuration
to save your changes.
Using the CLI to Configure CKIP
Follow these steps to configure a WLAN for CKIP using the controller CLI.
Step 1
Enter this command to disable the WLAN:
config wlan disable
wlan_id
Step 2
Enter this command to enable Aironet IEs for this WLAN: