78
7.3 Fax Settings
Note: Please login as admin account or an account with the permission of “Administer” to set up user
account.
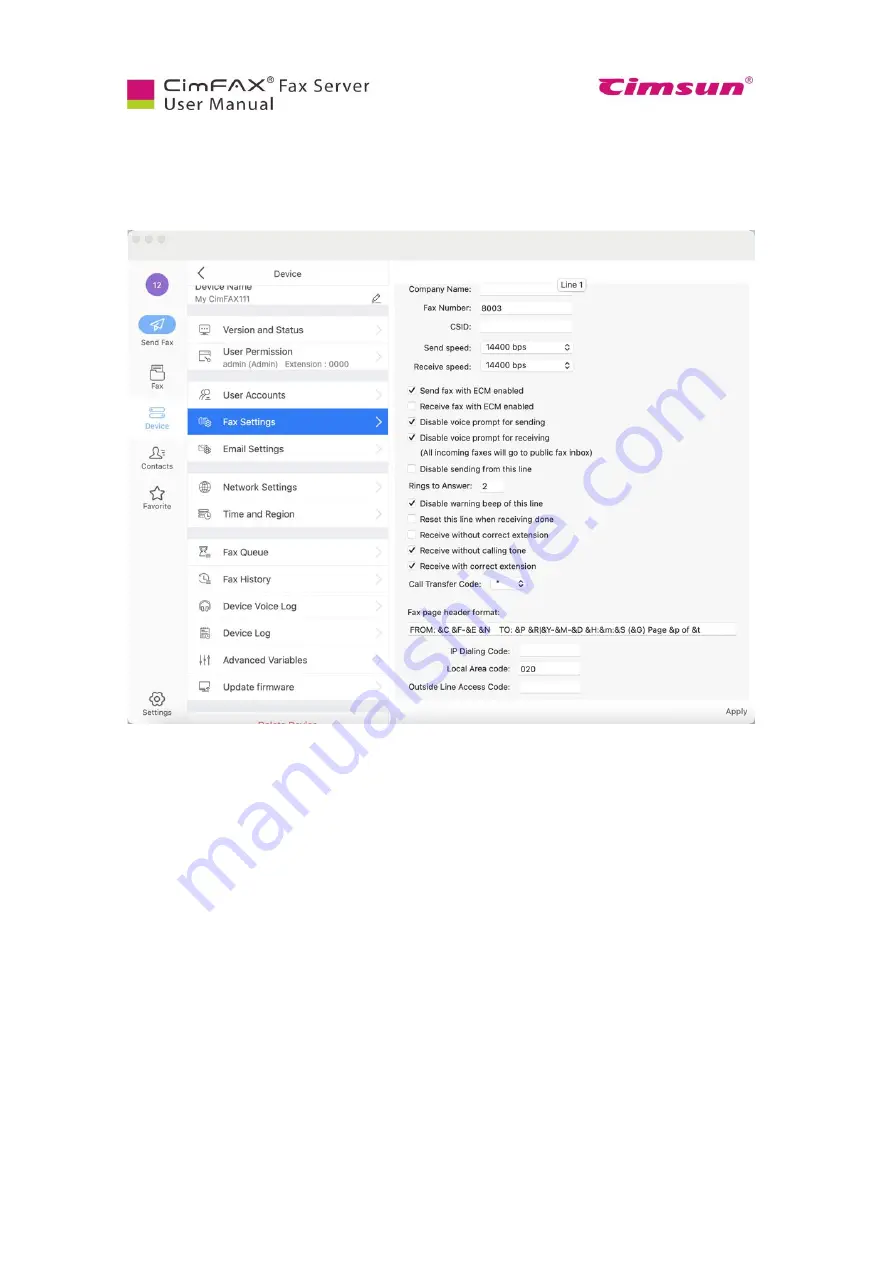
Click “Device”, then “Fax Settings”.
You need to fill in your company name, fax number, CSID (which is the short name of your company
name).
You can change send and receive speed when there are issues like sending and receiving fails. You can
also check on the options of “Send fax with ECM enabled” and “Receive fax with ECM enabled” when
sending and receiving fails or it sends or receives only part of the total fax.
For the explanations of other options, please refer to section 5.4 Fax Options.
Summary of Contents for CimFAX
Page 1: ...CimFAX Fax Server User Manual V5 0 ...
Page 27: ...21 4 Click Next or Browse to choose file location 5 Click Install ...
Page 28: ...22 6 Wait for file copy complete 7 Wait for the installation of CimFAX virtual printer ...
Page 30: ...24 ...
Page 37: ...31 11 Click Next Enter your name and password to complete the registration ...
Page 77: ...71 6 10 8 OCR options This function is not available any more ...
Page 81: ...75 7 Instructions for CimFAX on Mac ...
Page 95: ...89 ...
Page 104: ...98 Here are the screenshots of fax sending progress ...
Page 105: ...99 ...
Page 106: ...100 ...
Page 108: ...102 Click trash can icon to view deleted faxes ...
Page 111: ...105 8 Fax Mode ...


