- 29 -
6. Operation
6-1. Preparation
for
Operation
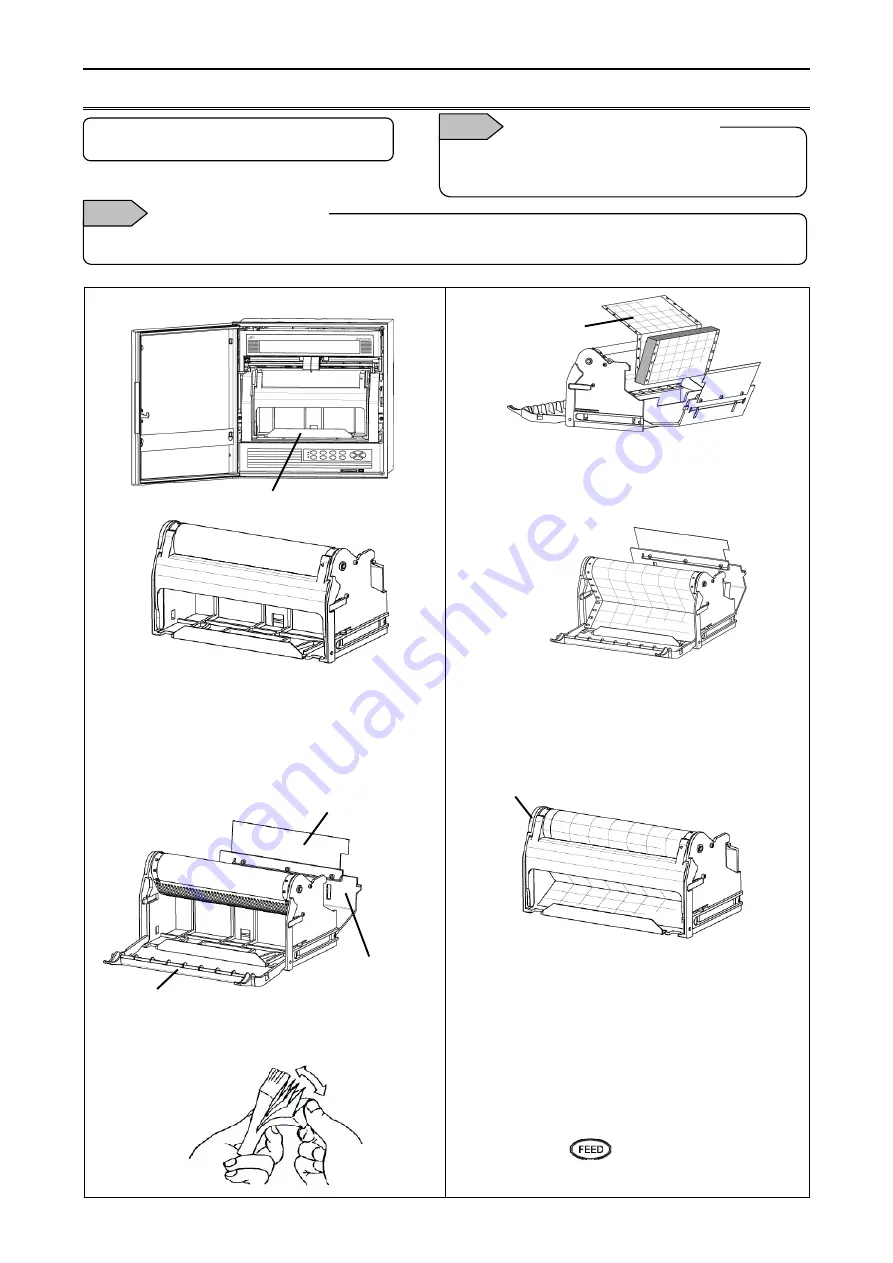
1. How to set chart paper
1. Pulling out the chart cassette
(1) Open the unit door.
(2)
Hold the chart cassette grip and pull it toward
you.
(3) Each pen rises up when pulled out the chart
cassette.
2. Setting chart paper
(1) Open the chart guide and chart feeding holder.
(2) Loosen the both ends of chart to prevent double
feed.
(3) Set chart in the chart housing at the back of the
chart cassette. The “round” hole and “oval” hole
should be at the left and right side of the chart
respectively. Make sure to set chart in the
correct direction.
(4) Draw out chart approximately 20cm and set
holes on the both ends to the sprockets of the
chart drum. Put two or three folds of chart in the
chart tray at the front of the chart cassette and
then close the chart guide and chart feeding
holder opened in the step (1).
(5) Turn the thumb wheel downward and make sure
that the holes on the both ends of chart are not
released from the sprockets, and feeding is
smoothly done.
3. Returning the chart cassette to the inside of
the unit
(1) Align the guide of the chart cassette with the
guide rail located at the both sides of the
internal chassis and then insert the cassette
until it is locked.
(2) Operate the
key to check if the chart is
fed properly and smoothly. If not, reset the chart
again.
Chart cassette grip
Be careful of injury by dropping the chart cassette after
pulling it from inner unit. Take care not to catch your
fingers in the unit when putting the chart cassette back.
Handling of chart cassette
Note
Thumb wheel
“Attention”
Red print surface
Chart feeding holder
(Metal part)
Chart guide
When opening the chart feeding holder, hold resin part.
Chart feeding holder
Note
Chart feeding holder
(Resin part)


