background image

General

General

General

General fitness

fitness

fitness

fitness tips

tips

tips

tips

Start your exercise programme slowly, i.e. one exercise unit every 2 days. Increase
your exercise session week by week. Begin with short periods per exercise and then
increase these continually. Start slowly with the exercise sessions and don’t set
yourself impossible targets. In addition to these exercises, do other forms of exercise
such as jogging, swimming, dancing and/or cycling.

Always warm up thoroughly before exercising. To do so, carry out at least five
minutes of stretching or gymnastic exercises to avoid muscle strains and injuries.

Check your pulse regularly. If you do not have a pulse measuring instrument, ask
your GP how you can measure your heart rate effectively. Determine your personal
exercise frequency range to achieve optimal training success. Take into account both
your age and your level of fitness. The table on page 16 will give you a reference
point for determining the optimal exercise pulse.

Make sure you breathe regularly and calmly when exercising.

Take care to drink enough while exercising. This ensures that the liquid requirement
of your body is satisfied. Consider that the recommended drinking amount of 2-3
litres per day is strongly increased through physical strain. The fluid you drink should
be at room temperature.

When exercising on the device always wear light and comfortable clothing as well as
sports shoes. Do not wear any loose clothing that could tear or become caught in the
device whilst exercising.

Exercises

Exercises

Exercises

Exercises for

for

for

for your

your

your

your personal

personal

personal

personal work-out

work-out

work-out

work-out

How high or low should your heart rate be during exercises?
Your GP can give your more information on the current guidelines.

Age

Heat rate frequency range 50-75%

(beats per minute)

- ideal training pulse -

Maximum heart rate frequency

100%

20 years

100-150

200

25 years

98-146

195

30 years

95-142

190

35 years

93-138

185

40 years

90-135

180

45 years

88-131

175

50 years

85-127

170

55 years

83-123

165

60 years

80-120

160

65 years

78-116

155

70 years

75-113

150

COPYRIGHT(c) 1997 AMERICAN HEART ASSOCIATI0N

21

Summary of Contents for CF2205

Page 1: ...Treadmill Treadmill Treadmill Treadmill Manual Manual Manual Manual Ver Ver Ver Ver 1 0 1 0 1 0 1 0 09 05 05 09 05 05 09 05 05 09 05 05...

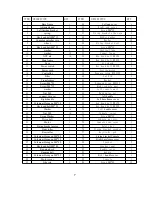
Page 2: ...t List 1 1 1 1 7 7 7 7 Assembly Assembly Assembly Assembly Diagram Diagram Diagram Diagram 2 2 2 2 8 8 8 8 Assembly Assembly Assembly Assembly Instructions Instructions Instructions Instructions 9 9 9...

Page 3: ...be replaced by our manufacture or our maintain dept or the correlative professional persons The warranty applies to the following parts as far as included in the scope of delivery Frame cable electro...

Page 4: ...ell or if you feel pain in your joints or muscles In particular keep an eye on how your body is responding to the exercise programme Dizziness is a sign that you are exercising too intensively with th...

Page 5: ...nce voltage To limit the danger of damage to the treadmill it should be equipped with an over voltage protective device not included This appliance is designed for use with 220 230 Volt rated voltage...

Page 6: ...after the trainer is fully assembled Please consider that there is always the risk of injury when using tools and carrying out technical activities Please proceed with care when assembling the device...

Page 7: ...BASE FRAME FRAME FRAME FRAME COVER COVER COVER COVER HAND HAND HAND HAND COVER COVER COVER COVER HARDWARE HARDWARE HARDWARE HARDWARE KIT KIT KIT KIT HARDWARE HARDWARE HARDWARE HARDWARE KIT KIT KIT KIT...

Page 8: ...played parts in this diagram are shipped pre assembled For spare parts please do always specify parts numbers used on this diagram or in the following parts list 6 Parts Parts Parts Parts List List Li...

Page 9: ...63 Right console mast 1 21 washer 8 64 Left console mast 1 22 Nut M4 4 65 Hand pulse set 1 23 connect wire set 1 66 left handle 1 24 Right handle 1 67 Left base frame cover 1 25 Columnar Hexagon M8 1...

Page 10: ...Assembly Assembly Assembly Assembly Diagram Diagram Diagram Diagram 2 2 2 2 8 console Handle bar Console mast Main body Motor cover Moving wheel Rear roller...

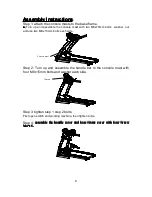
Page 11: ...le the handle bar to the console mast with four M8x15mm bolts and washer each side Step 3 tighten step 1 step 2 bolts First open switch and working machine then tighten bolts Step 4 assemble assemble...

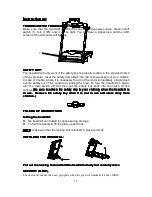
Page 12: ...treadmill treadmill treadmill treadmill is is is is in in in in use use use use Remove Remove Remove Remove the the the the safety safety safety safety key key key key when when when when it it it it...

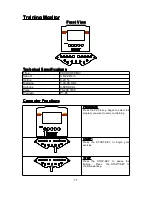
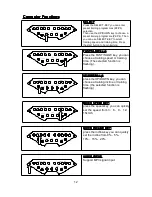
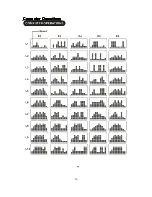
Page 13: ...es 0 999 KCAL Pulse 70 200 Min Program P1 P6 Computer Computer Computer Computer F F F Fun un un unc c c ction tion tion tions s s s P2 P3 P4 P5 P6 PROGRAM PROGRAM PROGRAM PROGRAM Press the P2 P6 key...

Page 14: ...he selected function is flashing INCLINE KEYS SPEED KEYS 15 10 5 0 20 3 6 9 12 15 INCLINE SELECT STOP START SPEED UP DOWN UP DOWN UP DOWN UP DOWN keys keys keys keys press the UP DOWN key you can choo...

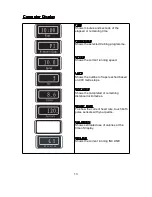
Page 15: ...Shows the current running speed LAPS LAPS LAPS LAPS Shows the number of laps reached based on 400 metres laps DISTANCE DISTANCE DISTANCE DISTANCE Shows the completed or remaining distance in kilometre...

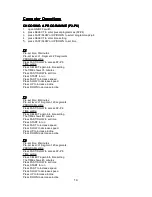
Page 16: ...FAST to increase speed Press SLOW to decrease speed Press UP to increase incline Press DOWN to decrease incline P3 P3 P3 P3 Pre set time 40minutes Pre set level L1 Segment 20 segments PROGRAM setting...

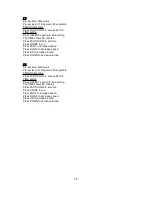
Page 17: ...ase speed Press SLOW to decrease speed Press UP to increase incline Press DOWN to decrease incline P6 P6 P6 P6 Pre set time 42minutes Pre set level L1 Segment 20 segments PROGRAM setting Press FAST SL...

Page 18: ...Computer Computer Computer Computer Operations Operations Operations Operations 16...

Page 19: ...ated 4 Be careful not to tighten the running belt tension too much as you can create excessive pressure on the front and rear roller bearings An excessively tightened running belt may damage the rolle...

Page 20: ...essary In case of a dry surface refer to the following instructions Only use oil free silicon spray Application Application Application Application of of of of lubricant lubricant lubricant lubricant...

Page 21: ...se Any other use is impermissible and possibly even dangerous We cannot be held liable for damages that were caused by improper usage Please consult your GP before starting your exercise session to cl...

Page 22: ...TREADMILL TREADMILL This treadmill is designed to be reliable and easy to use However if you experience a problem please reference the trouble shooting guide listed below PROBLEM The console does not...

Page 23: ...cise pulse Make sure you breathe regularly and calmly when exercising Take care to drink enough while exercising This ensures that the liquid requirement of your body is satisfied Consider that the re...

Page 24: ...NECK EXERCISES EXERCISES EXERCISES EXERCISES Tilt your head to the right and feel the tension in your neck Slowly drop your head down to your chest in a semi circle and then turn your head to the left...

Page 25: ...this exercise 2 times for each leg INSIDE INSIDE INSIDE INSIDE UPPER UPPER UPPER UPPER THIGH THIGH THIGH THIGH Sit on the floor and place your feet in such a way that your knees are facing outwards P...

Page 26: ...m Maintain this position for 30 40 seconds if possible EXERCISES EXERCISES EXERCISES EXERCISES FOR FOR FOR FOR THE THE THE THE CALVES ACHILLES CALVES ACHILLES CALVES ACHILLES CALVES ACHILLES TENDON TE...

Reviews: