18
LT8019
1, Rear vented using a standard flue air duct assembly up to 600mm.
2, Top vent which will involve the changing over of the spigot position from rear to top, plus fitting an additional
restrictor plate when flue length exceeds 2metres on a vertical rise.
SECTION NINE Preparing the Appliance for Installation
•
Carefully unpack the appliance from the carton and check the contents.
•
Remove the top plate. Lift away the door, which hooks over the lip of the combustion chamber and remove the
ash pan cover. Place these to one side.
•
Loosen the three bottom clamp flange nuts but
DO NOT REMOVE.
•
Remove the remaining flange nuts from around the glass panel and lift away the three clamps holding the glass.
•
With extreme care lift away the glass panel and put to one side in a safe place.
•
Change spigot positions and fit the restrictor plate (if required) if installing with the top outlet flue system.
•
The appliance is now ready for installation.
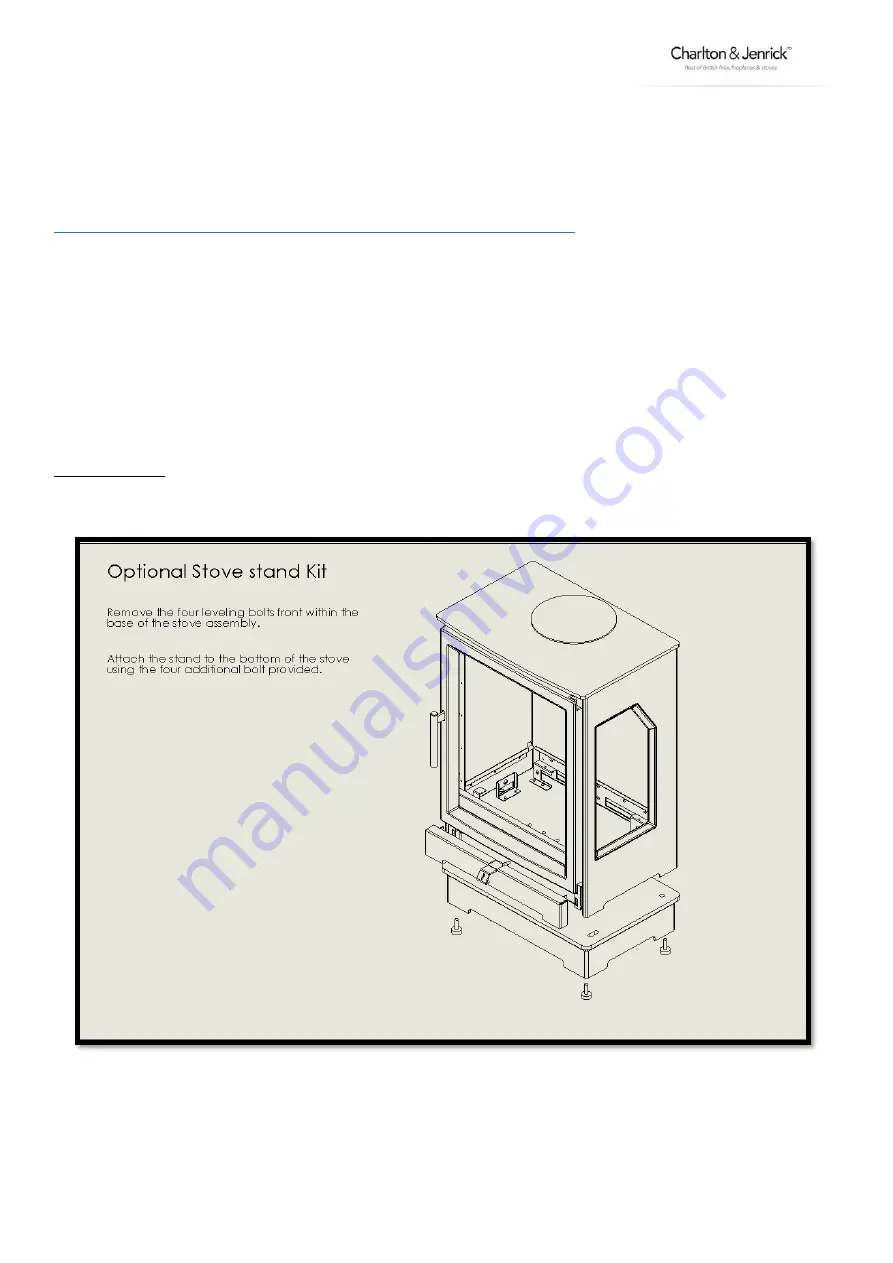
Optional stand
The Edge Bf product can be fitted stove body only or with one the following options.
Summary of Contents for Edge 3s BF
Page 15: ...www charltonandjenrick co uk 15 LT8019 Appliance Dimensions EDGE BF EDGE 3s BF ...
Page 21: ...www charltonandjenrick co uk 21 LT8019 ...
Page 22: ...22 LT8019 ...
Page 32: ...32 LT8019 SECTION FOURTEEN Wiring Diagram Maintenance Instructions ...
Page 34: ...34 LT8019 Register your appliance online today to active your warranty ...
Page 37: ...www charltonandjenrick co uk 37 LT8019 ...
Page 38: ...38 LT8019 ...


