14
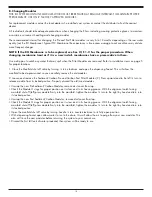
B. Changing Modules
THIS RO SYSTEM CONTAINS MODULES WHICH MUST BE REPLACED AT REGULAR INTERVALS TO MAINTAIN PROPER
PERFORMANCE. USE ONLY FACTORY APPROVED MODULES.
For replacement modules contact the local dealer who installed your system or contact the distributor to find the nearest
dealer.
All individuals should take adequate precautions when changing the filters, including wearing protective gloves, to maintain
a sanitary environment handling and changing modules.
The recommended interval for changing the Pre and Post Filter modules is every 6 to 12 months depending on the raw water
quality (not the RO Membrane). Typical TFC Membrane life expectancy is three years average. Local conditions may dictate
more frequent changes.
NOTE: If the RO Membrane is to be replaced, see Sec. IV, F.1- 2 for the proper procedure. When
changing membrane treat as if it is a new install, membranes have a preservative in them.
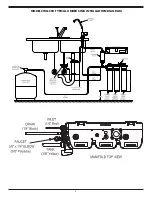
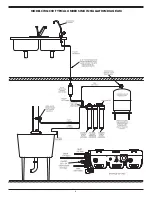
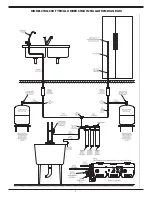
Use a drip pan to catch any water that may spill when the Filter Modules are removed. Refer to installation views on page 5
for proper locations.
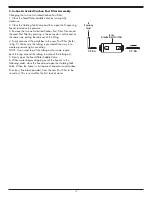
1. Close the Manifold shut off valve by turning ¼ turn clockwise and open the dispensing Faucet. This will allow the
manifold to be de-pressurized so you can safely remove the old modules.
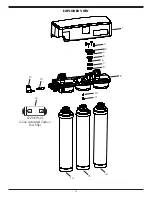
2. Loosen and remove the Sediment/Carbon Pre and Carbon Post Filter Modules (2). Press upward and to the left ¼ turn to
release module from its locked position. Properly discard the old/used modules.
• Unwrap the new Pre-Sediment/Carbon Modules, remove dust cover from top.
• Check the Module O-rings for proper position on its stem and in its housing groove. With the alignment notch facing
manifold shut off (left) press module firmly into the manifold, tighten the modules ¼ turn to the right by hand and turn into
its locked position.
• Unwrap the new Post Sediment/Carbon Modules, remove dust cover from top.
• Check the Module O-rings for proper position on its stem and in its housing groove. With the alignment notch facing
manifold shut off (left) press module firmly into the manifold, tighten the modules ¼ turn to the right by hand and turn into
its locked position.
• Open the manifold shut off valve by turning handle ¼ turn counterclockwise to its fully open position.
• With dispensing faucet open allow water to run to the drain, this will allow the air to purge from your new modules. This
also will rinse the new modules before returning the system to your normal use.
• Discard the first full tank of water produced; then system will be ready to use.
Summary of Contents for CWQC50
Page 1: ...INSTALLATION OPERATION AND SERVICE MANUAL RO DRINKING WATER SYSTEM MODEL CWQC50...
Page 5: ...5 MODEL CWQC50 TYPICAL UNDER SINK INSTALLATION DIAGRAM...
Page 6: ...6 MODEL CWQC50 TYPICAL UNDER SINK INSTALLATION DIAGRAM...
Page 7: ...7 MODEL CWQC50 TYPICAL UNDER SINK INSTALLATION DIAGRAM...


